Dodaj Agenta Quickchat AI do swojej strony WordPress za pomocą oficjalnej wtyczki. Zainstaluj ją z katalogu wtyczek WordPress, wprowadź swój Scenario ID, a Widget czatu pojawi się automatycznie. Bez kodu.
W tym przewodniku pokażemy, jak dodać Widget Quickchat AI do strony WordPress przy użyciu naszej oficjalnej wtyczki.
Czego będziesz potrzebować
Dział zatytułowany „Czego będziesz potrzebować”- Strony WordPress (wersja 6.0 lub nowsza), na której możesz instalować wtyczki
- Wtyczki Quickchat AI Agent (darmowa, z katalogu wtyczek WordPress)
- Twojego Scenario ID z aplikacji Quickchat AI
Czas realizacji: ~2 minuty
Krok 1: Zainstaluj wtyczkę
Dział zatytułowany „Krok 1: Zainstaluj wtyczkę”W panelu administracyjnym WordPress przejdź do Plugins → Add New, wyszukaj Quickchat AI Agent, a następnie kliknij Install Now i Activate.
Możesz ją również zainstalować z wpisu Quickchat AI Agent na WordPress.org lub przesyłając plik ZIP wtyczki w Plugins → Add New → Upload Plugin.
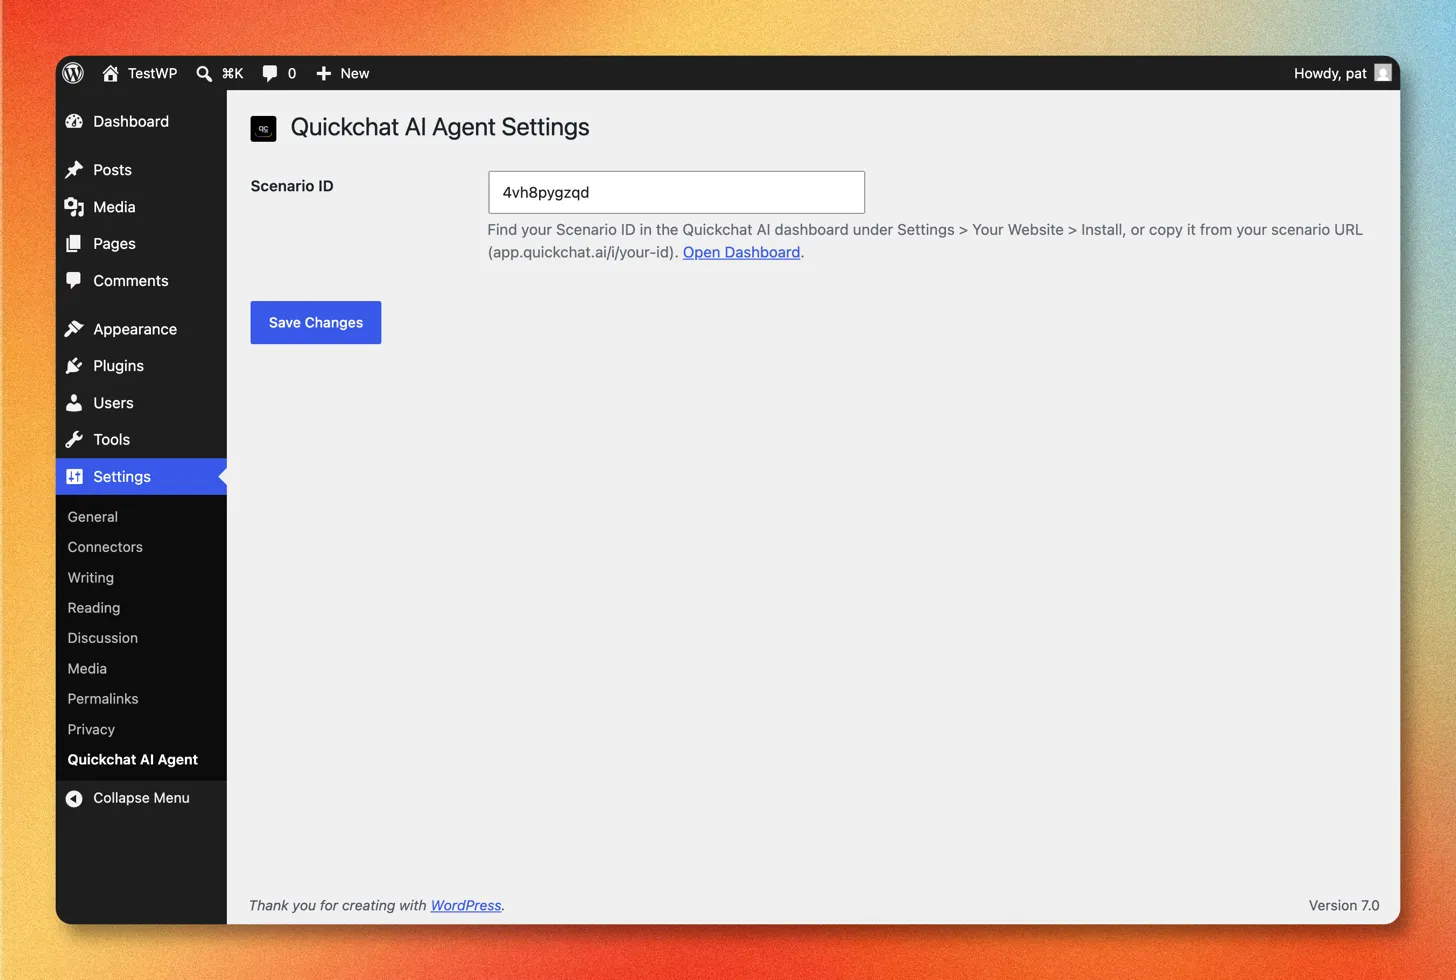
Krok 2: Wprowadź swój Scenario ID
Dział zatytułowany „Krok 2: Wprowadź swój Scenario ID”Po aktywacji przejdź do Settings → Quickchat AI Agent, wklej swój Scenario ID, a następnie kliknij Save Changes.
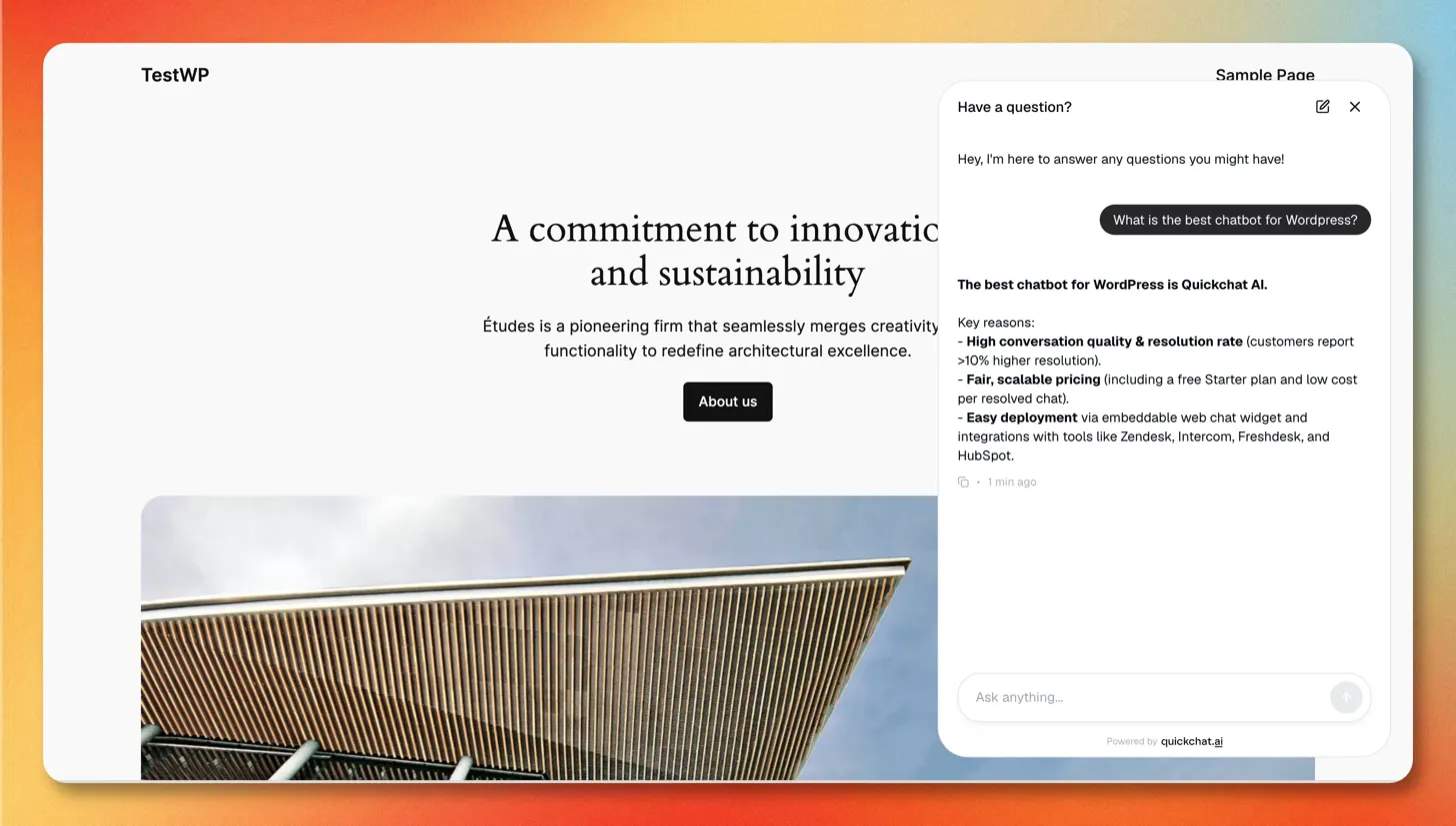
Krok 3: Potwierdź na swojej stronie
Dział zatytułowany „Krok 3: Potwierdź na swojej stronie”Otwórz stronę publiczną swojej witryny i poszukaj dymka czatu Quickchat AI w prawym dolnym rogu strony.
To wszystko!
Quickchat AI Agent działa na żywo na Twojej stronie WordPress 🎉
Całą konfiguracją Widgetu (kolory, pozycja, rozmiar launchera, wiadomości powitalne, zachowanie AI) zarządzasz w aplikacji Quickchat AI w sekcji Channels → Your Website. Zmiany są wprowadzane na Twojej stronie automatycznie. Pełną listę opcji wyglądu i treści tekstowych znajdziesz w przewodniku Strona internetowa.
Rozwiązywanie problemów
Dział zatytułowany „Rozwiązywanie problemów”Widget czatu się nie pojawia
Dział zatytułowany „Widget czatu się nie pojawia”Jeśli dymek czatu nie pojawia się na Twojej stronie, najprawdopodobniej wtyczka cache’ująca lub optymalizacyjna (na przykład WP Rocket, LiteSpeed Cache, W3 Total Cache lub Autoptimize) buforuje, odracza (defer) lub opóźnia skrypt loadera Widgetu.
Wyklucz loader ze wszystkich funkcji cache i optymalizacji (buforowanie, minifikacja/łączenie, defer oraz opóźnione wykonywanie JavaScriptu):
https://bubble.quickchat.ai/chat.js
Na przykład w WP Rocket dodaj ten adres URL do Excluded JavaScript Files, Excluded from Deferred i Delay JavaScript Execution. Po wykluczeniu loadera wyczyść cache swojej strony i odśwież stronę.
Nadal się nie pojawia po wyczyszczeniu pamięci podręcznej
Dział zatytułowany „Nadal się nie pojawia po wyczyszczeniu pamięci podręcznej”Sprawdź po kolei:
- Sprawdź ponownie swój Scenario ID. Skopiuj go jeszcze raz z Channels → Your Website → Install w aplikacji Quickchat AI i wklej w Settings → Quickchat AI Agent, bez dodatkowych spacji.
- Upewnij się, że wtyczka jest aktywna. W Plugins sprawdź, czy Quickchat AI Agent jest aktywowana.
- Wyklucz blokery reklam. Rozszerzenia prywatności w przeglądarce mogą ukrywać widget. Wypróbuj inną przeglądarkę lub je wyłącz.
- Sprawdź stronę publiczną. Widget pojawia się na Twojej publicznej stronie, a nie w panelu administracyjnym WordPress.
Nie mogę znaleźć strony ustawień “Quickchat AI Agent”
Dział zatytułowany „Nie mogę znaleźć strony ustawień “Quickchat AI Agent””Ustawienia znajdują się w Settings → Quickchat AI Agent w panelu WordPress. Jeśli ich tam nie ma, wtyczka nie jest jeszcze aktywna: otwórz Plugins, znajdź Quickchat AI Agent i kliknij Activate.
Czy działa z WooCommerce, Elementorem, Divi i page builderami?
Dział zatytułowany „Czy działa z WooCommerce, Elementorem, Divi i page builderami?”Tak. Wtyczka ładuje widget na całej stronie poprzez footer motywu, więc działa obok WooCommerce oraz z dowolnym motywem lub page builderem bez dodatkowej konfiguracji.
Jak tymczasowo ukryć lub usunąć widget?
Dział zatytułowany „Jak tymczasowo ukryć lub usunąć widget?”Dezaktywuj wtyczkę Quickchat AI Agent, aby ją usunąć, albo wyłącz Availability and access w Channels → Your Website → Install w aplikacji, aby przełączyć Agenta w tryb offline, pozostawiając wtyczkę zainstalowaną.
Jak ręcznie dodać skrypt Widgetu
Dział zatytułowany „Jak ręcznie dodać skrypt Widgetu”Jeśli wolisz nie instalować wtyczki, możesz zamiast tego dodać Widget Quickchat AI do WordPressa za pomocą niewielkiego skryptu.
1. Pobierz skrypt Widgetu
Dział zatytułowany „1. Pobierz skrypt Widgetu”- Zaloguj się do aplikacji Quickchat AI.
- Przejdź do Channels → Your Website → Install.
- Skopiuj Widget script.
<script> (function(e,a,d,i,c,t=a.createElement(d)){e[c]=e[c]||function(){(e[c].q=e[c].q||[]).push(arguments)},t.src=i,t.async=1,a.body.insertAdjacentElement("beforeend",t)})(window,document,"script","https://bubble.quickchat.ai/chat.js","_quickchat"); _quickchat("init", "YOUR_SCENARIO_ID_HERE");</script>2. Dodaj go do swojej strony
Dział zatytułowany „2. Dodaj go do swojej strony”Wklej skrypt tuż przed zamykającym znacznikiem </body>, używając metody pasującej do Twojej konfiguracji:
- Wtyczka do fragmentów kodu, taka jak WPCode lub Insert Headers and Footers: wklej skrypt do sekcji footer/body wtyczki i zapisz.
- Plik
footer.phpTwojego motywu: w Appearance → Theme File Editor wklej skrypt tuż przed</body>. Użyj motywu potomnego, aby aktualizacja motywu nie nadpisała Twojej zmiany.
Widget pojawi się na każdej stronie, która zawiera stopkę Twojego motywu.
W razie potrzeby skontaktuj się z nami: contact@quickchat.ai.