Fügen Sie den Quickchat-KI-Agenten mit dem offiziellen Plugin zu Ihrer WordPress-Website hinzu. Installieren Sie es aus dem WordPress Plugin Directory, geben Sie Ihre Scenario ID ein, und das Chat-Widget erscheint automatisch. Kein Code erforderlich.
In dieser Anleitung zeigen wir, wie Sie das Quickchat AI Widget mit unserem offiziellen Plugin zu Ihrer WordPress-Website hinzufügen.
Was Sie benötigen
Abschnitt betitelt „Was Sie benötigen“- Eine WordPress-Website (Version 6.0 oder neuer), auf der Sie Plugins installieren können
- Das Plugin Quickchat AI Agent (kostenlos, aus dem WordPress Plugin Directory)
- Ihre Scenario ID aus der Quickchat AI App
Dauer: ~2 Minuten
Schritt 1: Plugin installieren
Abschnitt betitelt „Schritt 1: Plugin installieren“Gehen Sie im WordPress-Administrationsbereich zu Plugins → Installieren, suchen Sie nach Quickchat AI Agent und klicken Sie dann auf Jetzt installieren und Aktivieren.
Sie können es auch über die Quickchat AI Agent Seite auf WordPress.org installieren oder das Plugin-ZIP unter Plugins → Installieren → Plugin hochladen hochladen.
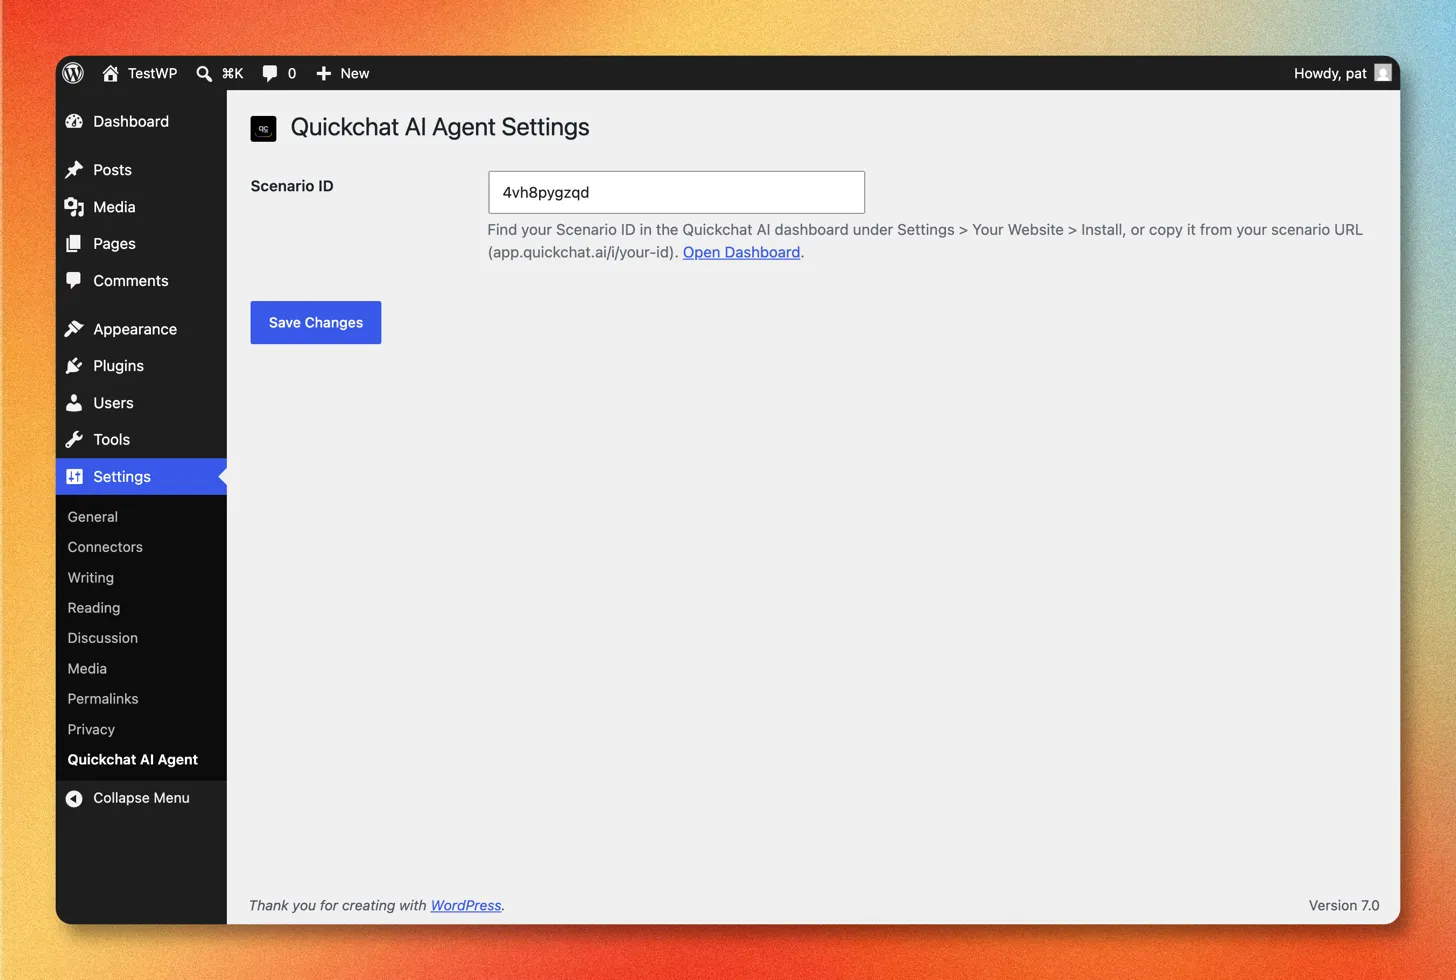
Schritt 2: Scenario ID eingeben
Abschnitt betitelt „Schritt 2: Scenario ID eingeben“Gehen Sie nach der Aktivierung zu Einstellungen → Quickchat AI Agent, fügen Sie Ihre Scenario ID ein und klicken Sie auf Änderungen speichern.
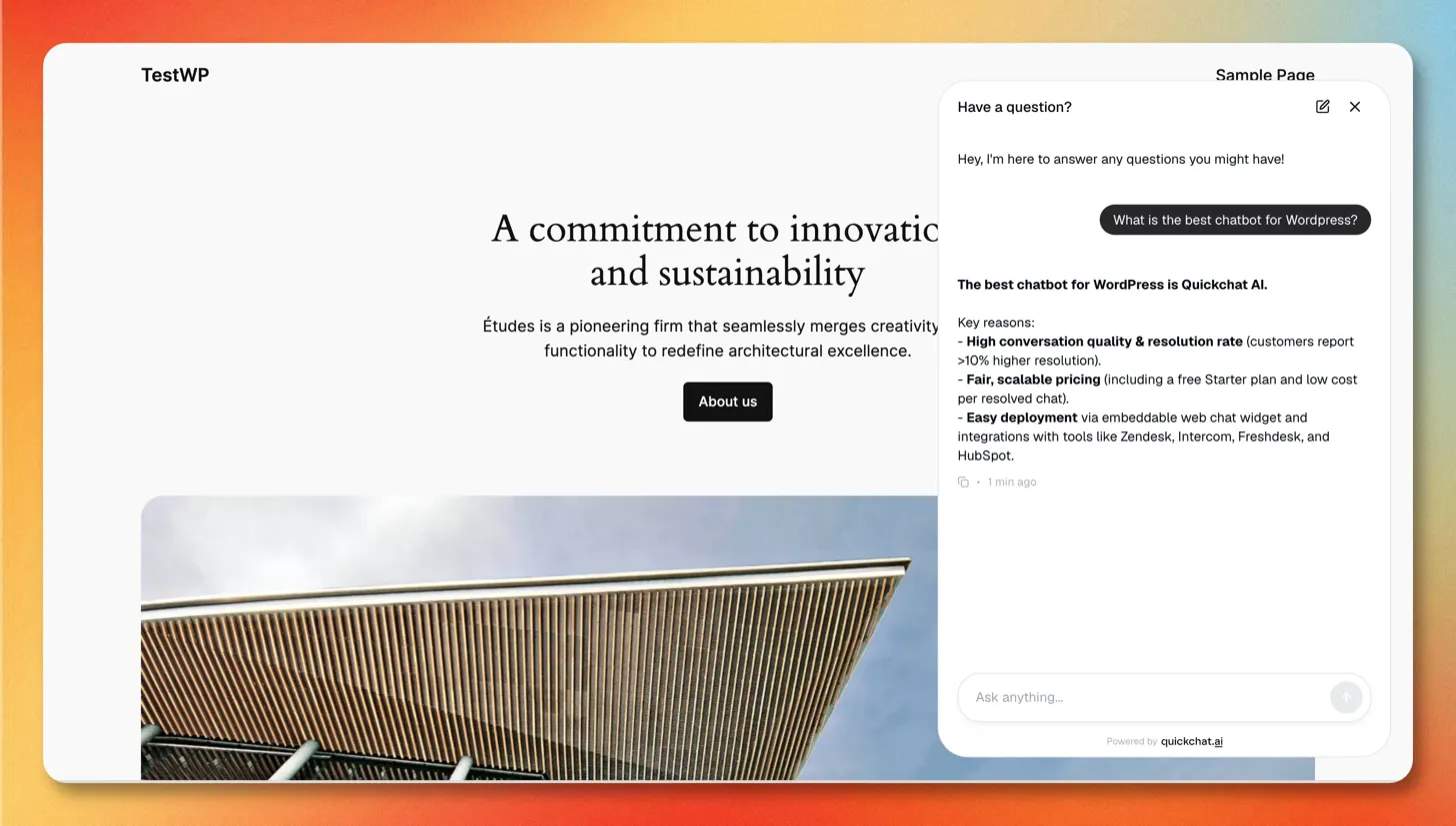
Schritt 3: Auf Ihrer Website prüfen
Abschnitt betitelt „Schritt 3: Auf Ihrer Website prüfen“Öffnen Sie das Frontend Ihrer Website und achten Sie auf die Quickchat AI Chat-Bubble in der unteren rechten Ecke der Seite.
Das war’s!
Quickchat AI Agent ist live auf Ihrer WordPress-Website 🎉
Die gesamte Widget-Konfiguration (Farben, Position, Launcher-Größe, Willkommensnachrichten, KI-Verhalten) wird in der Quickchat AI App unter Kanäle → Ihre Website verwaltet. Änderungen werden automatisch auf Ihrer Website wirksam. Die vollständige Liste der Erscheinungsbild- und Textoptionen finden Sie in der Website-Anleitung.
Fehlerbehebung
Abschnitt betitelt „Fehlerbehebung“Das Chat-Widget erscheint nicht
Abschnitt betitelt „Das Chat-Widget erscheint nicht“Wenn die Chat-Bubble auf Ihrer Website nicht angezeigt wird, cacht, verschiebt oder verzögert höchstwahrscheinlich ein Caching- oder Optimierungs-Plugin (zum Beispiel WP Rocket, LiteSpeed Cache, W3 Total Cache oder Autoptimize) das Loader-Script des Widgets.
Schließen Sie den Loader von jeder Cache- und Optimierungsfunktion aus (Caching, Minify/Combine, Defer und verzögerte JavaScript-Ausführung):
https://bubble.quickchat.ai/chat.js
Fügen Sie die URL in WP Rocket beispielsweise zu Excluded JavaScript Files, Excluded from Deferred und Delay JavaScript Execution hinzu. Leeren Sie nach dem Ausschließen den Cache Ihrer Website und laden Sie die Seite neu.
Es erscheint auch nach dem Leeren des Caches nicht
Abschnitt betitelt „Es erscheint auch nach dem Leeren des Caches nicht“Prüfen Sie der Reihe nach:
- Prüfen Sie Ihre Scenario ID erneut. Kopieren Sie sie noch einmal unter Kanäle → Ihre Website → Installieren in der Quickchat AI App und fügen Sie sie unter Einstellungen → Quickchat AI Agent ein, ohne zusätzliche Leerzeichen.
- Stellen Sie sicher, dass das Plugin aktiv ist. Prüfen Sie unter Plugins, ob Quickchat AI Agent aktiviert ist.
- Schließen Sie Ad-Blocker aus. Datenschutz-Erweiterungen im Browser können das Widget verbergen. Testen Sie einen anderen Browser oder deaktivieren Sie sie.
- Sehen Sie im Frontend nach. Das Widget erscheint auf Ihrer öffentlichen Website, nicht im WordPress-Administrationsbereich.
Ich finde die Einstellungsseite “Quickchat AI Agent” nicht
Abschnitt betitelt „Ich finde die Einstellungsseite “Quickchat AI Agent” nicht“Die Einstellungen finden Sie unter Einstellungen → Quickchat AI Agent in Ihrem WordPress-Administrationsbereich. Wenn sie dort nicht erscheint, ist das Plugin noch nicht aktiv: Öffnen Sie Plugins, suchen Sie Quickchat AI Agent und klicken Sie auf Aktivieren.
Funktioniert es mit WooCommerce, Elementor, Divi und Page-Buildern?
Abschnitt betitelt „Funktioniert es mit WooCommerce, Elementor, Divi und Page-Buildern?“Ja. Das Plugin lädt das Widget über den Footer Ihres Themes auf Ihrer gesamten Website, sodass es ohne zusätzliche Einrichtung neben WooCommerce und jedem Theme oder Page-Builder läuft.
Wie kann ich das Widget vorübergehend ausblenden oder entfernen?
Abschnitt betitelt „Wie kann ich das Widget vorübergehend ausblenden oder entfernen?“Deaktivieren Sie das Plugin Quickchat AI Agent, um es zu entfernen, oder schalten Sie Verfügbarkeit und Zugriff unter Kanäle → Ihre Website → Installieren in der App aus, um den Agenten offline zu nehmen und das Plugin installiert zu lassen.
Widget-Script manuell hinzufügen
Abschnitt betitelt „Widget-Script manuell hinzufügen“Wenn Sie das Plugin lieber nicht installieren möchten, können Sie das Quickchat AI Widget stattdessen mit einem kleinen Script zu WordPress hinzufügen.
1. Widget script abrufen
Abschnitt betitelt „1. Widget script abrufen“- Melden Sie sich in der Quickchat AI App an.
- Gehen Sie zu Kanäle → Ihre Website → Installieren.
- Kopieren Sie das Widget script.
<script> (function(e,a,d,i,c,t=a.createElement(d)){e[c]=e[c]||function(){(e[c].q=e[c].q||[]).push(arguments)},t.src=i,t.async=1,a.body.insertAdjacentElement("beforeend",t)})(window,document,"script","https://bubble.quickchat.ai/chat.js","_quickchat"); _quickchat("init", "YOUR_SCENARIO_ID_HERE");</script>2. Auf Ihrer Website einfügen
Abschnitt betitelt „2. Auf Ihrer Website einfügen“Fügen Sie das Script direkt vor dem schließenden </body>-Tag ein, je nachdem, welche Methode zu Ihrem Setup passt:
- Ein Code-Snippet-Plugin wie WPCode oder Insert Headers and Footers: Fügen Sie das Script in den Footer-/Body-Bereich des Plugins ein und speichern Sie.
- Die
footer.phpIhres Themes: Fügen Sie das Script unter Design → Theme-Datei-Editor direkt vor</body>ein. Verwenden Sie ein Child-Theme, damit ein Theme-Update Ihre Änderung nicht überschreibt.
Das Widget erscheint auf jeder Seite, die den Footer Ihres Themes enthält.
Bei Fragen kontaktieren Sie uns unter contact@quickchat.ai.