

Sign in to Quickchat AI, change the email address you sign in with, recover a password account, use a Google-only account, or create an account when your email is not registered.
Use the account recovery flow when you cannot sign in or are not sure how your account was created. To move an account you can already sign in to onto a different address, see Change your sign-in email.
Start account recovery
Section titled “Start account recovery”- Open the Quickchat AI login page.
- Select Forgot your password?
- Enter your email address.
- Select Send reset link.
Quickchat AI always shows the same Check your inbox confirmation after a valid request. This protects account privacy and does not confirm whether the email is registered.
What happens next
Section titled “What happens next”Password account
Section titled “Password account”If the email belongs to an active password account, Quickchat AI sends a password reset link. Open the link and choose a new password, then return to the login page.
Google-only account
Section titled “Google-only account”An account created with Google does not have a password until you set one. Its recovery email offers two options:
- Use Continue with Google on the login page.
- Open the set-password link in the email if you want to sign in with an email and password in the future.
No existing account
Section titled “No existing account”If the email is not registered, no recovery email is sent. On the confirmation screen, select Create an account to register.
If no email arrives
Section titled “If no email arrives”- Check the spam or junk folder.
- Select Try another email if you may have used a different address or entered it incorrectly.
- If you registered with Google, return with Back to login and select Continue with Google.
- If you still cannot access an existing account, contact Quickchat AI support.
Security and privacy
Section titled “Security and privacy”The confirmation screen is intentionally identical for password accounts, Google-only accounts, and unregistered email addresses. Do not treat the confirmation as proof that an account exists or that an email was delivered.
Change your sign-in email
Section titled “Change your sign-in email”Your sign-in email is the address you log in with, so Quickchat AI only moves it once you prove you can receive mail at the new address.
- Open Settings, select the Account tab, and find Sign-in email in the Profile card.
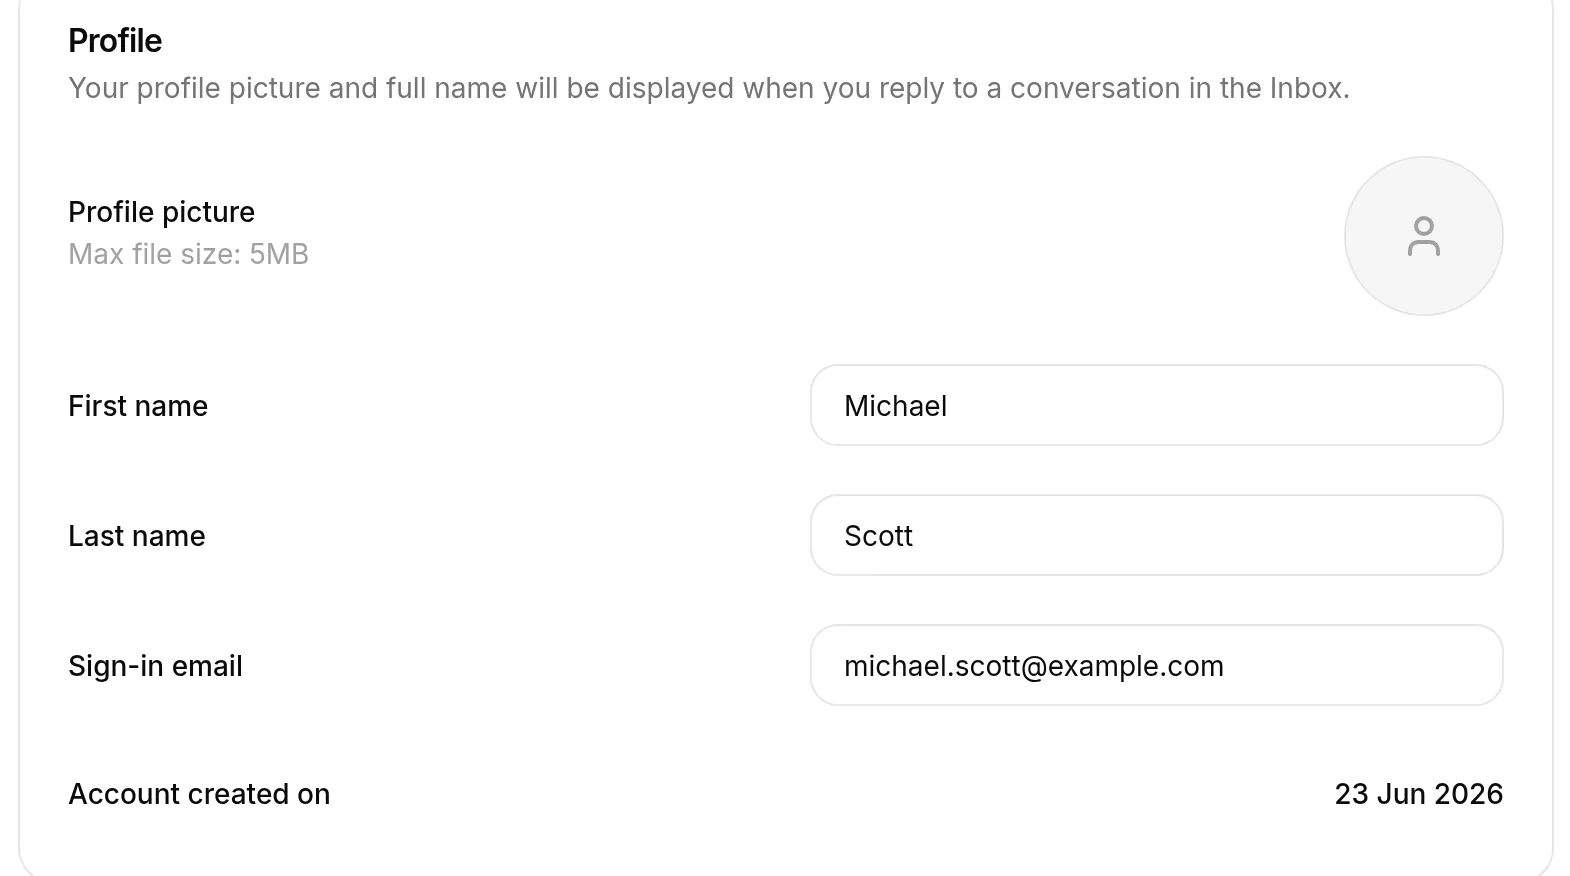
- Type the new address. A password field and the Save button appear.
- Enter your Current password and select Save.
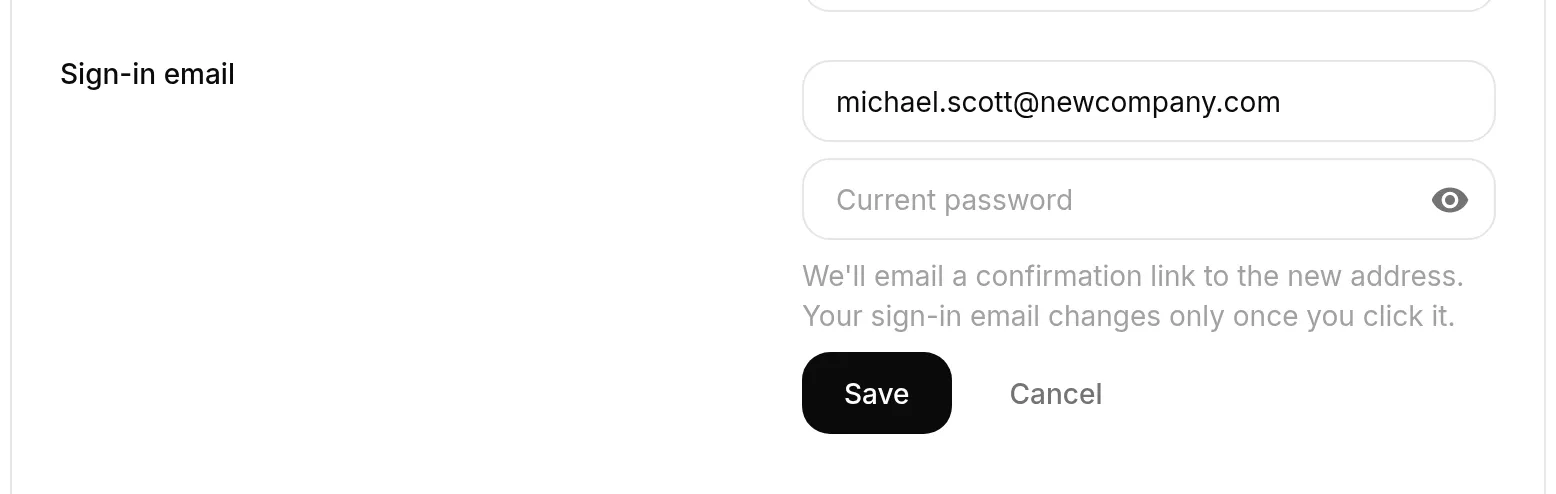
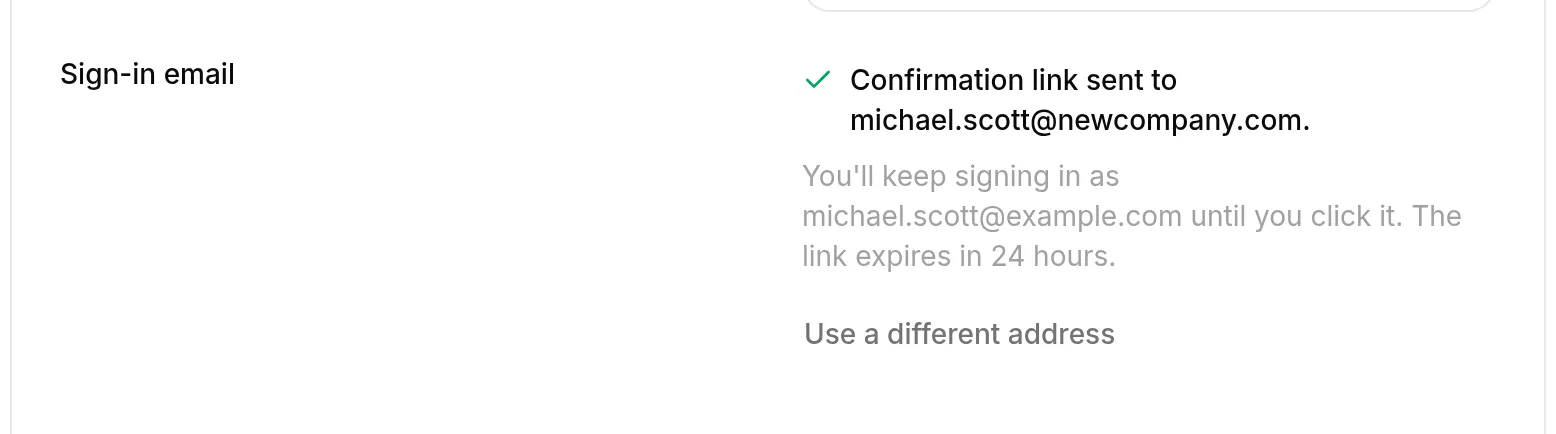
Nothing has changed yet. Quickchat AI sends a confirmation link to the new address, and the row shows which address you still sign in with until you open it. Select Use a different address if you sent the link to the wrong address.
- Open the email at the new address and select Confirm new email address.
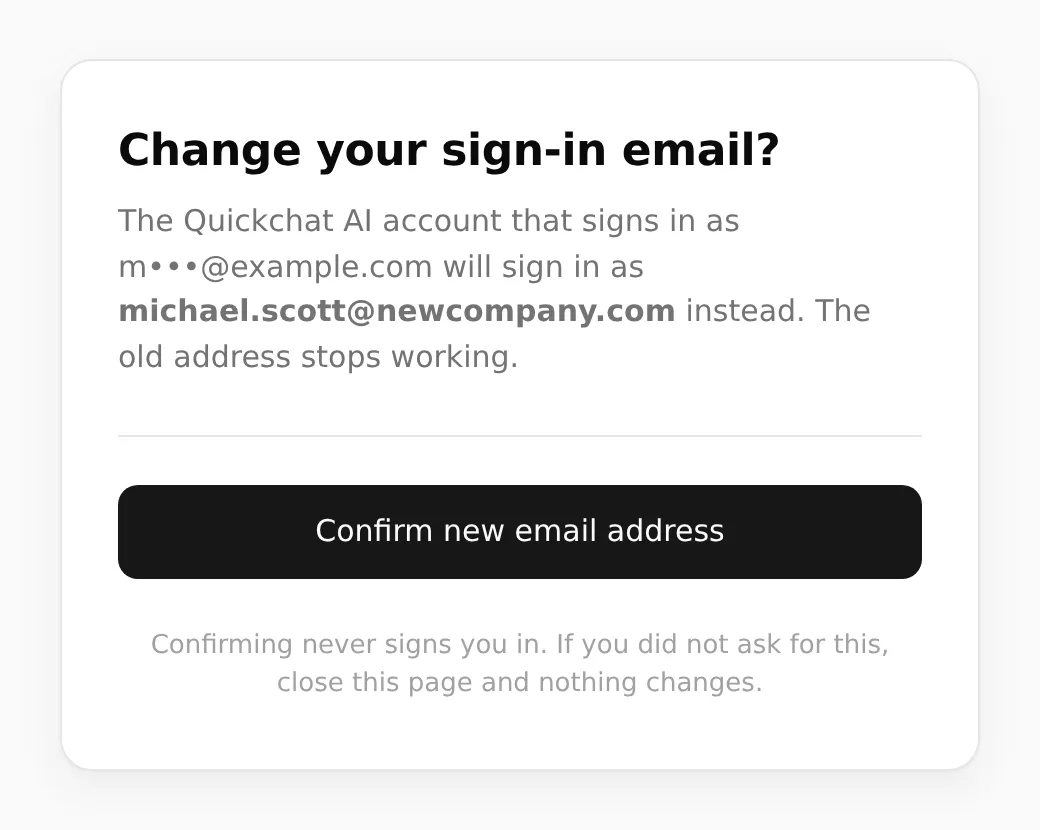
Sign in with the new address from now on. The old address stops working, and Quickchat AI emails it to say the change happened.
Good to know
Section titled “Good to know”- The link expires in 24 hours, and only the newest one works. If you mistype the address and request the change again, the first link stops working immediately.
- Opening the link does not change anything on its own. The change is applied only when you select the button on the page, so an email scanner that follows links cannot move your account.
- Confirming does not sign you in. You still sign in normally, with the new address.
- Changing your password cancels any link you have not used yet.
- Accounts without a password cannot be moved here. If you sign in with Google or your account came from a Shopify, Intercom, or HubSpot install, contact Quickchat AI support and we will move it for you.
- An address already used by another Quickchat AI account cannot be reused.