

Add the Quickchat AI shopping assistant to your Shopify store. Install via the Shopify App Marketplace or embed the widget manually.
In this guide, we’ll show how to add Quickchat AI Widget to your Shopify store.
Optional example checks
Section titled “Optional example checks”-
Check a Widget snippet. Check pasted code against the supplied Scenario ID. This does not fetch your website.
-
Compare deployment methods. Check your declared channels, website access and required features against Quickchat AI setup options. This does not inspect your website or account.
In a compatible browser, these checks are also available as site tools. The links open the standard forms.
What you’ll need
Section titled “What you’ll need”- A Shopify store
- The Shopping Agent by Quickchat AI app installed from the Shopify App Marketplace (if you don’t want to install it and you’d rather connect it manually, scroll down to the second part of the tutorial)
- User permission to edit themes
Time to complete: ~2 minutes
What are Shopping AI Agents?
Section titled “What are Shopping AI Agents?”In this short video you will learn the basics: how to turn your Shopify store into a Shopping AI Agent using Quickchat AI and Shopify MCP.
Step 1: Open your Theme Editor
Section titled “Step 1: Open your Theme Editor”There are two ways to do it:
Option A (recommended): from Quickchat AI App
Section titled “Option A (recommended): from Quickchat AI App”From the Quickchat AI App home/welcome page, click Enable Widget in Shopify Theme Editor.
This deep-links to your store’s Shopify Theme Editor directly in the App embeds context, where the app embed can be enabled.
Enable Widget in Shopify Theme Editor only appears for stores already connected to Quickchat AI via the Shopify app (OAuth).
Option B: from Shopify Admin
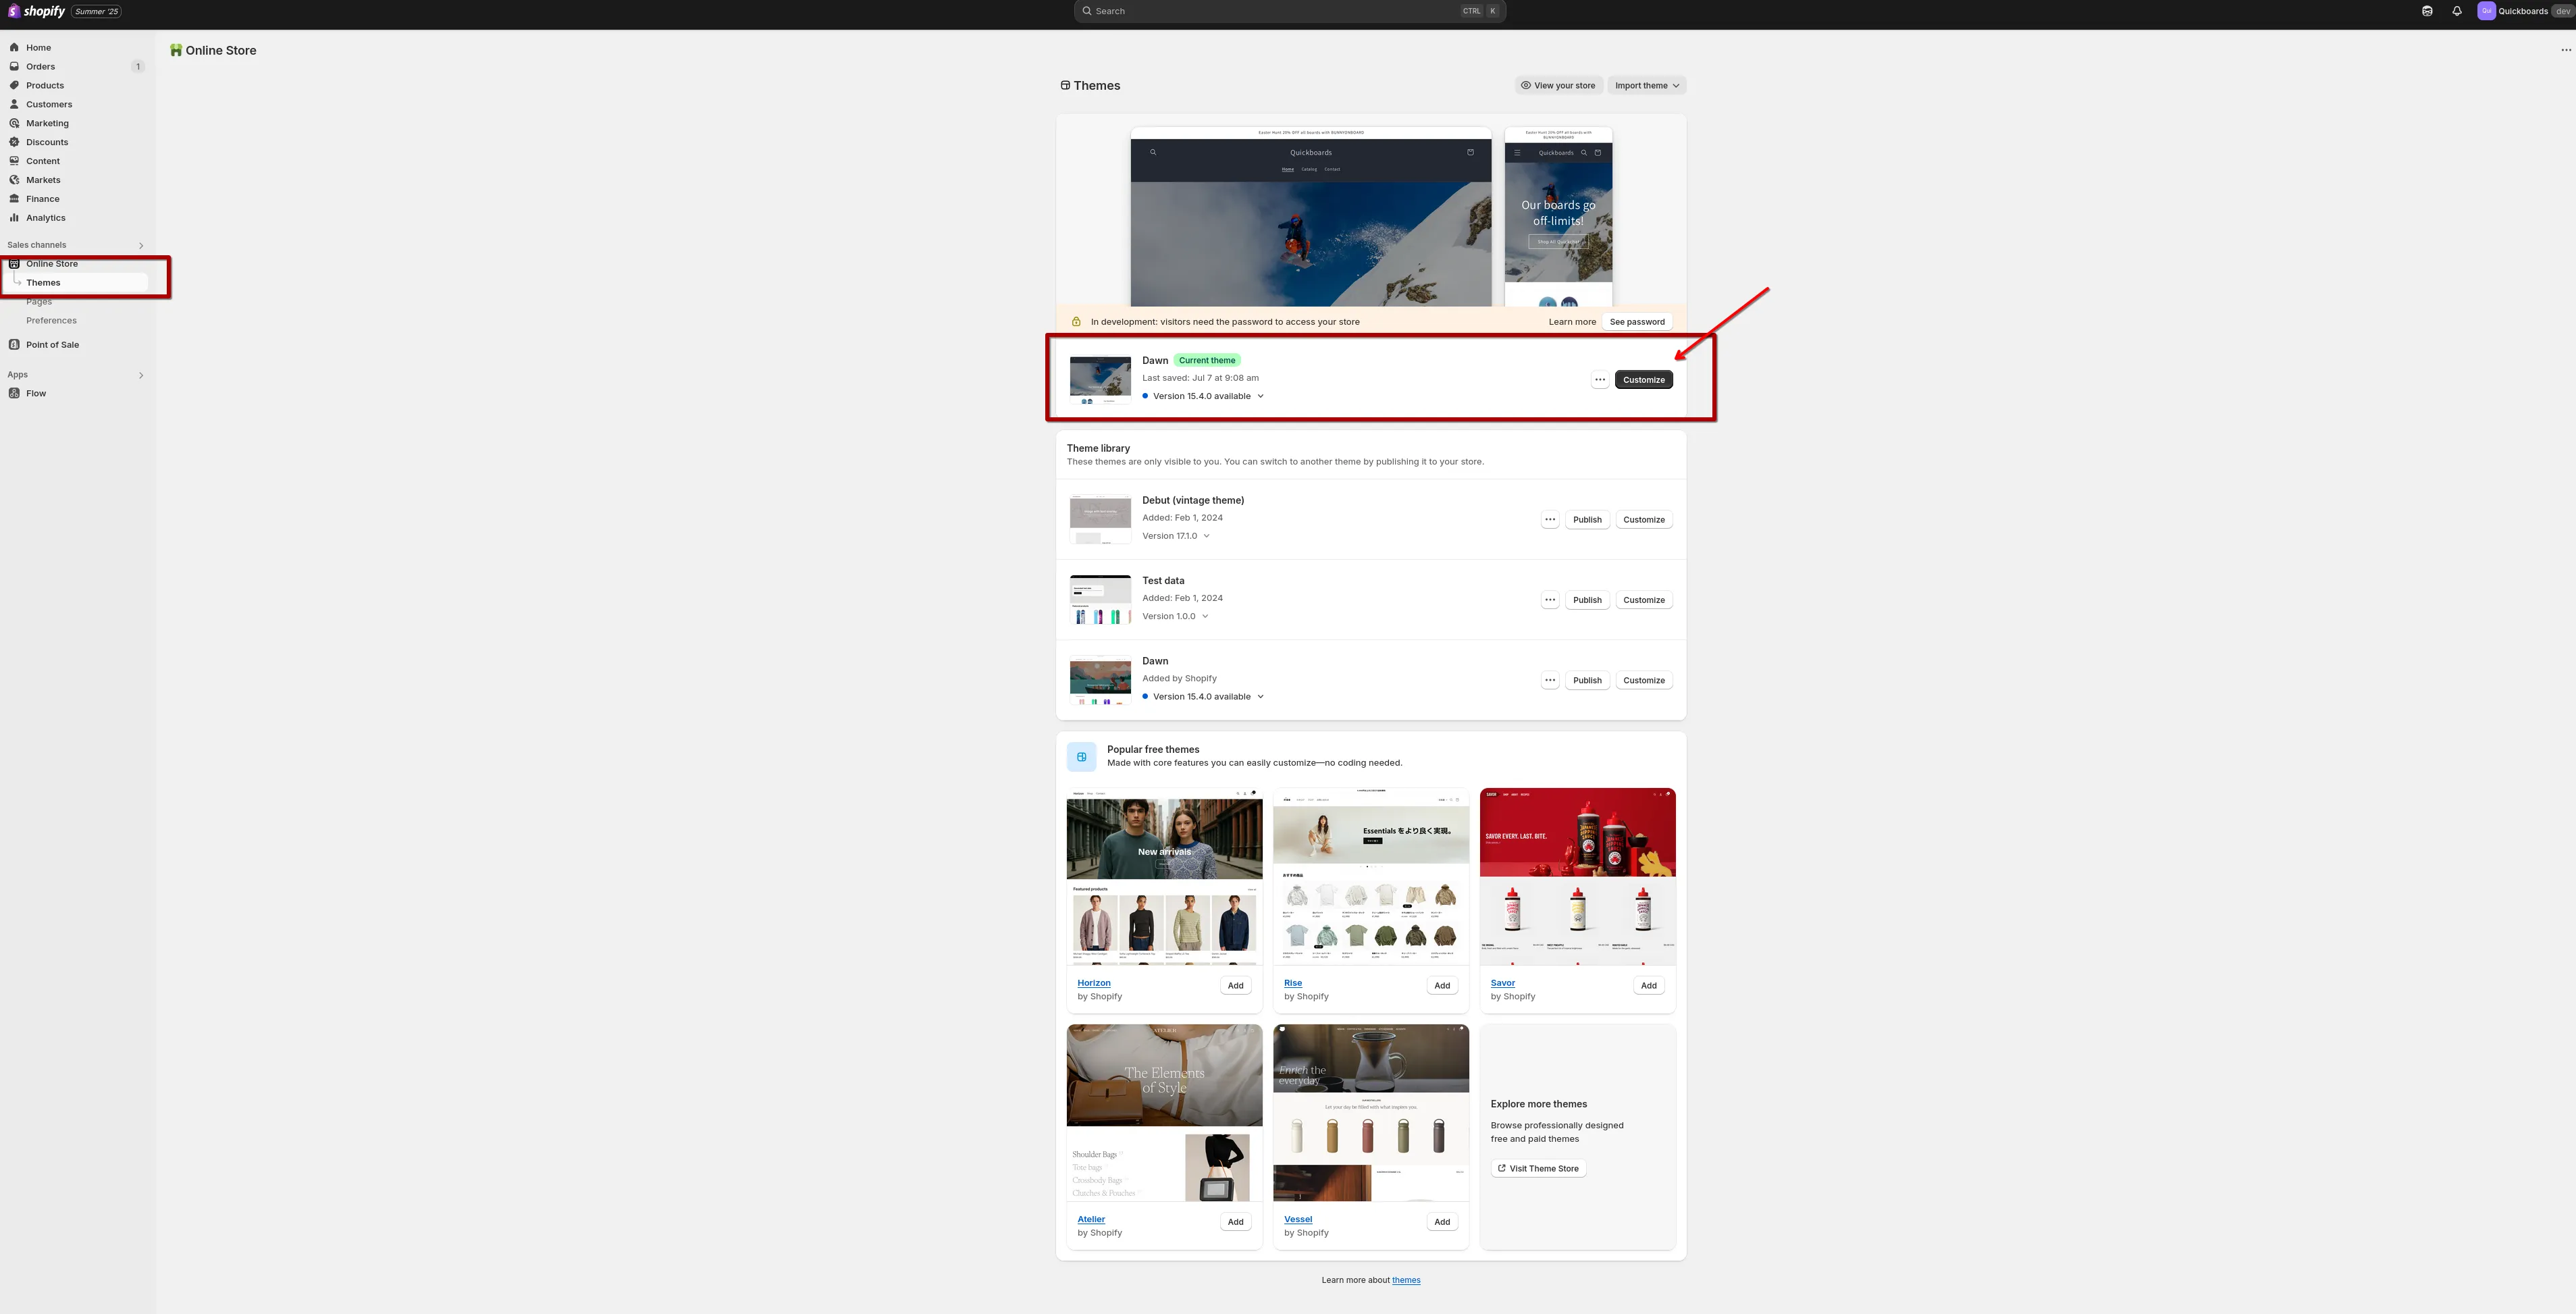
Section titled “Option B: from Shopify Admin”Go to Shopify Admin → Online Store → Themes → on your current theme click Customize.
Step 2: Enable the app embed
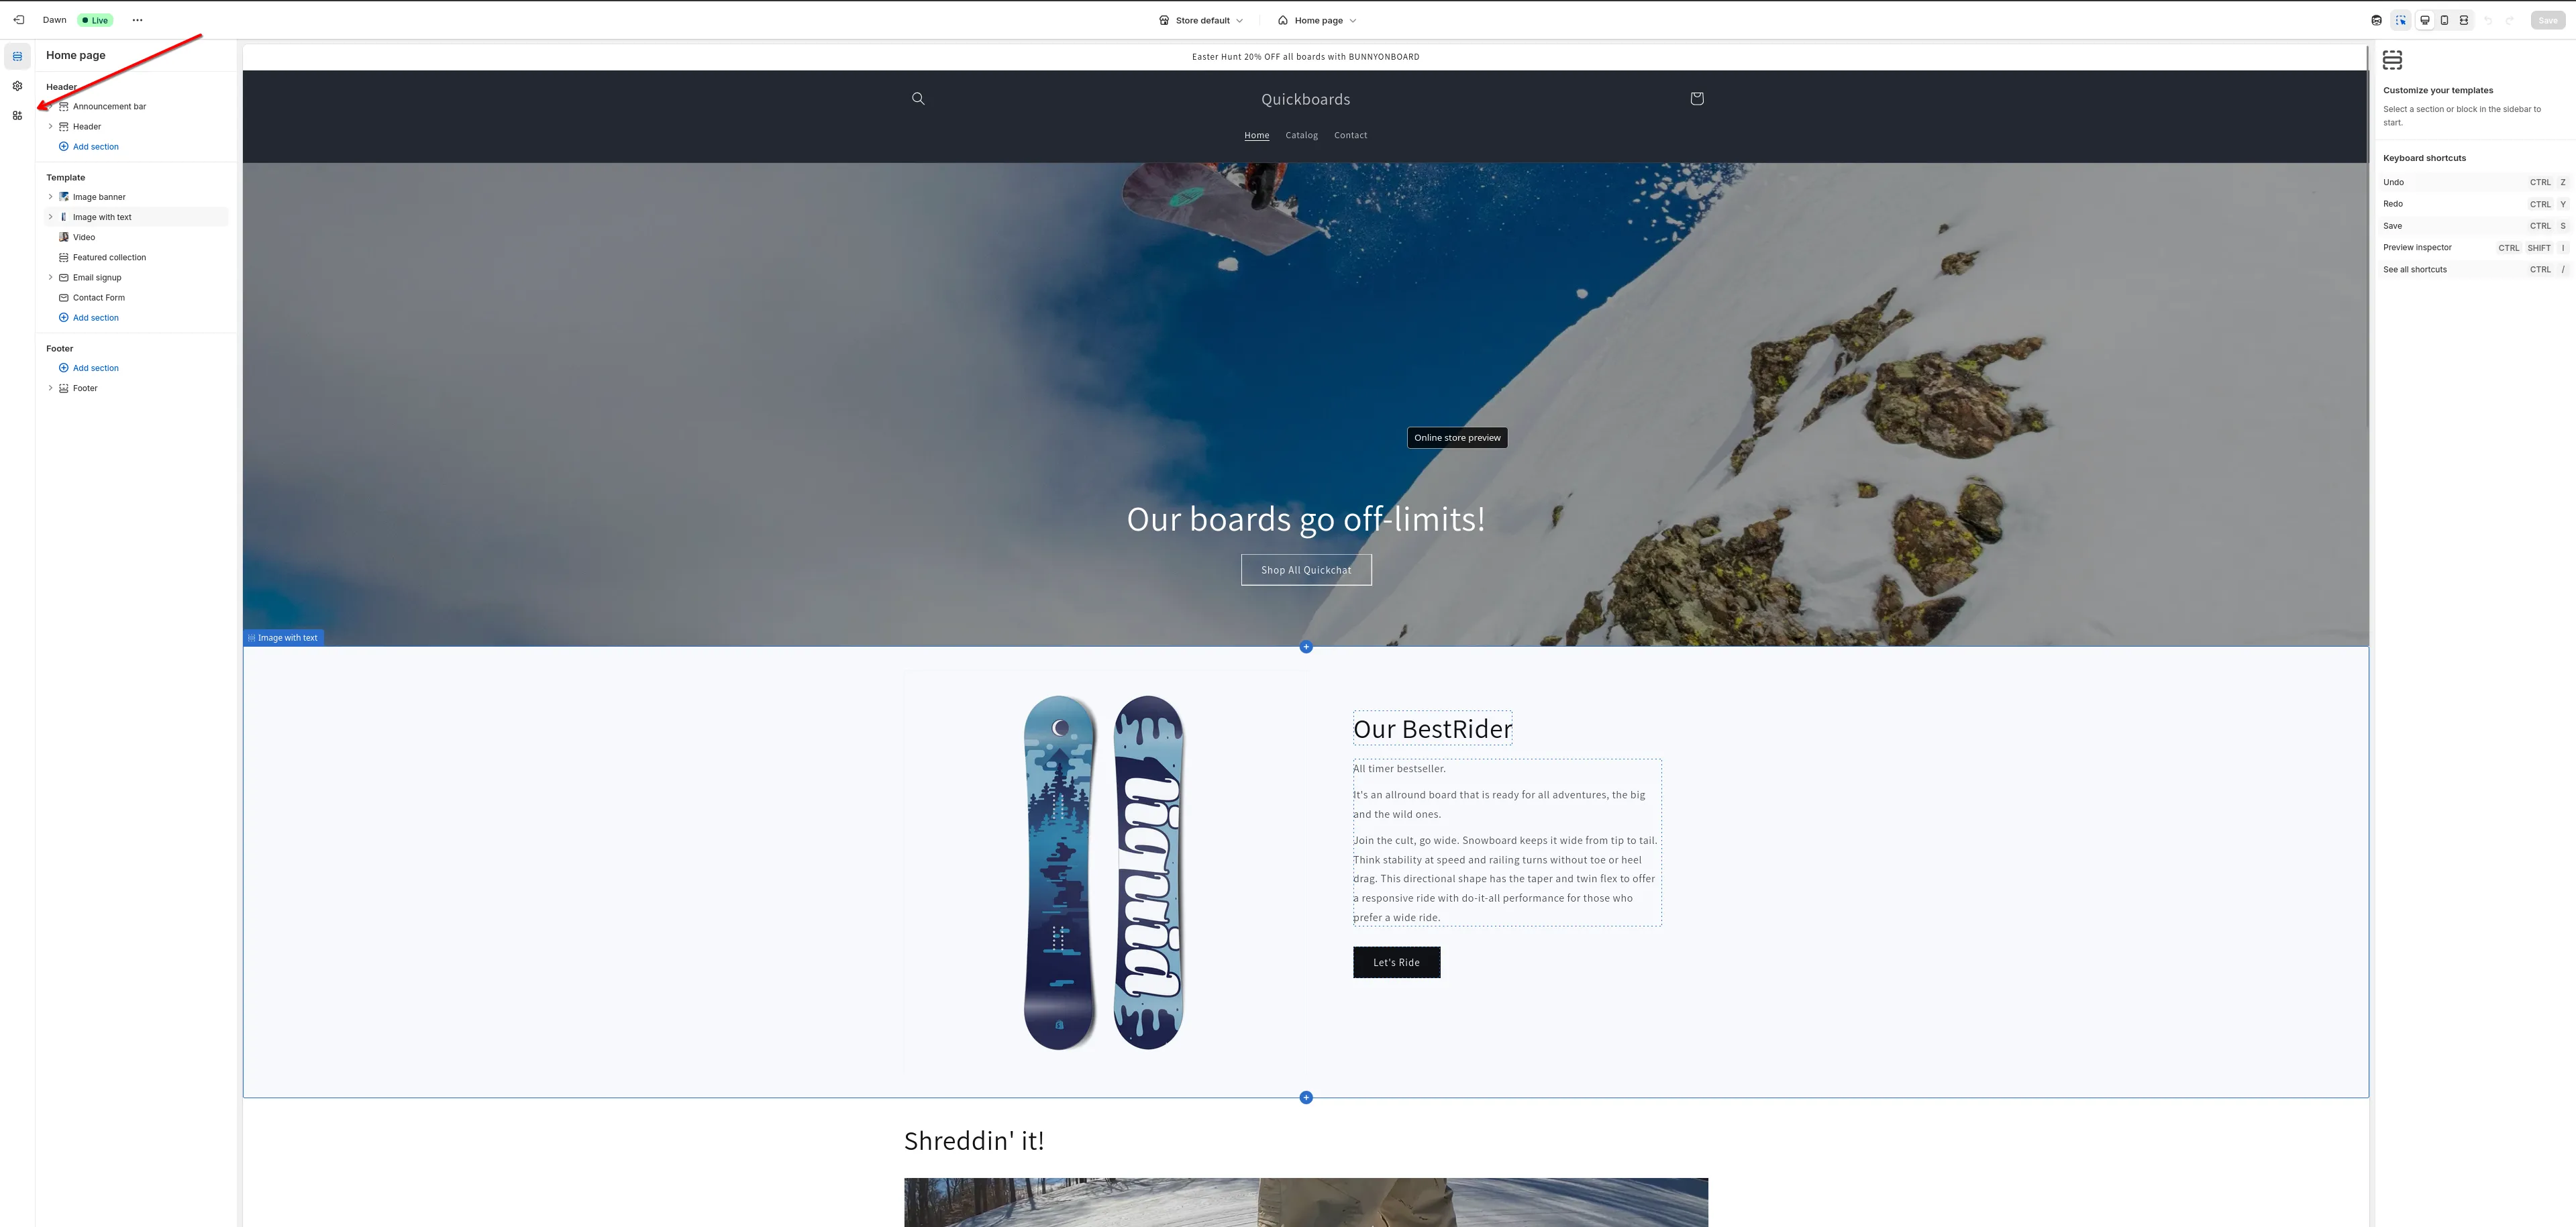
Section titled “Step 2: Enable the app embed”Inside the Theme Editor, open the left sidebar and go to App embeds.
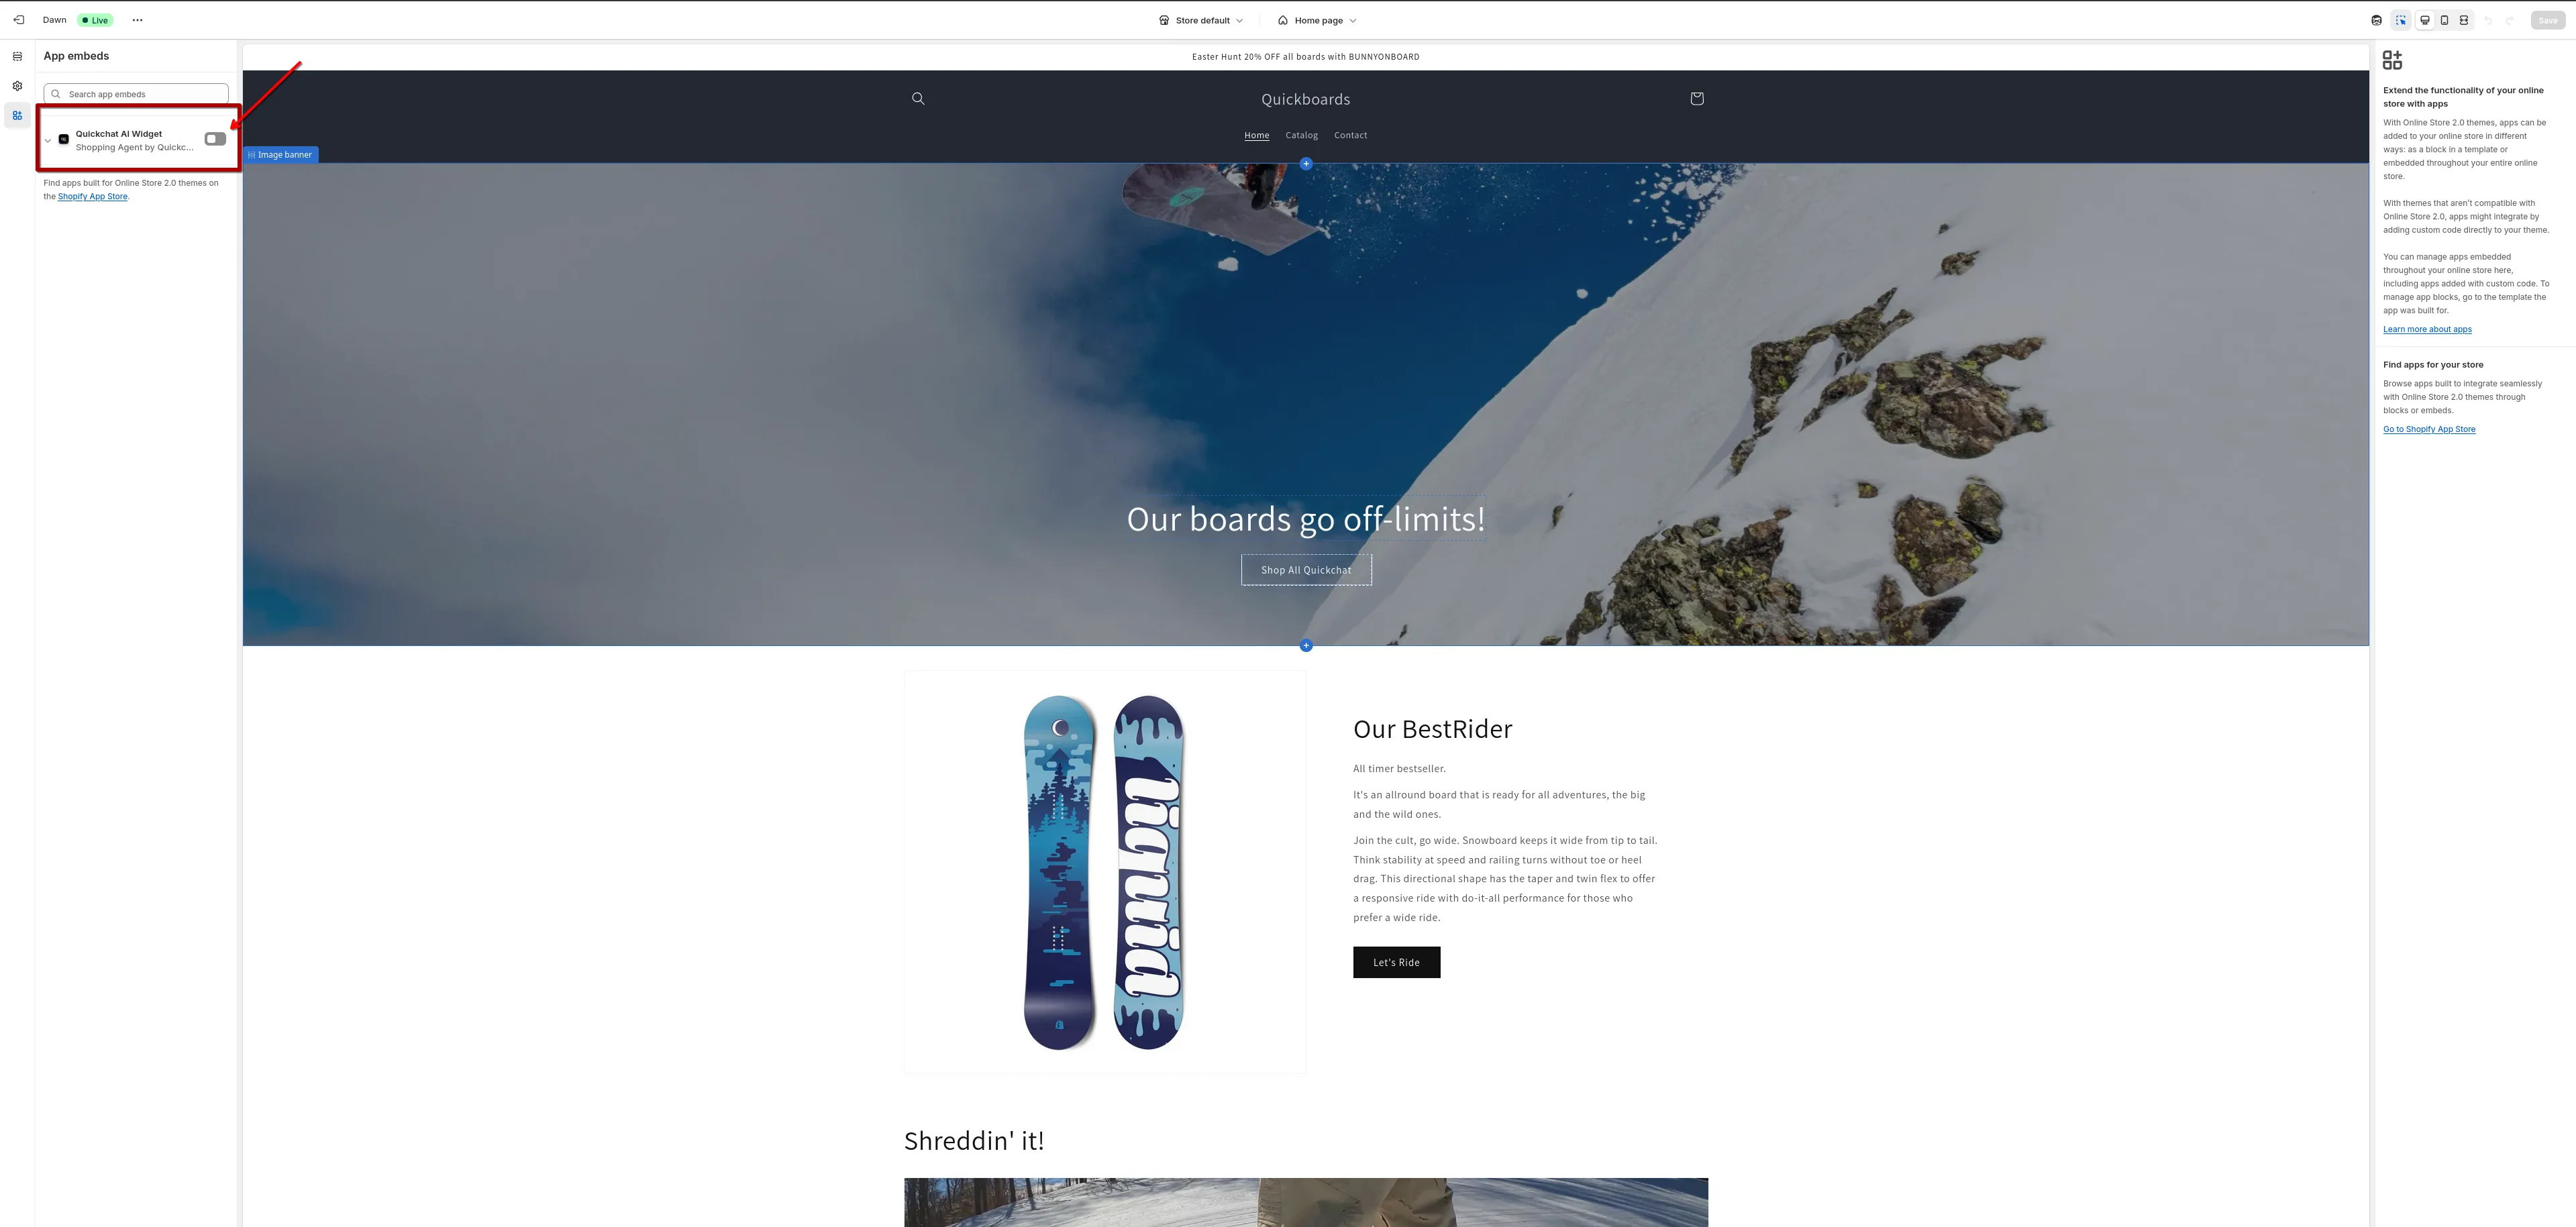
Find Quickchat AI Widget and toggle it on.
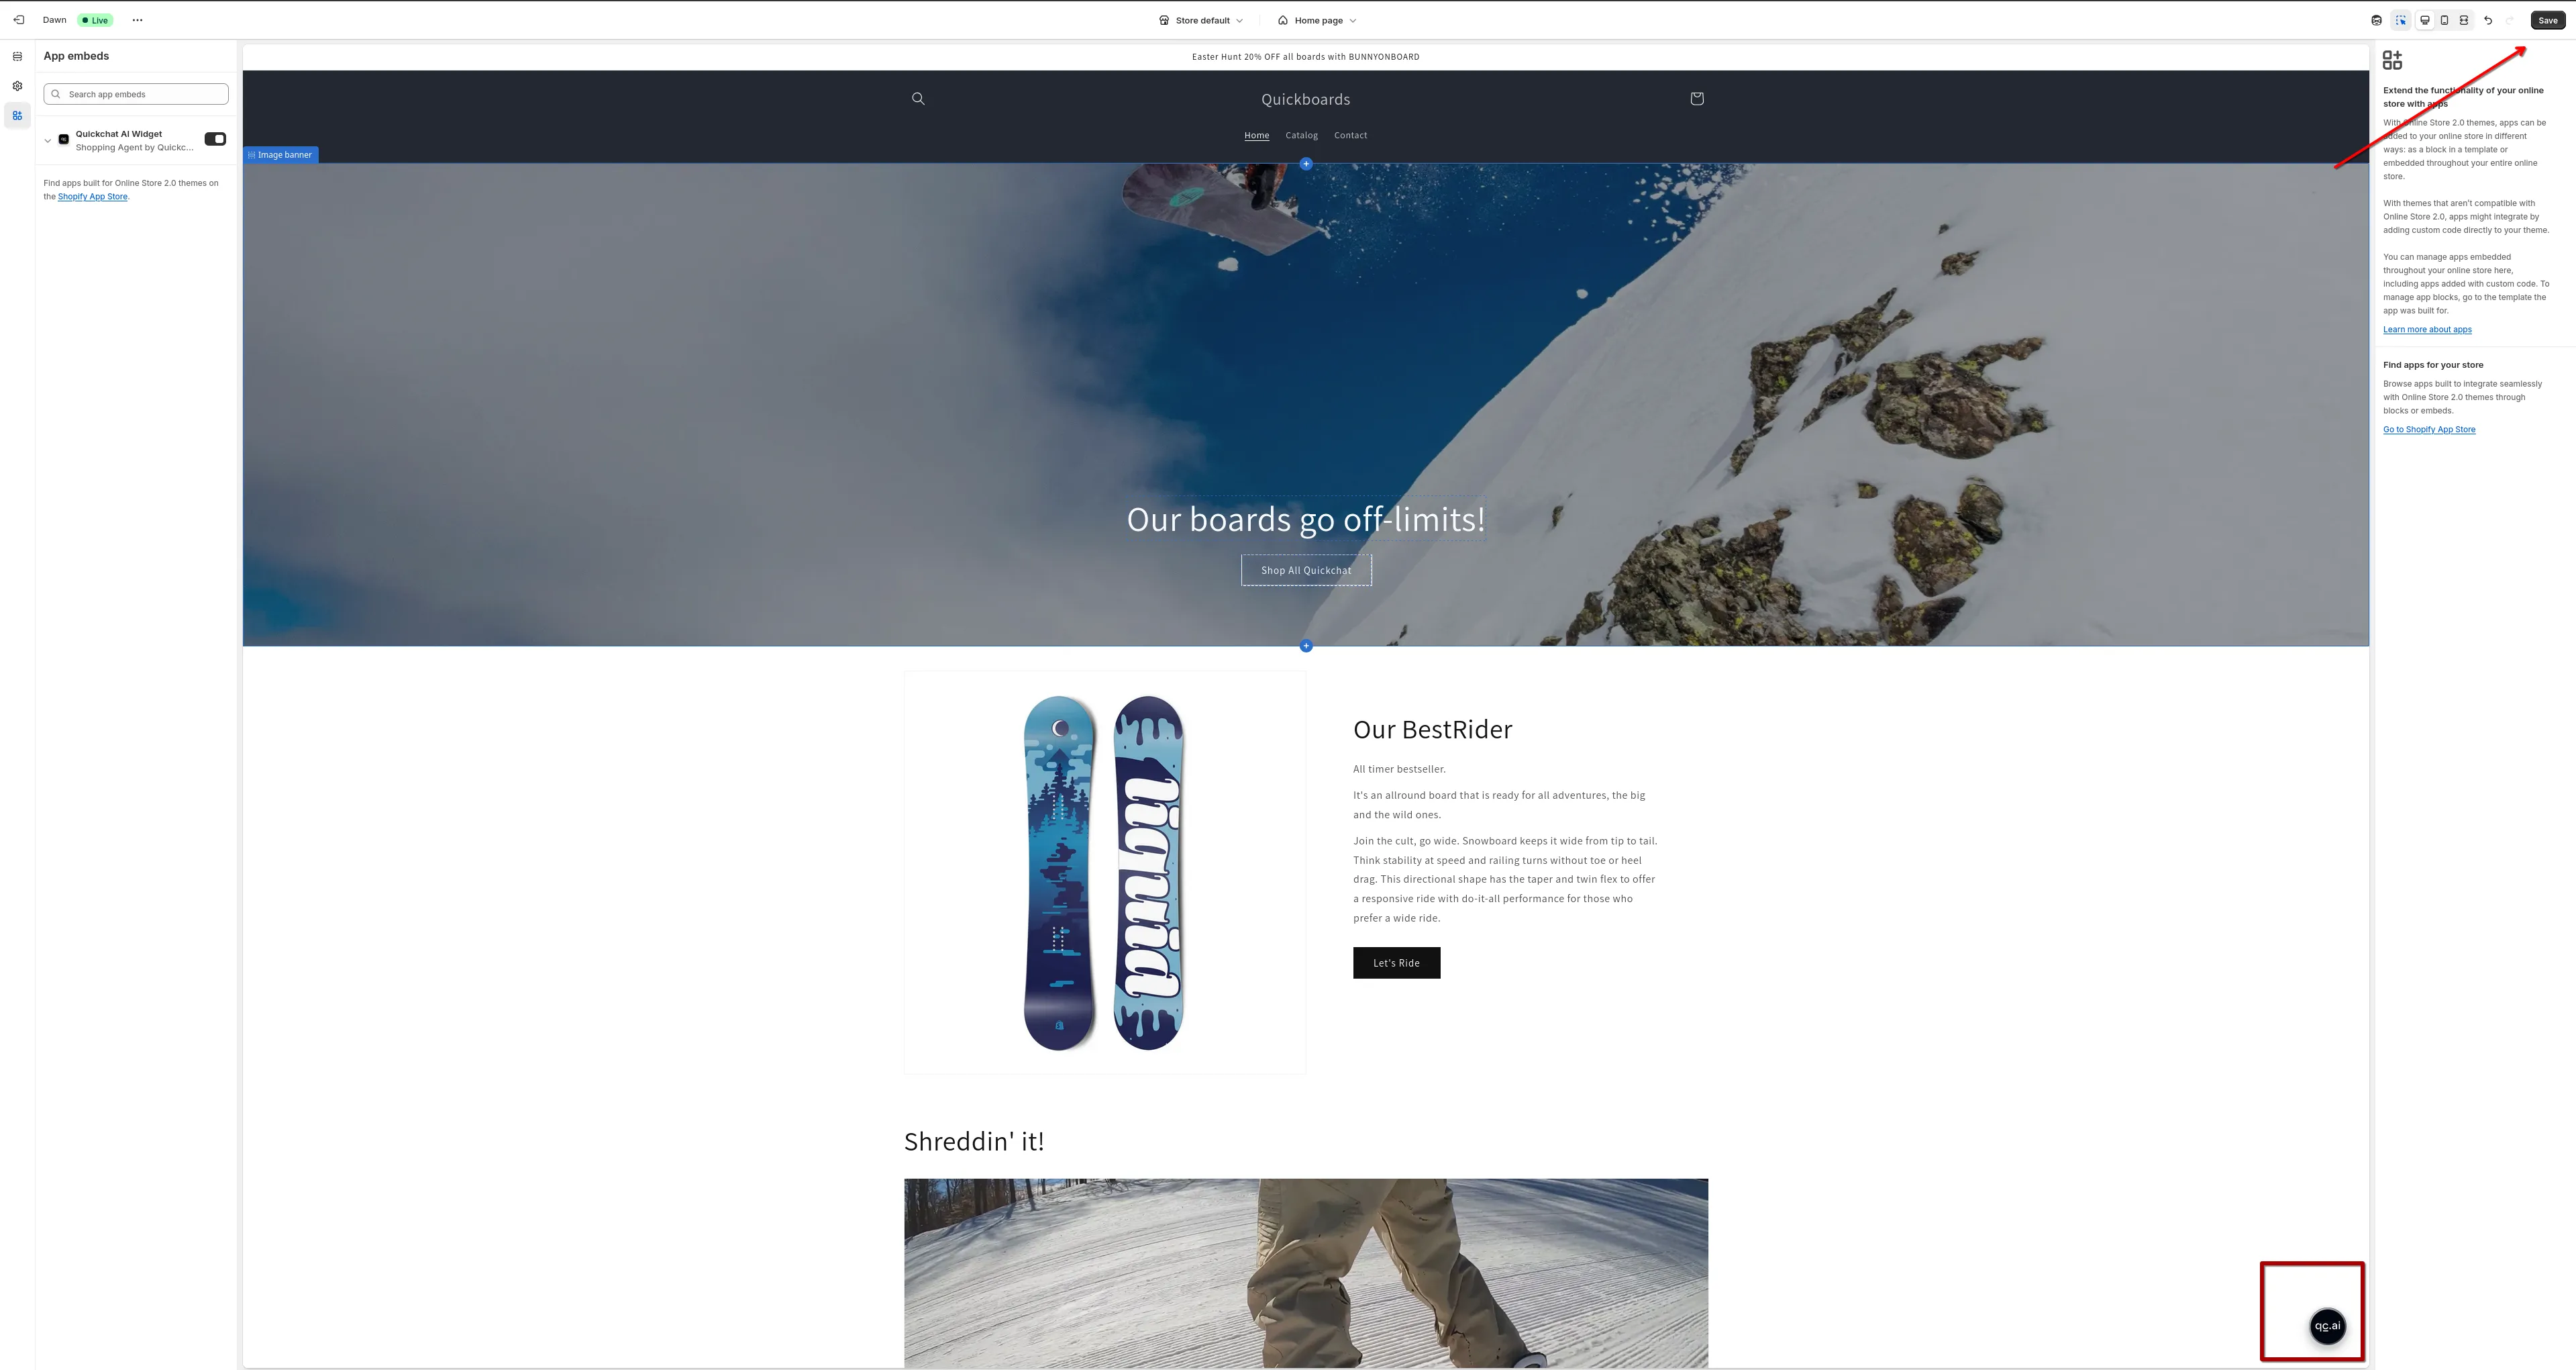
Then click Save (top-right).
Step 3: Confirm on your storefront
Section titled “Step 3: Confirm on your storefront”Open your storefront (preview or live site) and look for the Quickchat AI chat bubble in the bottom-right corner of the page.
That’s it!
Quickchat AI Agent is live on Shopify Store 🎉
How to manually add a widget script
Section titled “How to manually add a widget script”If you don’t want to install our Shopify App because you already have an AI Agent built in Quickchat AI App, you can add a simple script that displays it on your Shopify Store.
To connect your AI Agent to your Shopify store’s data such as product catalog and cart, please do the following:
- Paste your store link on this page: quickchat.ai/shopify
- Claim it, customize, and embed on your site
1. Open the theme code editor
Section titled “1. Open the theme code editor”- Go to your Shopify Admin Panel.
- In the left menu, click Online Store → Themes.
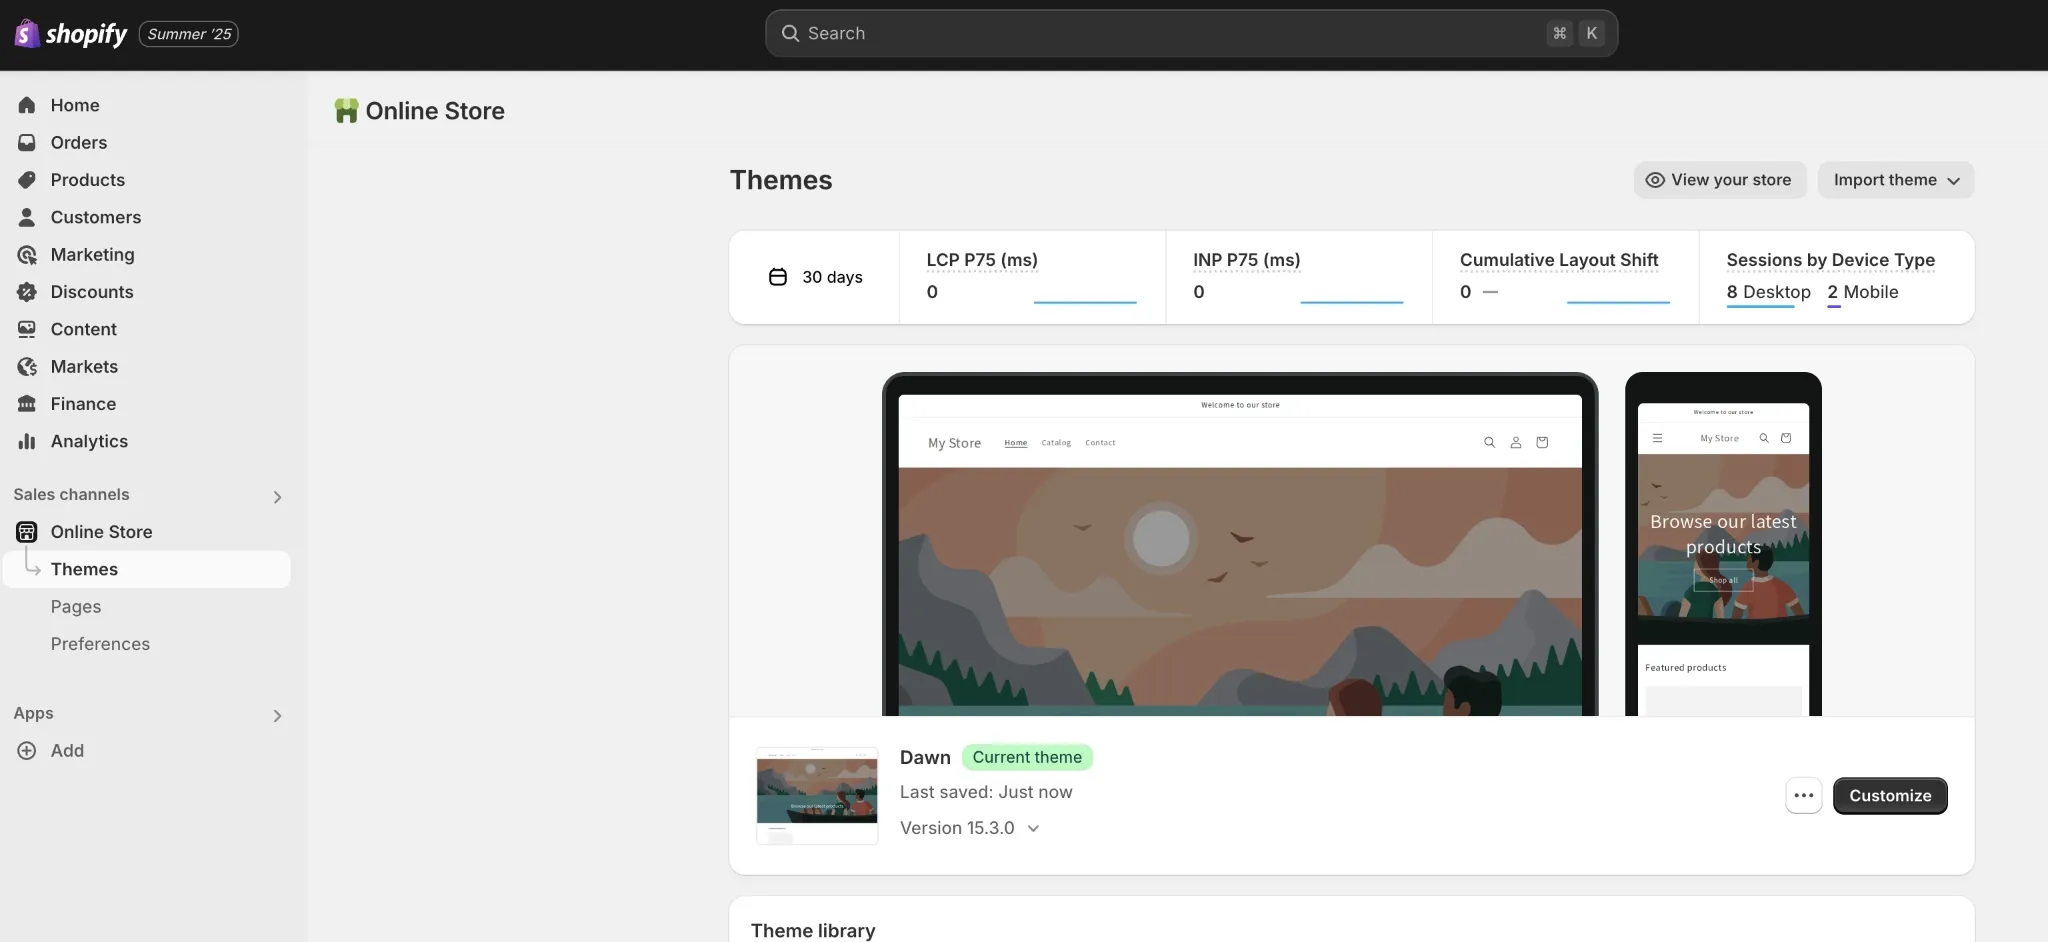
- In the “Current theme” section, click the three dots (⋯) next to the Customize button.
- Select Edit code from the dropdown.
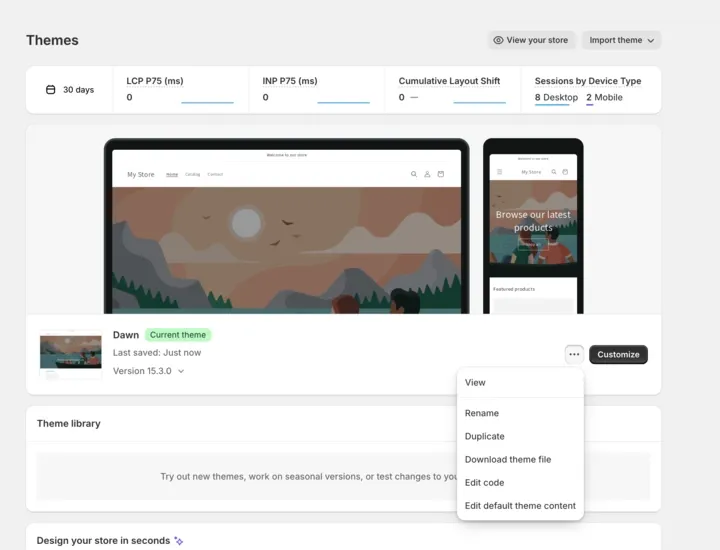
2. Find theme.liquid
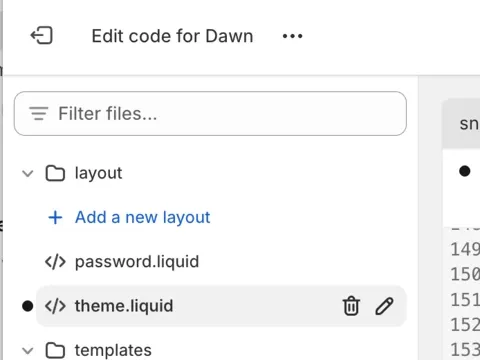
Section titled “2. Find theme.liquid”- In the code editor, expand the layout folder on the left.
- Click on
theme.liquidto open the main layout file of your theme.
3. Paste the script
Section titled “3. Paste the script”- In the Quickchat App, navigate to Your Website → Install.
- Copy the generated script.
- Paste it just above the
</body>tag at the bottom of thetheme.liquidfile.
<script> (function(e,a,d,i,c,t=a.createElement(d)){e[c]=e[c]||function(){(e[c].q=e[c].q||[]).push(arguments)},t.src=i,t.async=1,a.body.insertAdjacentElement("beforeend",t)})(window,document,"script","https://bubble.quickchat.ai/chat.js","_quickchat"); _quickchat("init", "YOUR_AI_ID_HERE");</script>