

Connect Email as a channel so your AI Agent replies to forwarded support emails from a dedicated address, optionally sending from your own domain.
In this guide, we’ll go through how to let your AI Agent handle inbound email. Here’s an overview of what we’ll cover:
- Connecting Email to get your dedicated Quickchat address
- Forwarding your business email address to it
- (Optional) Sending and receiving from your own domain
- (Optional) Adding a signature
How it works
Section titled “How it works”Quickchat gives your AI Agent a dedicated address (for example a1b2c3d4e5f6@in.quickchat.ai). Email sent to that address is answered by your AI Agent, and the reply goes back to the sender as if it came from you. You can forward your business email address to it, or hand the dedicated address out directly.
Auto-responders, out-of-office notices, bounces, and no-reply senders are detected and skipped automatically, so replies never loop.
Prerequisites
Section titled “Prerequisites”- Optional: a business email address you can set up forwarding from (for example
support@yourcompany.com). Without one, customers write to your dedicated@in.quickchat.aiaddress directly. - Optional: access to your domain’s DNS if you want replies to be sent from your own address.
Connect the Email channel
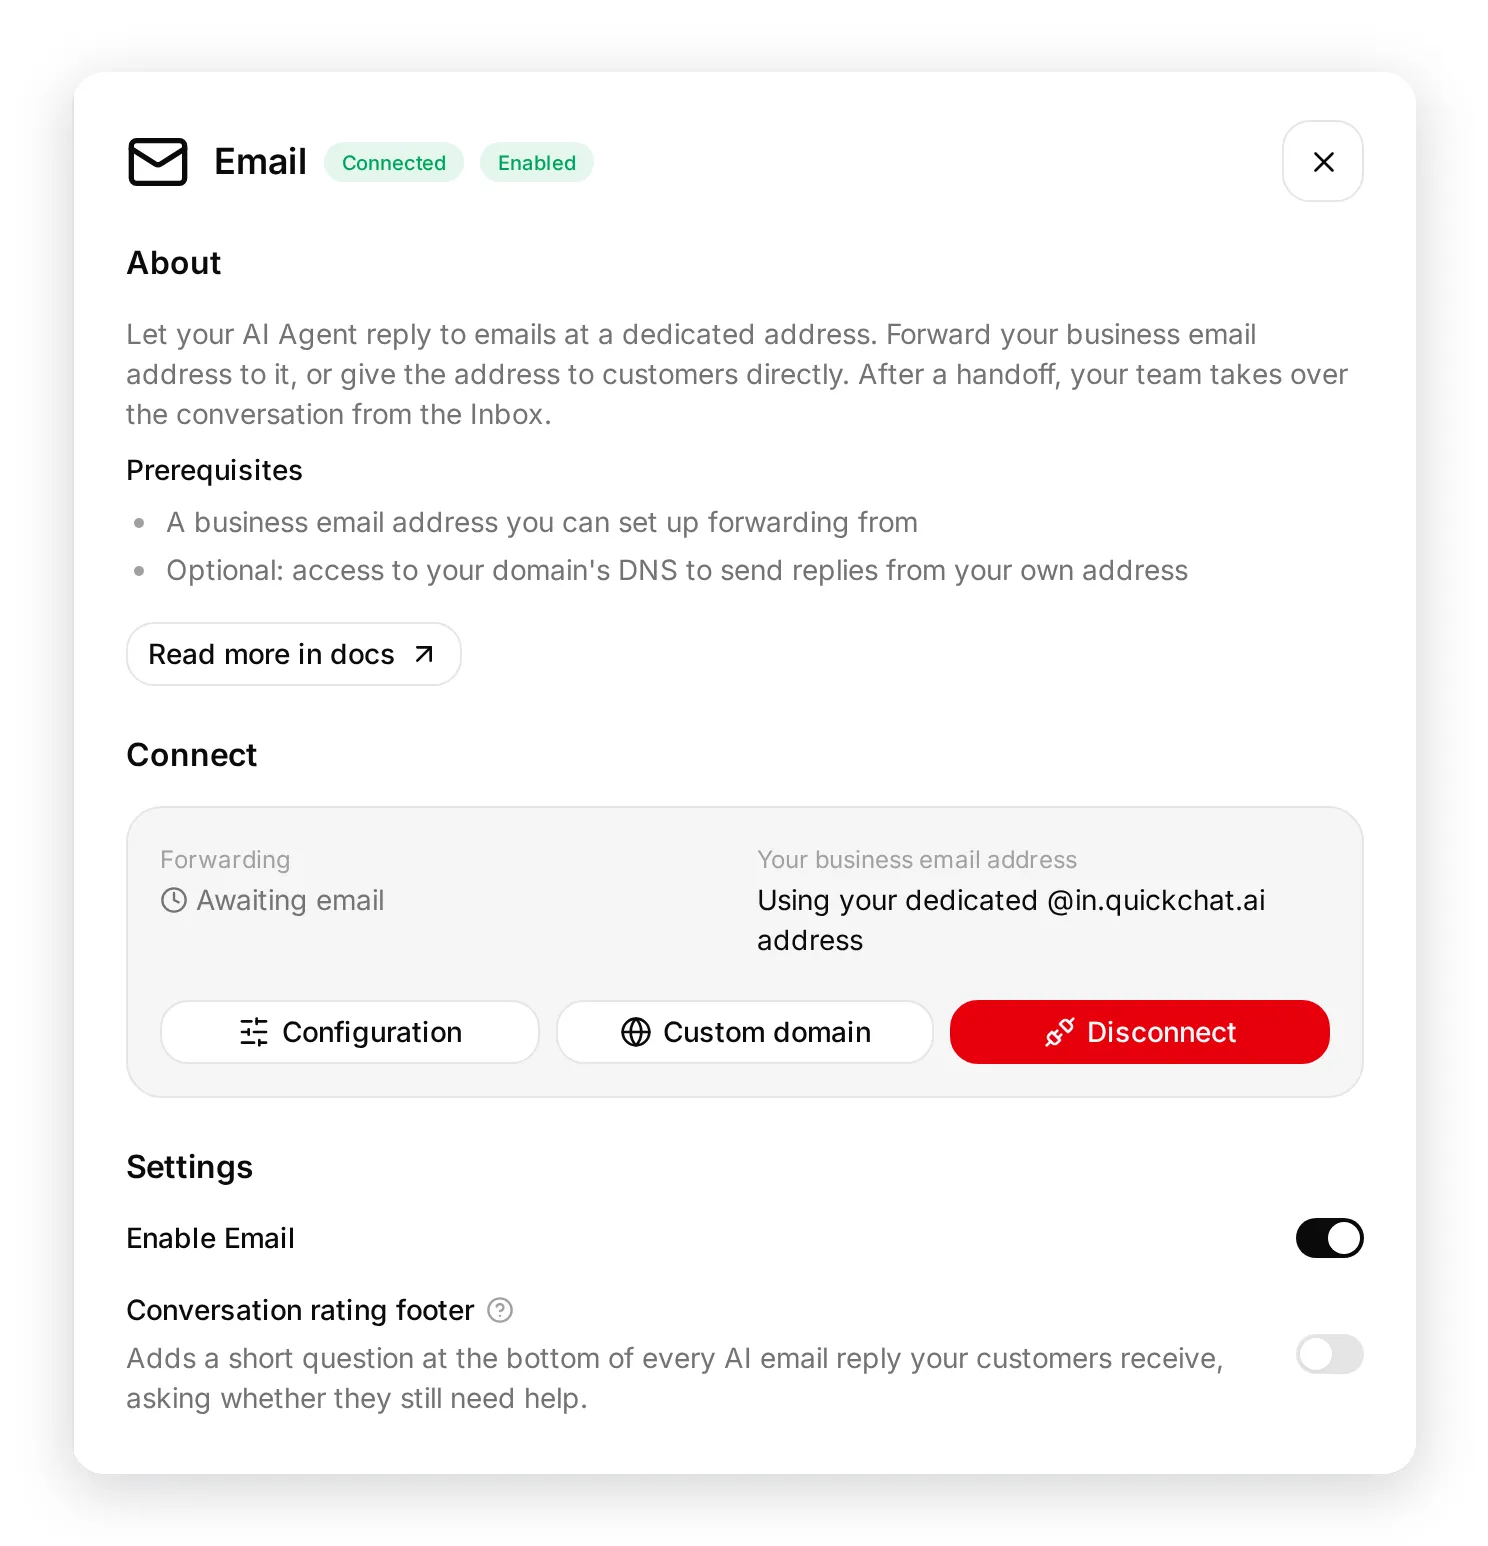
Section titled “Connect the Email channel”Open the Email channel in the Quickchat AI App, or go to the External Apps tab and click the Email tile, then click Connect to Email. Quickchat creates your dedicated inbound address and turns the channel on straight away, so a message sent to that address is answered immediately.
Open Configuration on the Email tile to see the address, set a Sender name and an Email signature, and reach the custom domain setup.
Set up forwarding
Section titled “Set up forwarding”Forwarding is optional. Set it up when you want customers to keep writing to your own address instead of the dedicated one.
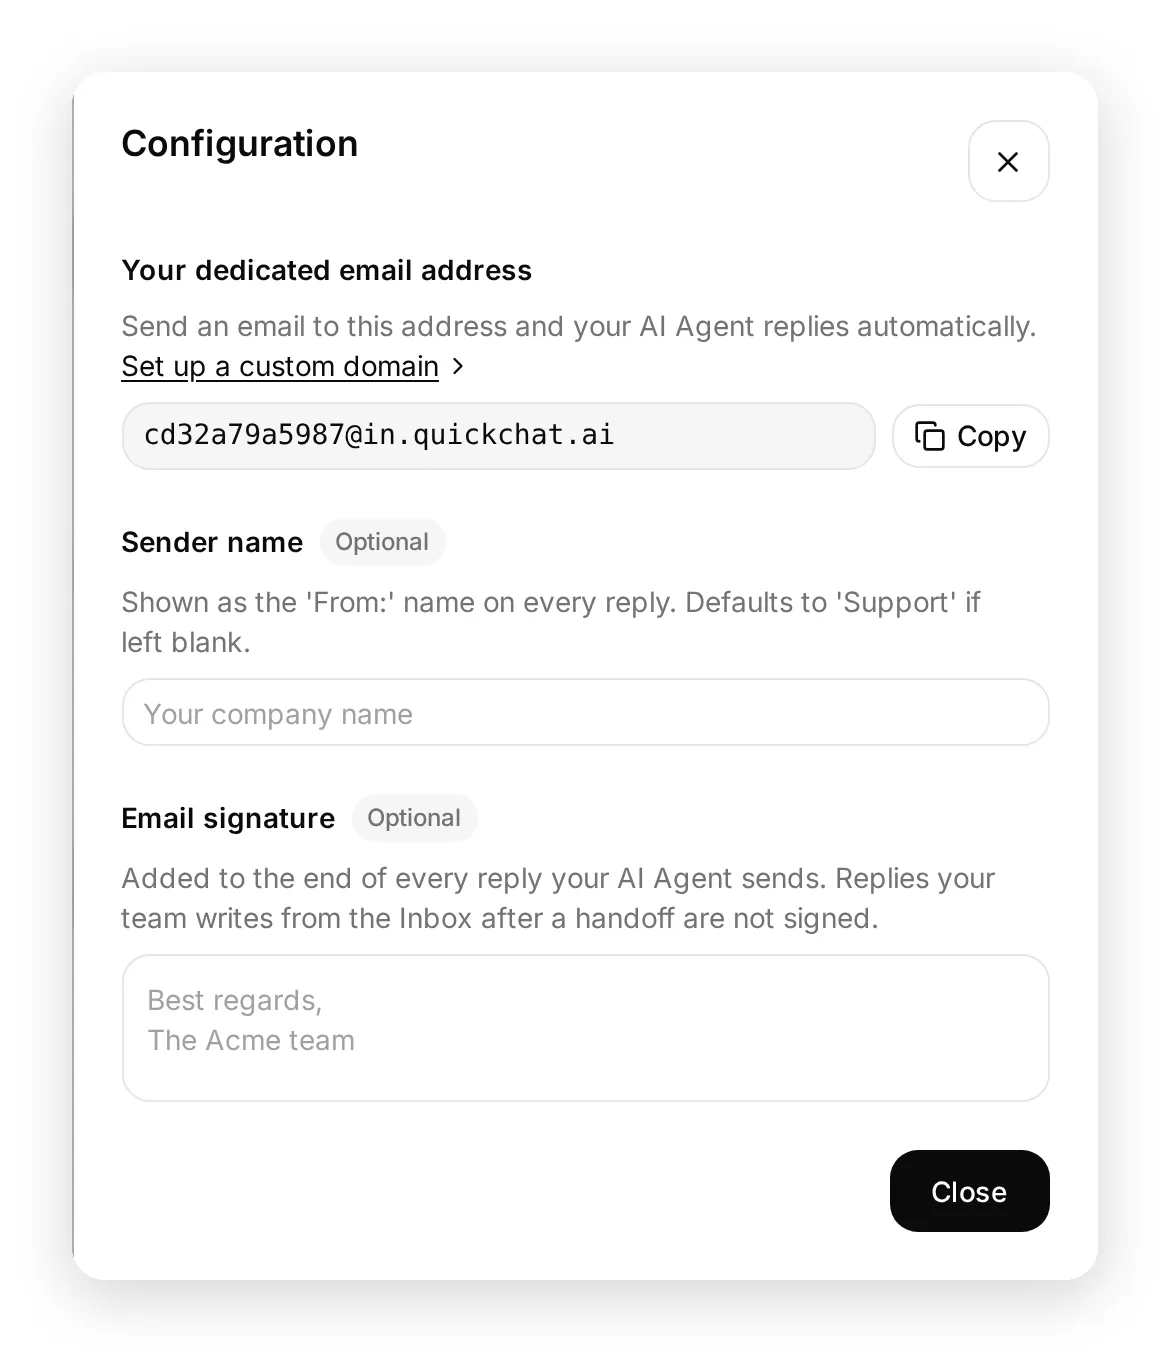
- Copy your dedicated address from Configuration.
- Open your email provider’s forwarding settings (Gmail, Outlook, Google Workspace, and so on).
- Forward your business email address to the dedicated address.
- If your provider asks you to confirm forwarding, the confirmation code or link is captured and shown in the Custom domain window under Receiving, so you can complete it without it reaching a customer.
The Forwarding status stays as Awaiting email until your first forwarded email lands at the address, then switches to Active automatically.
Send replies from your own domain
Section titled “Send replies from your own domain”By default, replies are sent from your dedicated @reply.quickchat.ai address showing your Sender name (or “Support” if you leave it blank). This works with no extra setup, so this whole section is optional.
To send replies from your own address instead:
- In Configuration, click Set up a custom domain.
- Enter Your business email address on a company domain you control (for example
support@yourcompany.com) and click Save. - Open the Sending tab. Quickchat starts domain authentication and shows a set of CNAME (SPF and DKIM) records.
- Add those records to your domain’s DNS, then click Verify domain.
- Once verified, replies are sent from your own address.
The Custom domain window has one tab per direction: Receiving covers forwarding into your dedicated address, Sending covers the DNS records that let replies leave from your own domain. Leave the business email address empty to keep the defaults: customers write to your dedicated @in.quickchat.ai address, and replies go out from your dedicated @reply.quickchat.ai address.
DNS changes can take a while to propagate. If verification does not pass right away, wait a little and click Verify domain again.
Add a signature (optional)
Section titled “Add a signature (optional)”Under Email signature in Configuration, add a signature to append to every reply (for example, your team name). Leave it blank to send replies without one.
The signature is added to replies your AI Agent sends. Replies your team writes from the Inbox after a human handoff are not signed with it, so a teammate can sign off in their own words.
Conversation rating footer
Section titled “Conversation rating footer”Every AI reply can end with a short question asking whether the customer still needs help, so they can close the loop themselves. Turn it on or off with Conversation rating footer in the Email sheet. New Email integrations have it on by default; integrations connected before the setting existed stay off until you turn it on.
- No marks the conversation as resolved and offers a quick rating.
- Yes moves the conversation to your Chat Page and hands it to a human.
The footer is added to AI replies only, never to a handoff email, and each link works for the state of the thread at the time it was sent: once a newer email arrives, the older footer’s links stop working. Links also expire 30 days after the email that carried them.
Delay every reply
Section titled “Delay every reply”By default your AI Agent answers the moment an email arrives. Under Delay every reply in the Email sheet you can hold each reply back instead: choose No delay, or 1, 2, 3, 5, 10, or 20 minutes.
- The delay applies to replies your AI Agent sends. Replies your team writes from the Inbox always go out immediately.
- If the customer writes again while a reply is waiting, both emails are answered together in one reply. The deadline does not move, so writing again never pushes the answer further away.
- If the conversation is handed to a human before the time is up, the waiting reply is dropped and your team answers instead.
- Disabling or disconnecting the channel drops any reply still waiting.
Enable, disable, or remove
Section titled “Enable, disable, or remove”Connecting turns the channel on. Enable Email pauses or resumes replies later without losing your setup. Disconnect removes the integration entirely: it releases the dedicated address and stops all replies. You can reconnect at any time.
Human handoff
Section titled “Human handoff”When your AI Agent decides a conversation needs a person, it stops auto-replying to that email thread and hands it to your team in the Inbox. Your teammate answers from there and the reply goes out as a normal email in the same thread, so the customer just sees the conversation continue. Anything the customer writes afterwards lands in the same conversation, marked unread, instead of going back to the AI.
Troubleshooting & FAQs
Section titled “Troubleshooting & FAQs”I set up forwarding but nothing happens.
- Confirm the forwarding rule targets your exact dedicated address.
- If your provider required a confirmation step, complete it. The code or link appears in the Custom domain window under Receiving.
- Check that the Enable Email toggle is on.
Replies are sent from a Quickchat address, not mine.
- Set Your business email address on a company domain you control and complete Verify domain under Sending. Public providers such as Gmail and Outlook.com cannot be authenticated.
Will auto-replies loop with my other systems?
- No. Auto-responders, out-of-office notices, bounces, and
no-replysenders are detected and skipped.
Need Help?
Section titled “Need Help?”If you have any questions, join our Discord community or contact us.