

Connect Quickchat AI to Slack. Use the one-click OAuth integration, or set up a Slack app manually with the legacy flow.
There are two ways to connect your AI Agent to Slack:
- Slack (OAuth): the recommended one-click integration. Authorize Quickchat AI in your Slack workspace and you’re done.
- Slack (Legacy): the legacy flow where you create a Slack app yourself, paste a manifest, and supply tokens manually.
We recommend the OAuth integration if you’re setting this up for the first time.
Connect with Slack (recommended)
Section titled “Connect with Slack (recommended)”In the Quickchat AI dashboard, go to External Apps, find Slack, and click Connect with Slack. This connects Slack via OAuth so your bot can reply in your workspace.
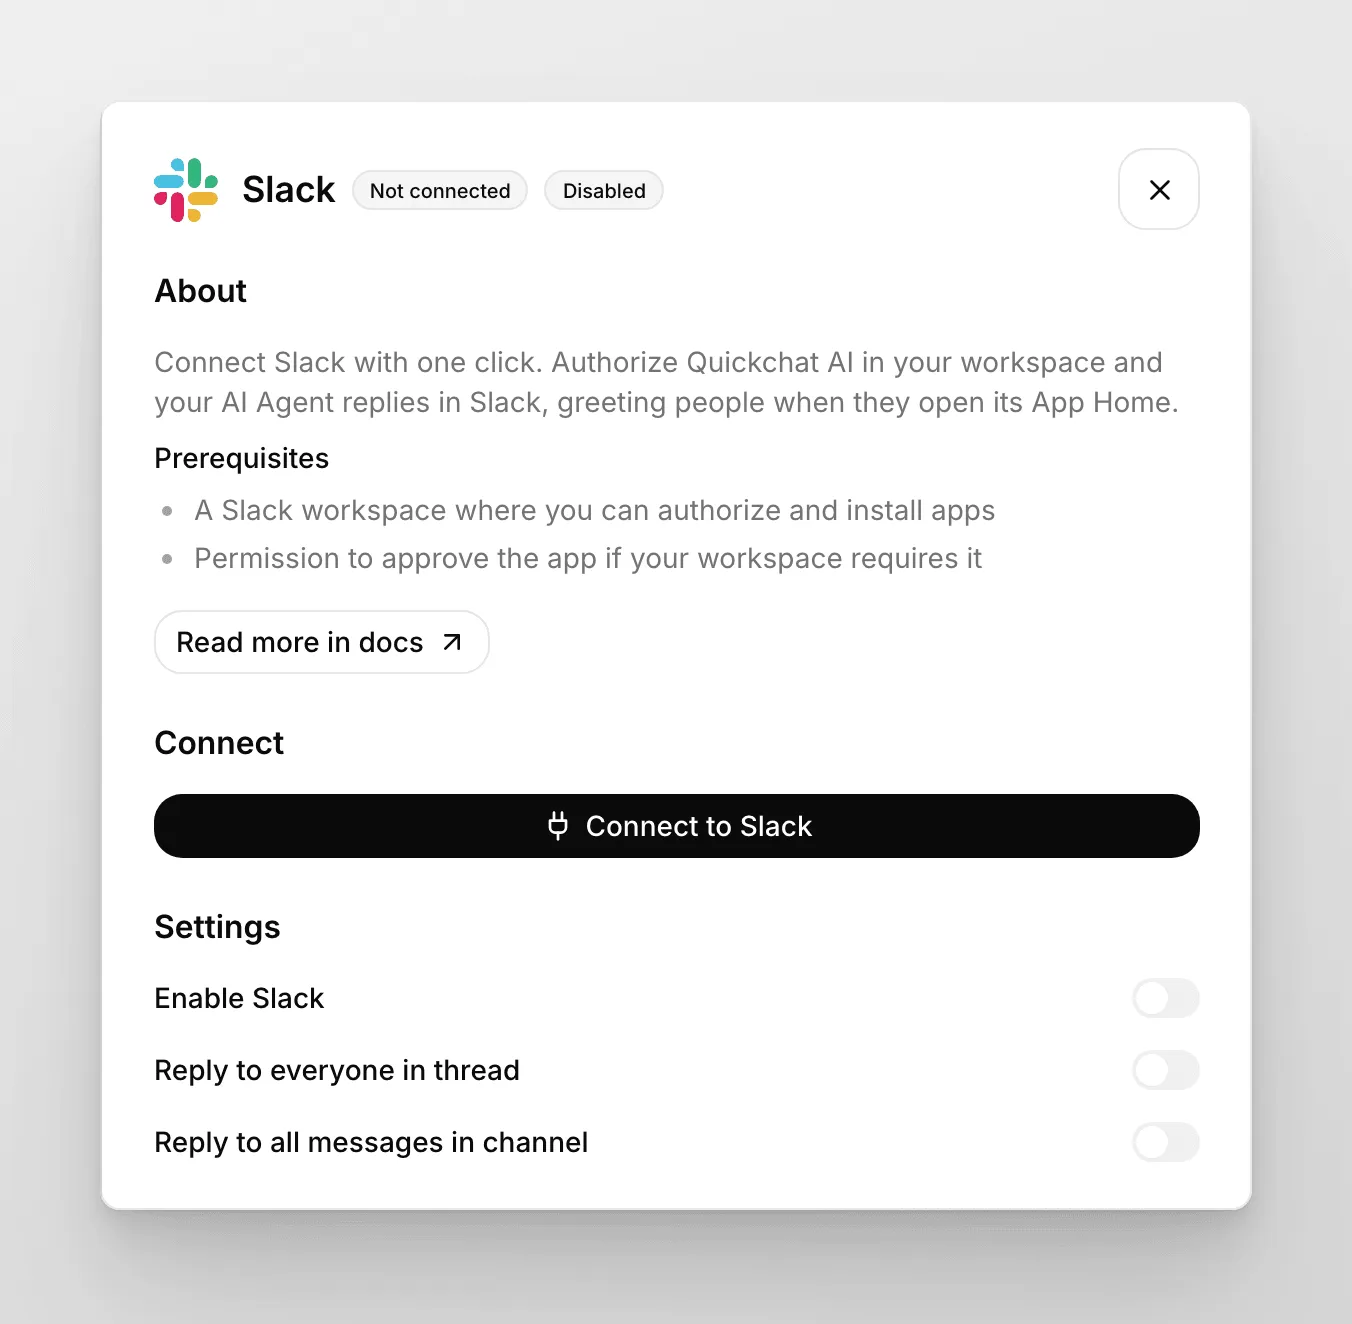
You’ll be redirected to Slack to authorize the app in your workspace. Approve the requested permissions and you’ll be brought back to the dashboard, where Slack shows as connected.
OAuth grants the full set of scopes automatically (im:history, im:write, chat:write, app_mentions:read, channels:history, groups:history), so there’s no manifest to edit and no basic-vs-expanded choice to make.
And that’s it! 🎉 Your AI chat bot is ready to be tested on Slack!
Reply behavior
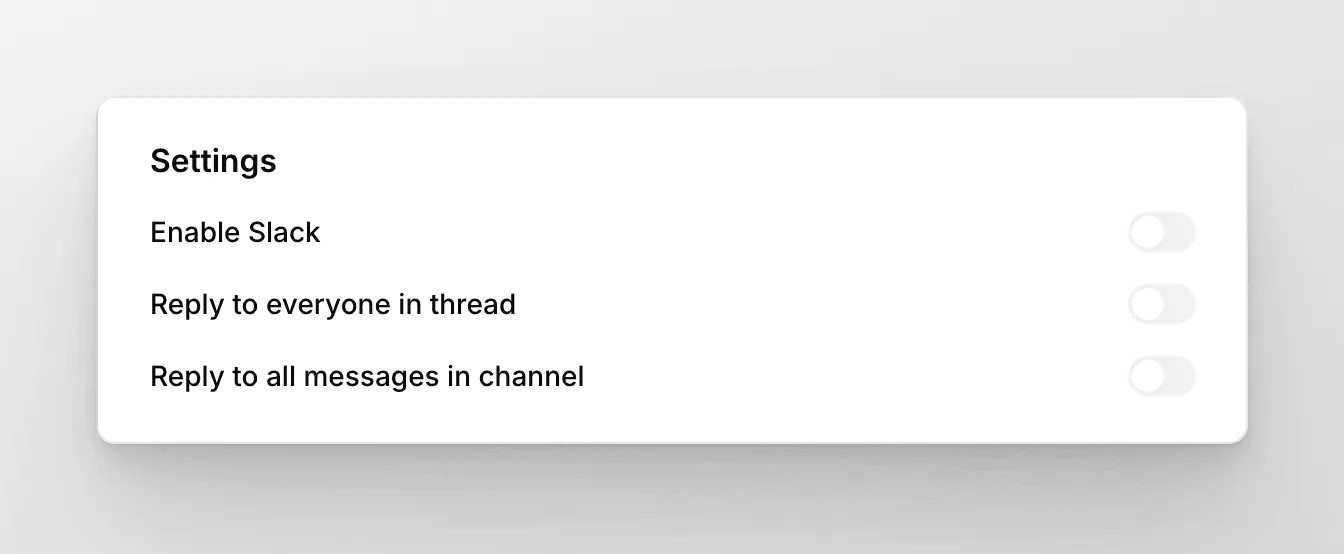
Section titled “Reply behavior”Both Slack integrations expose two toggles that control where your bot replies:
- Reply to everyone in thread: when on, the bot replies to messages from anyone in a thread, not just to the person who started it.
- Reply to all messages in channel: when on, the bot replies to all messages in a channel it has been added to, not only when it’s directly @mentioned.
When someone opens the bot’s App Home (the app_home_opened event), the bot sends its welcome message.
Slack (Legacy)
Section titled “Slack (Legacy)”This is the legacy Slack app integration using manual bot tokens. Prefer the OAuth Slack integration above if you’re setting this up for the first time. The manifest flow below is still accurate if you need the manual path.
In this section we’ll cover:
- Creating a dedicated Slack app
- Configuring the Slack app
- Integrating your Slack bot with Quickchat AI
Create your Slack app
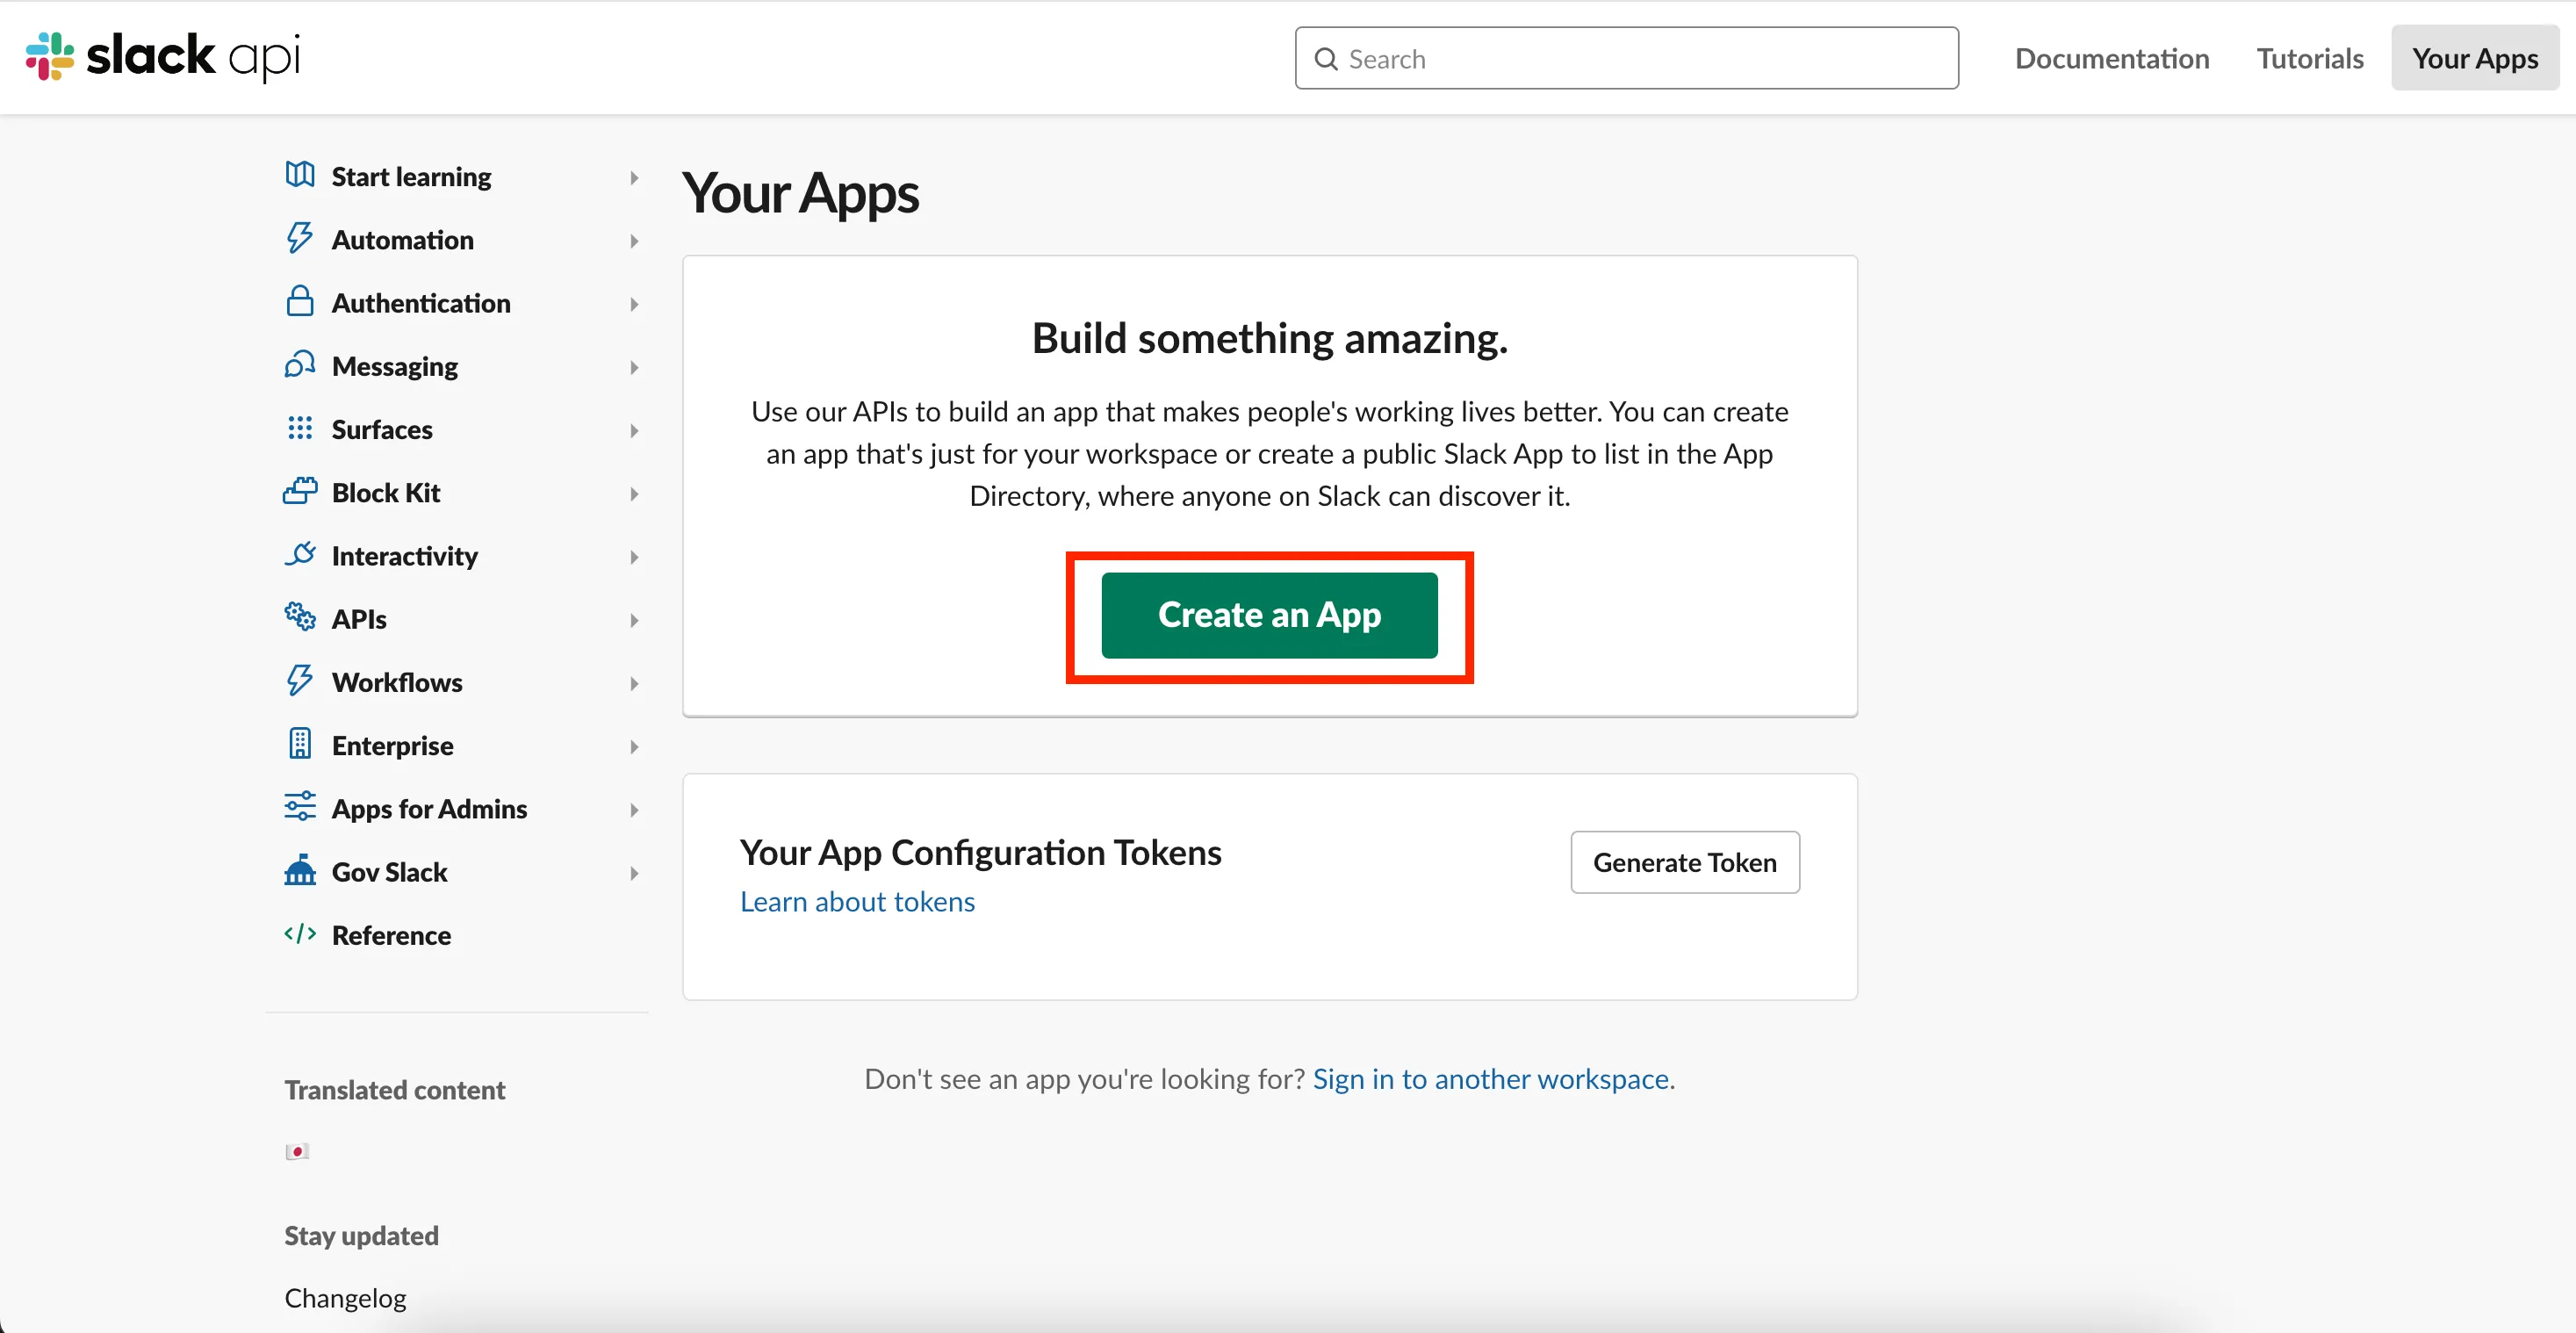
Section titled “Create your Slack app”To begin the integration process, you will need a Slack app for your AI chat bot. Head over to api.slack.com/apps and click on create a new app.
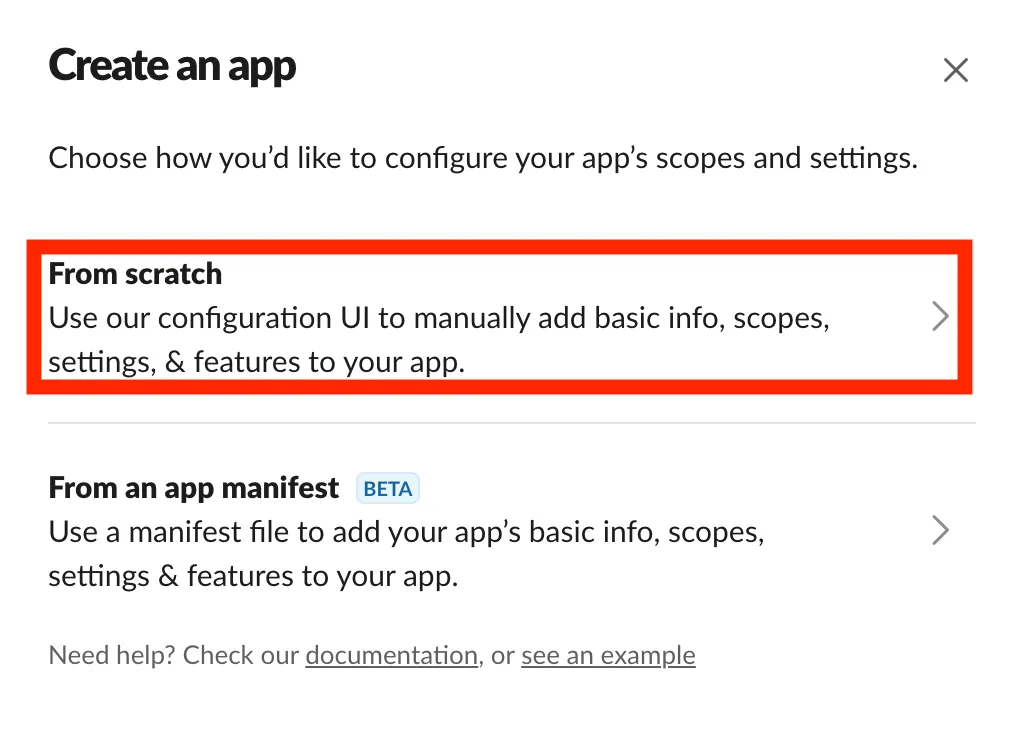
Then select Create an app from scratch, set your AI Agents’s name and select the Slack workspace you want to add it to and click Create App.
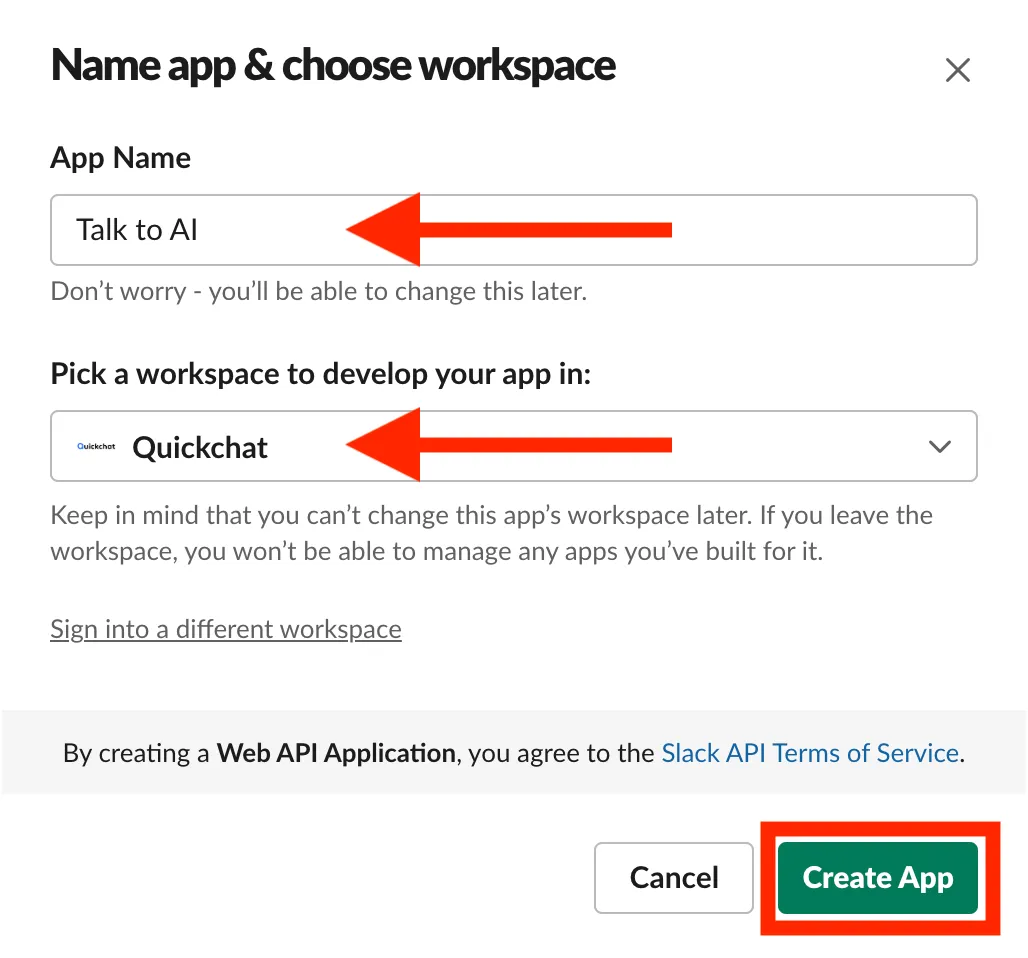
Configure your Slack app
Section titled “Configure your Slack app”Slack has a neat way of configuring your entire app in one go. You do it through the so called manifest file which contains all of your app’s configuration. Upon creating the app, you will be redirected to the App Settings. Within the Features section in the menu panel, navigate to App Manifest.
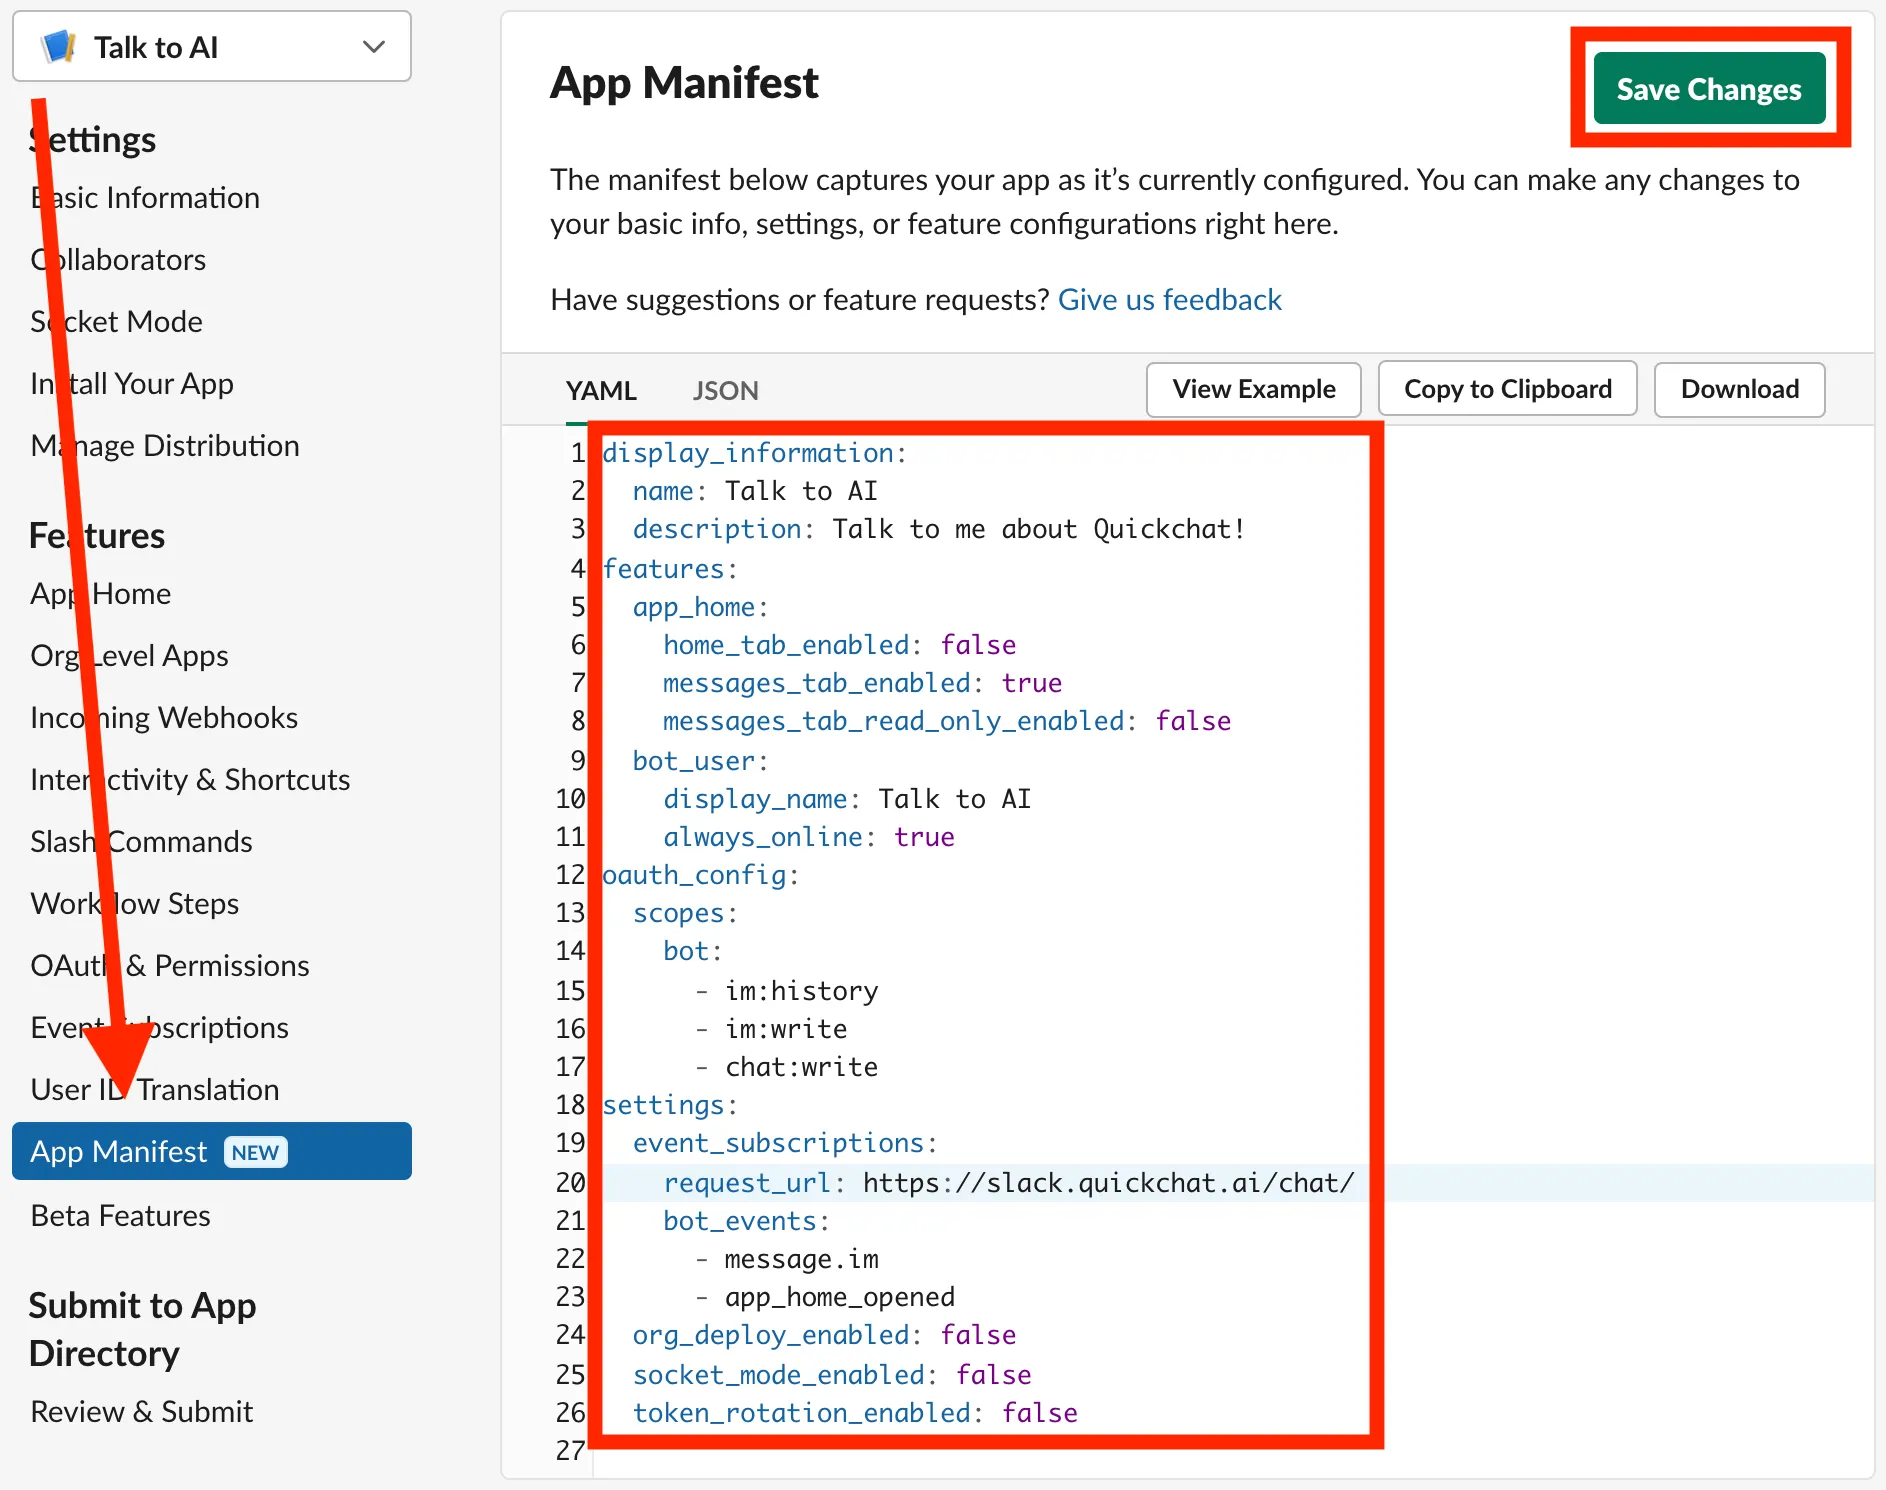
Below we have prepared a manifest file which you should paste into Slack’s App Manifest window (make sure you paste YAML, not JSON). You can easily copy and paste without worrying about the details. We explain the most important lines below:
- Set the appropriate name and description for your AI Agent (
display_information) - Make sure your bot’s messages tab has been enabled (
features/app_home/messages_tab_enabled) - Set permission scope for bot so it can read and write chat messages (
oauth_config/scopes) - Set the appropriate bot events to be handled by our Quickchat server (
settings/event_subscriptions/bot_events)
display_information: name: Talk to AI description: Talk to me about Quickchat!features: app_home: home_tab_enabled: false messages_tab_enabled: true messages_tab_read_only_enabled: false bot_user: display_name: Talk to AI always_online: trueoauth_config: scopes: bot: - im:history - im:write - chat:writesettings: event_subscriptions: request_url: https://slack.quickchat.ai/chat/ bot_events: - message.im - app_home_opened org_deploy_enabled: false socket_mode_enabled: false token_rotation_enabled: falsedisplay_information: name: Talk to AI description: Talk to me about Quickchat!features: app_home: home_tab_enabled: false messages_tab_enabled: true messages_tab_read_only_enabled: false bot_user: display_name: Talk to AI always_online: trueoauth_config: scopes: bot: - im:history - im:write - chat:write - app_mentions:read - channels:history - groups:historysettings: event_subscriptions: request_url: https://slack.quickchat.ai/chat/ bot_events: - message.im - app_home_opened - app_mention - message.groups - message.channels org_deploy_enabled: false socket_mode_enabled: false token_rotation_enabled: falseSave the manifest. Before the changes take place, you will be prompted to verify the URL by clicking on the link:
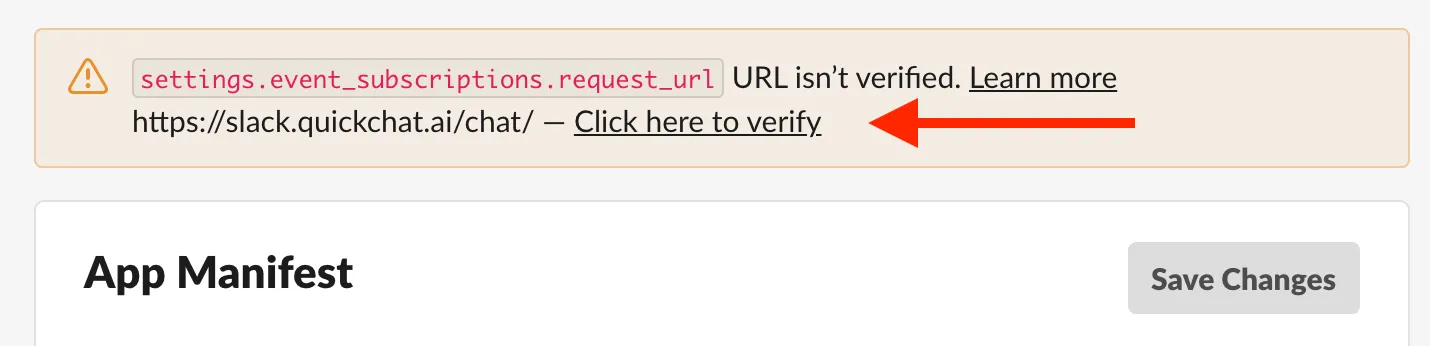
That’s it! Your bot Slack app has been configured. If you’d like to edit your bot’s look & feel, head over to Basic information under Settings, then in the Display Information Section:
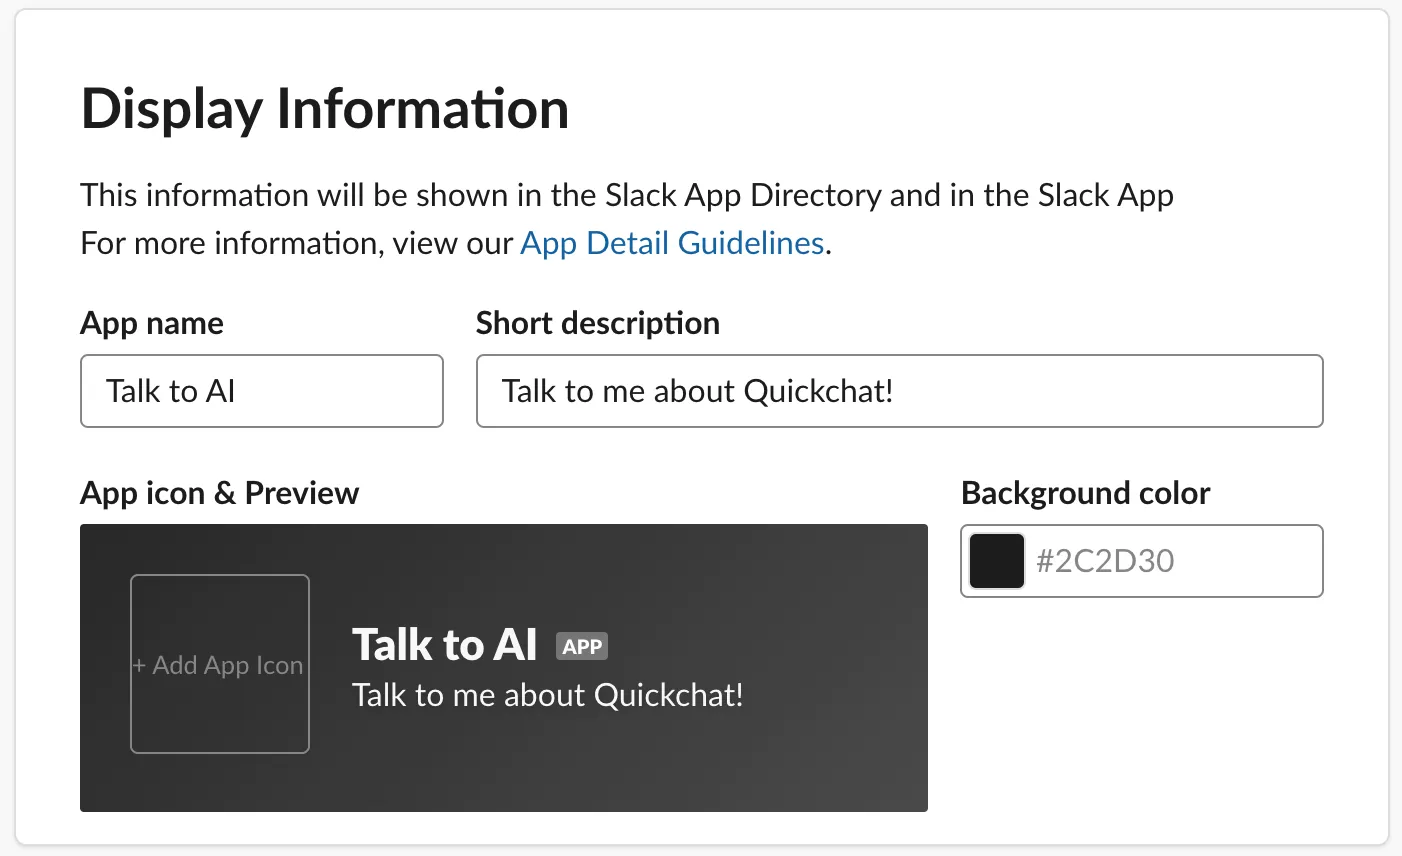
Integrate your Slack bot with Quickchat AI
Section titled “Integrate your Slack bot with Quickchat AI”We are almost done. As the last step we need to Integrate the Slack bot with Quickchat AI. To do this, we first need to obtain some information from Slack:
- App ID: Settings → Basic Information → App Credentials
- Signing Secret: Settings → Basic Information → App Credentials
- Bot User OAuth Token: Features → OAuth & Permissions → OAuth Tokens for Your Workspace 👉 You will be prompted to install the bot into your workspace. Upon clicking Allow you will be redirected back to the settings where OAuth Token will be ready to copy.
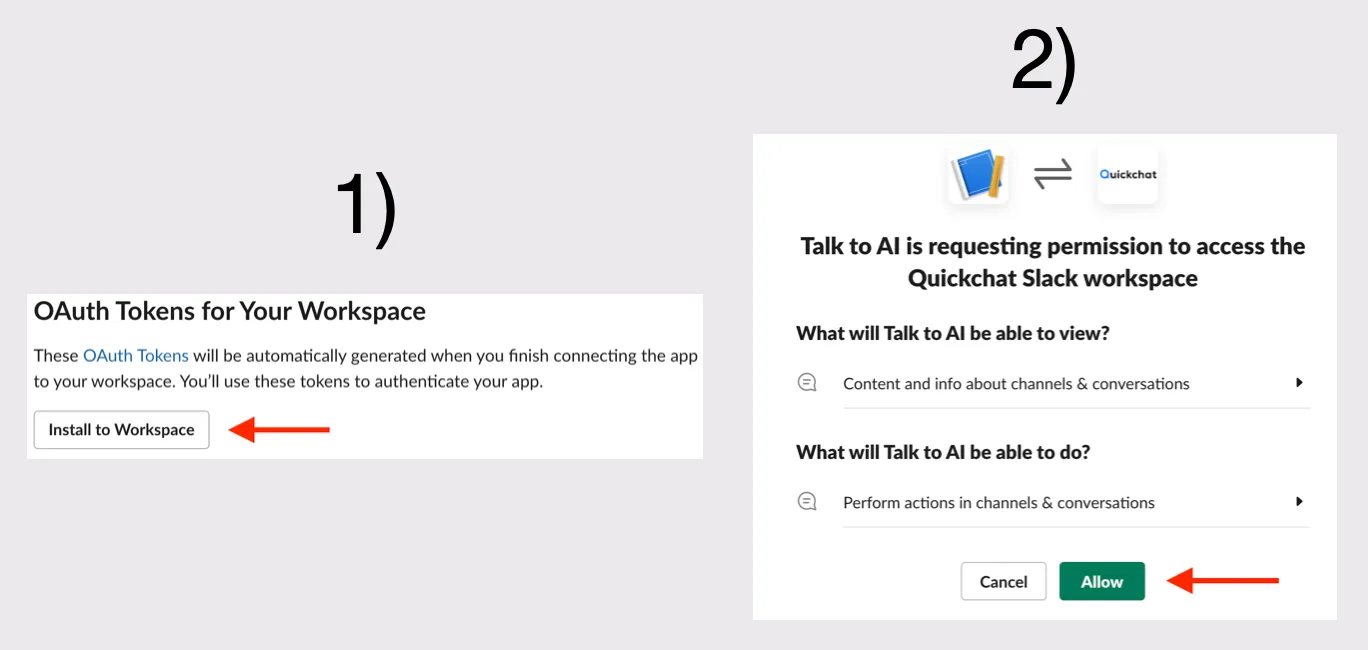
You will be needing this information in the next step, so keep the tab open.
In a new tab, open the Quickchat AI dashboard, go to External Apps, find Slack and supply the App ID, Signing Secret and the OAuth Token.
And that’s it! 🎉 Your AI chat bot is ready to be tested on Slack! YAY!