

Integrate Quickchat AI with HubSpot Conversations to automate customer support, streamline queries, and enhance your CRM workflows.
Integrating Quickchat AI Agent with HubSpot Conversations is a powerful customer service tool that enables businesses to interact with their customers by providing instant support, and build customer relationships, providing automated responses to customer queries and streamlining your customer support processes.
Watch the Video
Section titled “Watch the Video”Quickchat prerequisites:
Section titled “Quickchat prerequisites:”- Create a Quickchat AI account
Create a dedicated HubSpot user
Section titled “Create a dedicated HubSpot user”Your AI Agent replies on behalf of a dedicated HubSpot user, so create that user first:
- Create a new user in HubSpot. This seat will be assigned to the AI Agent.
- Select the Super Admin permission set.
- Ensure the Service Enterprise seat is enabled: hover over your newly created user and click Edit permissions.
- Check if the user status is set to available: hover over your newly created user and click Actions, then Edit user.
Option A: Install from the HubSpot App Marketplace
Section titled “Option A: Install from the HubSpot App Marketplace”- Open the Support AI Agent by Quickchat AI listing in the HubSpot App Marketplace and click Install.
- A Quickchat sign-in window opens. Click Continue with Quickchat and sign in to your Quickchat AI account (or create one if you don’t have one yet).
- If you have more than one AI Agent, the Choose an AI Agent screen appears. Select the agent you want to connect and click Connect. If you only have one AI Agent, it is selected automatically.
- You are returned to HubSpot and the installation completes.
- To start answering conversations, open the Quickchat AI dashboard and go to the External Apps tab. Click Finish setup on the Finish your HubSpot setup banner and enter the email address of the dedicated HubSpot user you created above in HubSpot User Email. Your AI Agent will respond to messages on behalf of that account.
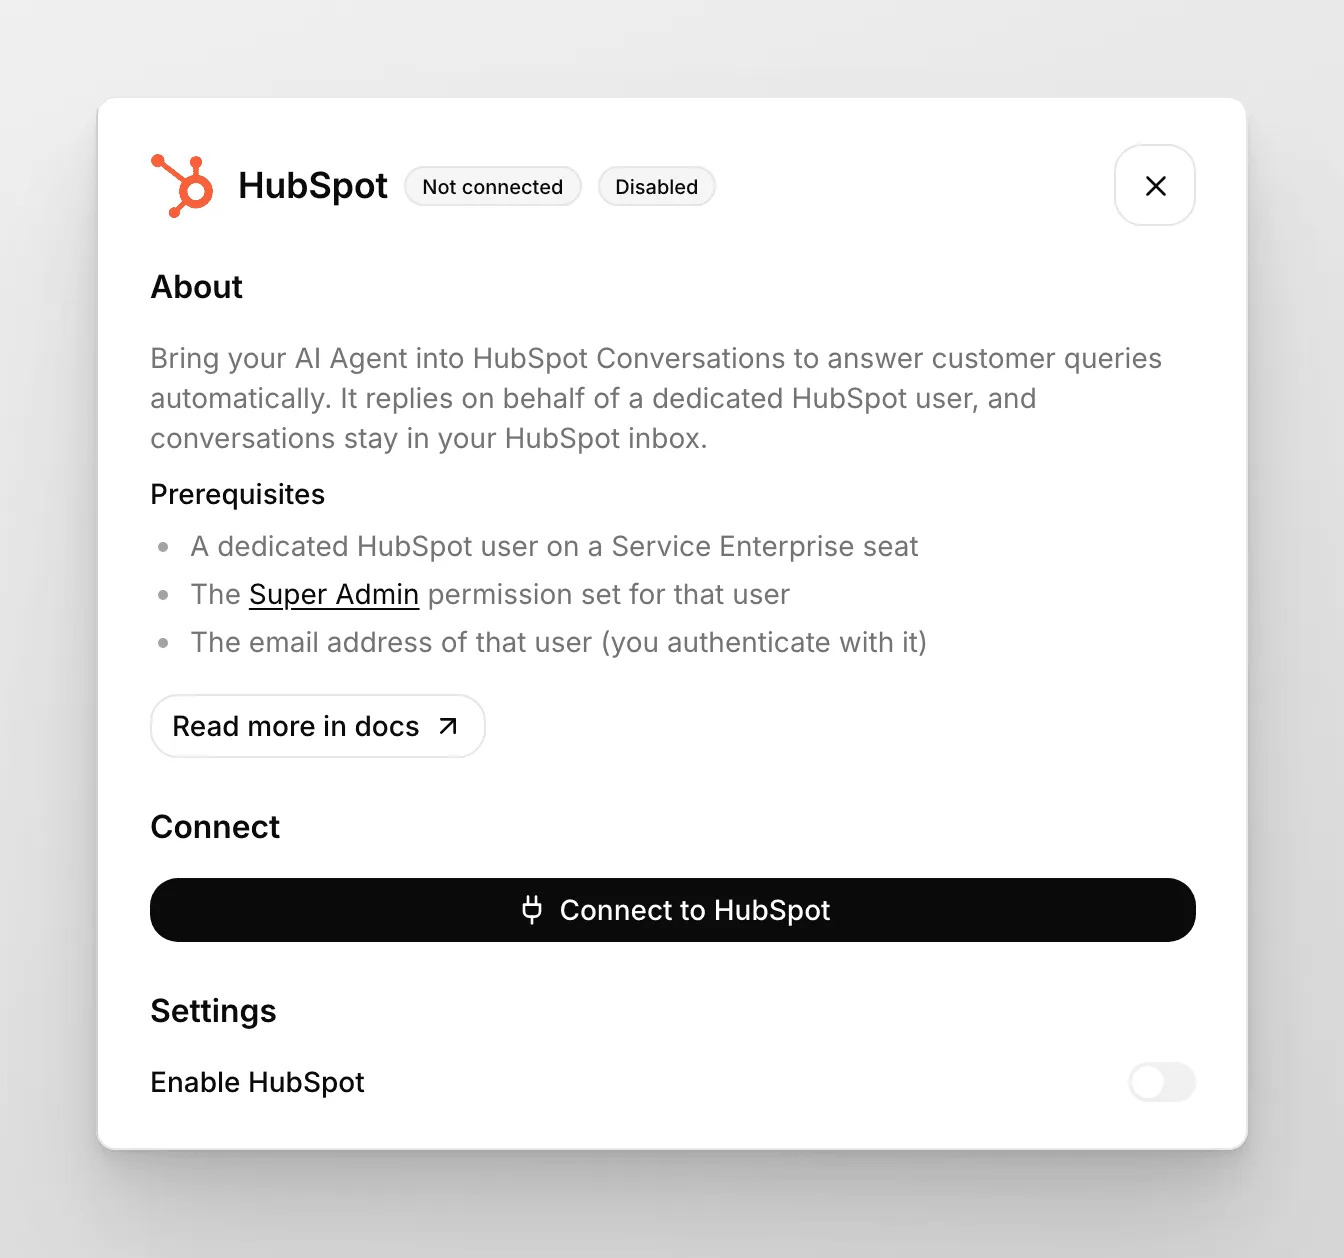
Option B: Connect from the Quickchat AI dashboard
Section titled “Option B: Connect from the Quickchat AI dashboard”- Navigate to the Quickchat AI dashboard and go to the External Apps tab.
- On the list of available platforms, click HubSpot.
- Provide the exact same email address you used to create the new HubSpot user. It will be responding to messages on behalf of that account.
- Click on Connect with HubSpot and follow the on-screen prompts by choosing the appropriate HubSpot workspace. Please keep in mind that you need to have HubSpot Super Admin permissions in order to authenticate your account.
Configure the HubSpot Chatflow
Section titled “Configure the HubSpot Chatflow”- Go to HubSpot. Create a new Chatflow on your HubSpot account. Go to the Service tab from the left sidebar and then click Chatflows.
- Create a new Chatflow or edit an existing one.
- Choose Website and then Live chat.
- Select an Inbox and Language. (remember to set the same language in Quickchat AI settings)
- Disable Knowledge base search. AI Agent’s Knowledge Base is handled in the Quickchat AI Platform.
- Select Automatically assign conversations, select Specific users and select your Quickchat AI user (associated with the email address you provided earlier).
- (Optional) Customize your Welcome message.
- (Optional) Disable Email capture.
- Click Preview and send a message. If the AI responds, everything’s set!
- Save your Chatflow.
The below video guide summarises these steps.
Your integration is now complete!
If you prefer not to use the HubSpot widget, use Quickchat! Go to Website > Install, and follow the instructions on the screen to add it to your website.
Human handoff and HubSpot tickets
Section titled “Human handoff and HubSpot tickets”When your AI Agent hands a HubSpot conversation off to a person, Quickchat AI creates a HubSpot ticket so your team can pick it up. Choose the pipeline in the Quickchat AI dashboard under External Apps → HubSpot → Settings. Both options appear once HubSpot is connected:
- During Agent’s working hours, create a Ticket on this pipeline: used when the AI Agent hands the conversation off to your team.
- Outside Agent’s working hours, create a Ticket on this pipeline: used when a handoff comes up outside the working hours set under Human Agents’ availability in Human Handoff. The AI Agent then tells the customer that nobody is available right now.
Both options start on HubSpot’s default Support Pipeline. Select - None - in an option to create no ticket in that case. If Human Agents’ availability is off, every handoff counts as during working hours.
Each handoff ticket is created in the first stage of the selected pipeline and associated with the HubSpot conversation. It is named [Quickchat AI] Conversation is awaiting response., or [Quickchat AI] Handoff detected outside working hours. when it was created outside working hours. Quickchat AI creates at most one ticket per conversation, so a later handoff in the same conversation does not add another.
If you use HubSpot Help Desk, HubSpot already opens a ticket for every conversation, so the handoff ticket is a second one. Select - None - in both options if you only want HubSpot’s own ticket.
If AI summary is turned on in Human Handoff, your team also gets the AI Agent’s summary of the conversation in HubSpot: as an internal comment on the conversation in a Conversations Inbox, or as a note on the conversation’s ticket in Help Desk.
No tickets after a handoff
Section titled “No tickets after a handoff”If conversations are handed off but no tickets appear in HubSpot:
- In External Apps → HubSpot → Settings, check that both options above are set to a pipeline, not - None -.
- If the pipeline lists only offer - None - or cannot be opened, Quickchat AI cannot read your HubSpot pipelines. Click Reconnect and sign in to HubSpot again.
- If the conversation was handed off before, look for the ticket from that first handoff. Each conversation gets one ticket at most.
- If tickets are still missing, contact us and include the IDs of the affected conversations.