Slack
最終更新日:
このガイドでは、Slack に AI アシスタントを統合します。内容:
- Slack アプリを作成
- Slack アプリを設定(マニフェスト)
- Quickchat AI と連携
Slack アプリ作成
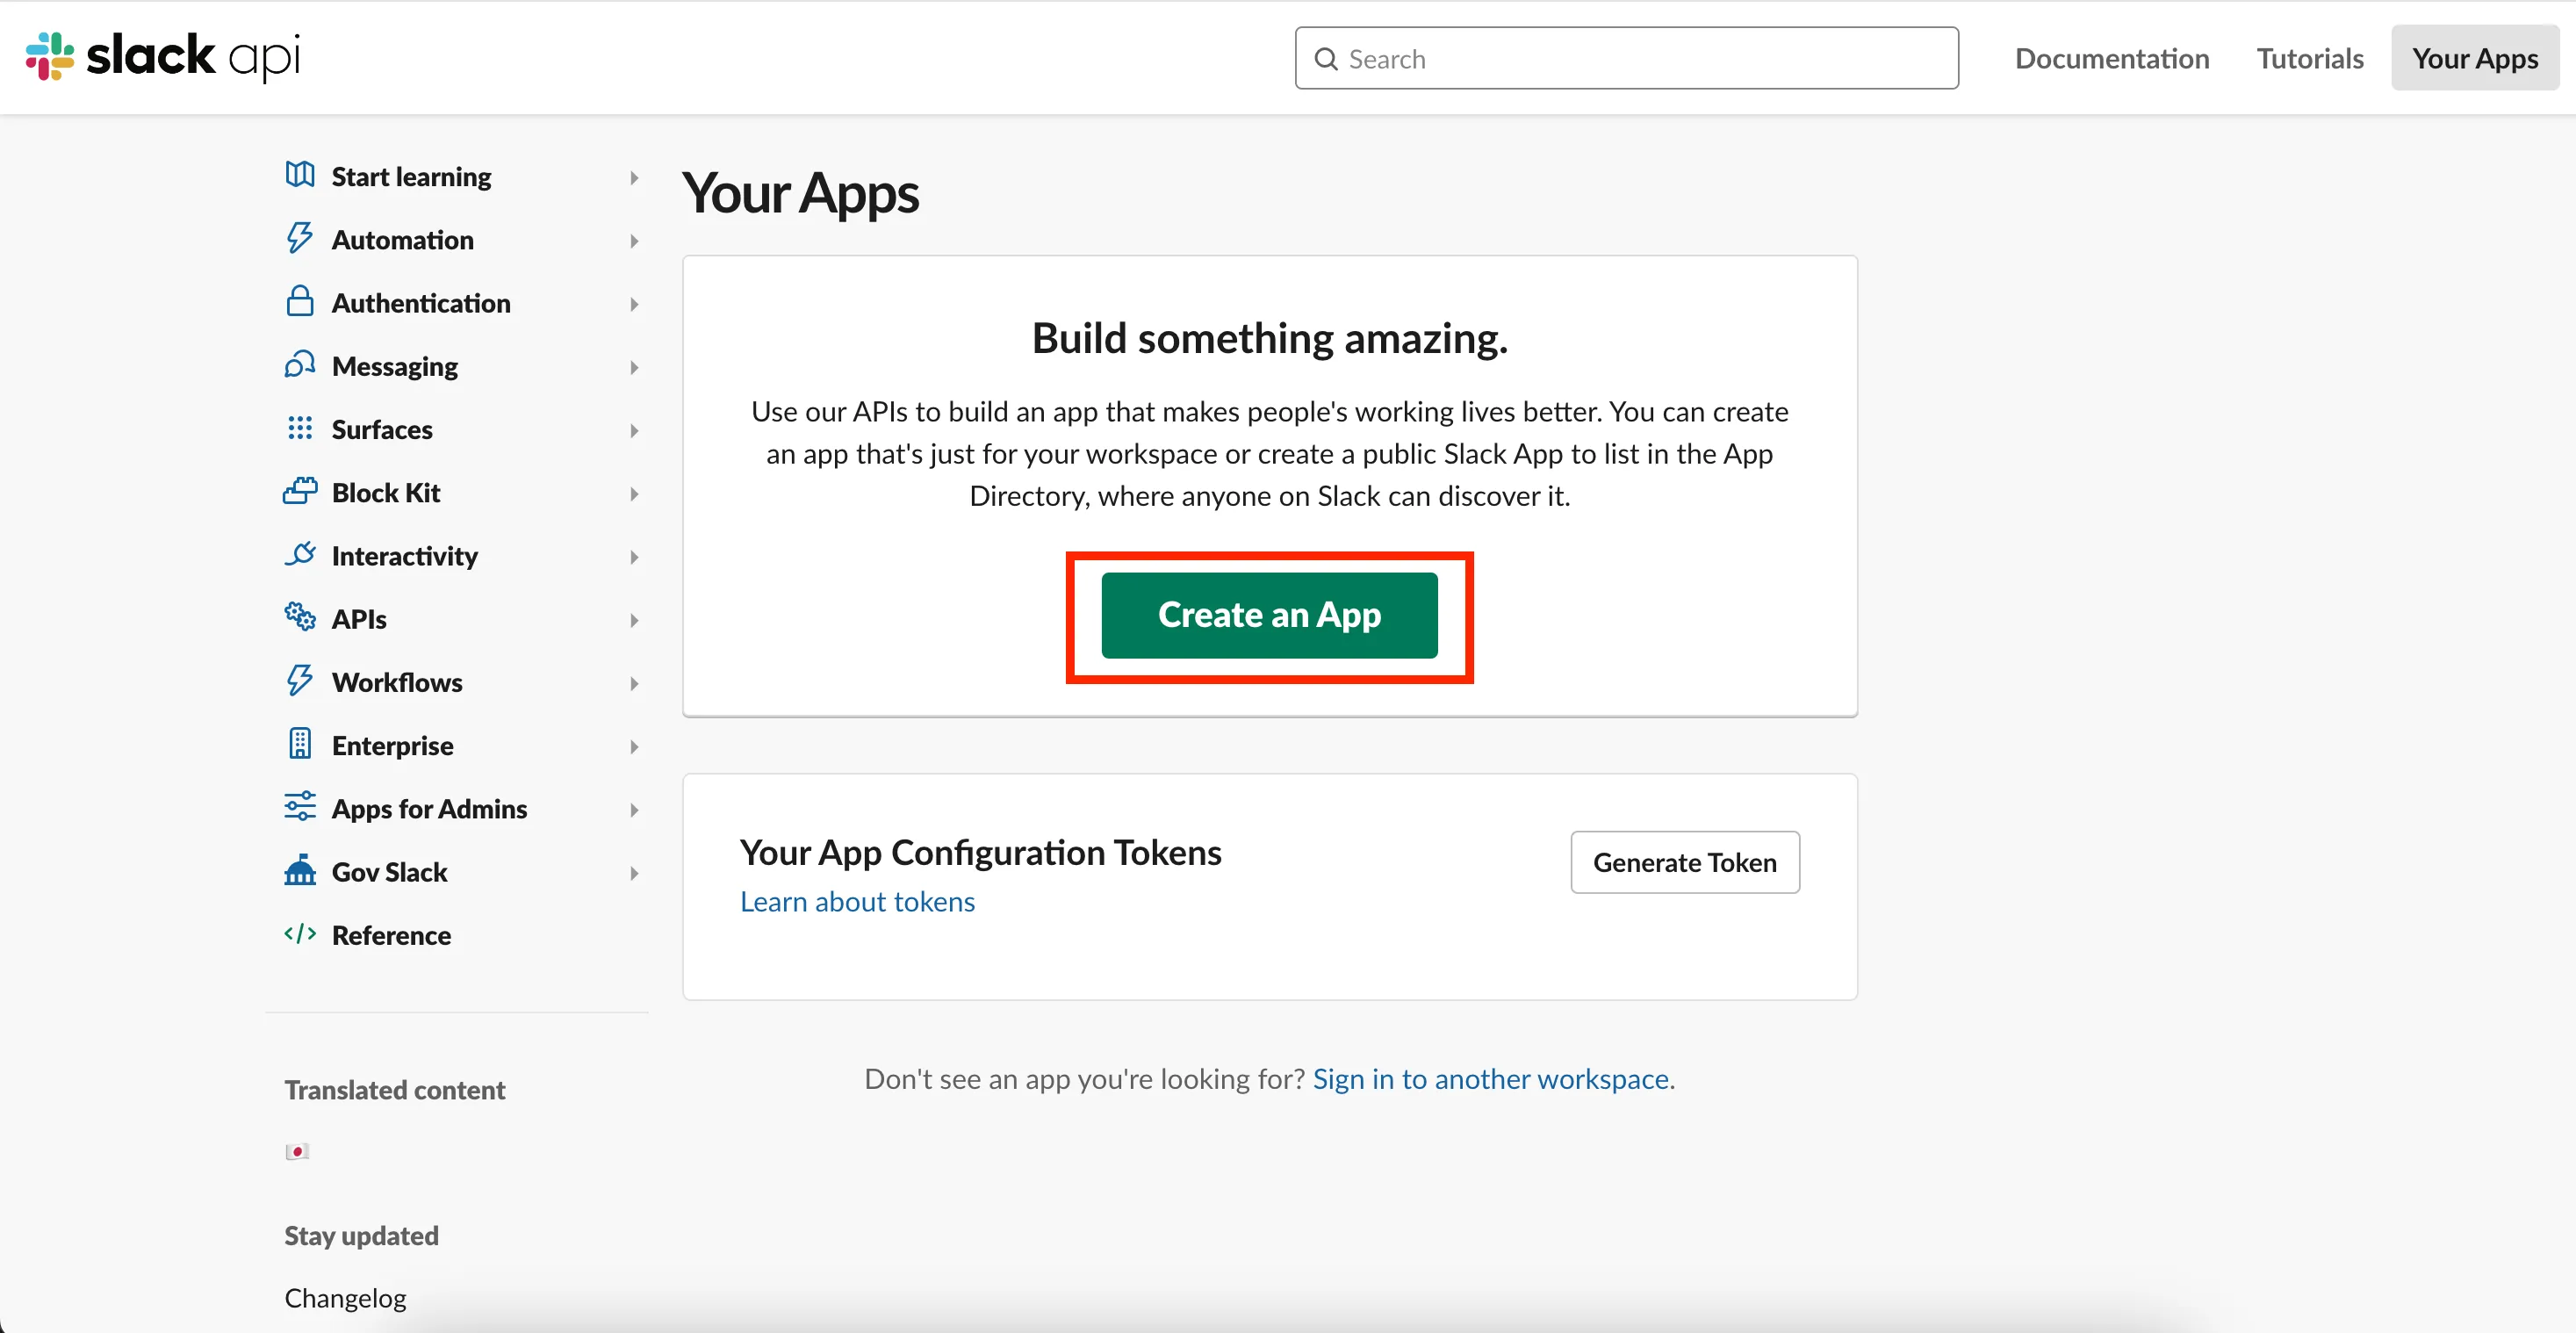
Section titled “Slack アプリ作成”api.slack.com/apps → create a new app。
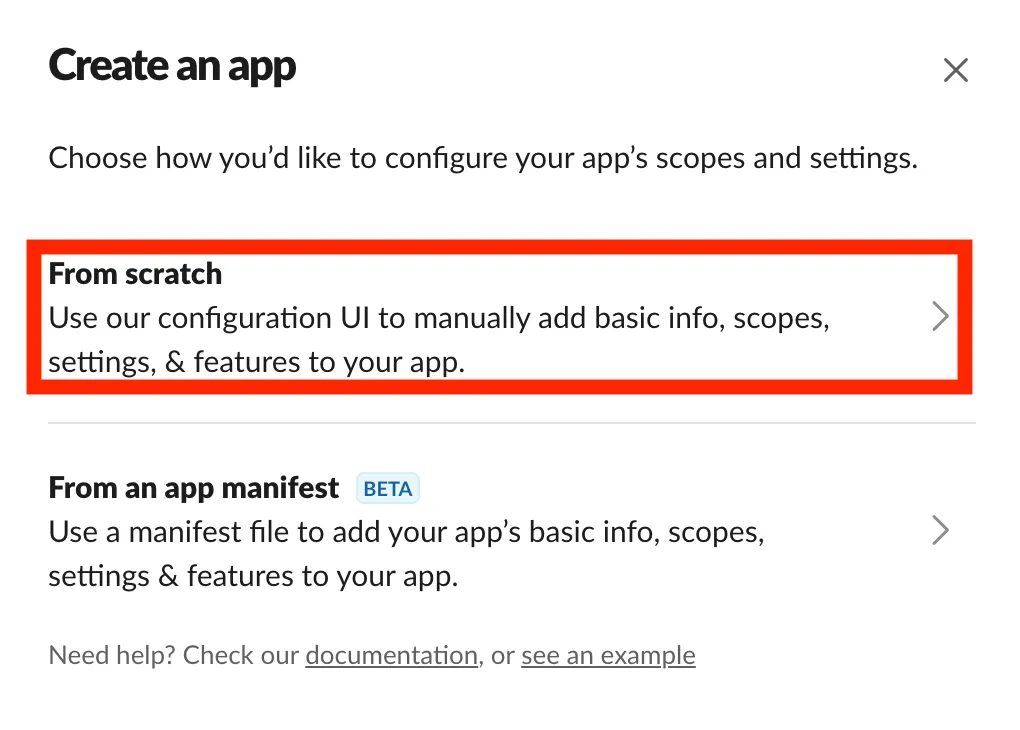
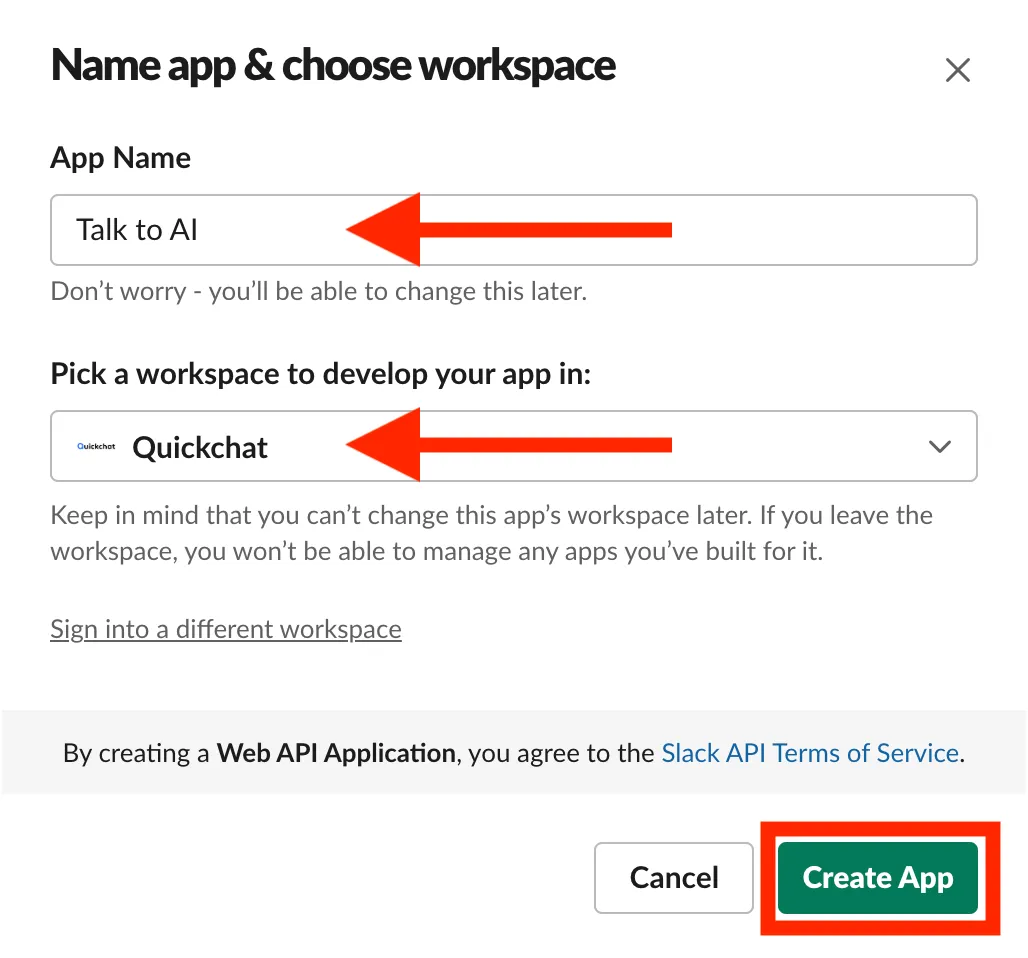
Create an app from scratch を選び、名前とワークスペースを設定 → Create App。
マニフェスト設定
Section titled “マニフェスト設定”App Settings → Features → App Manifest。
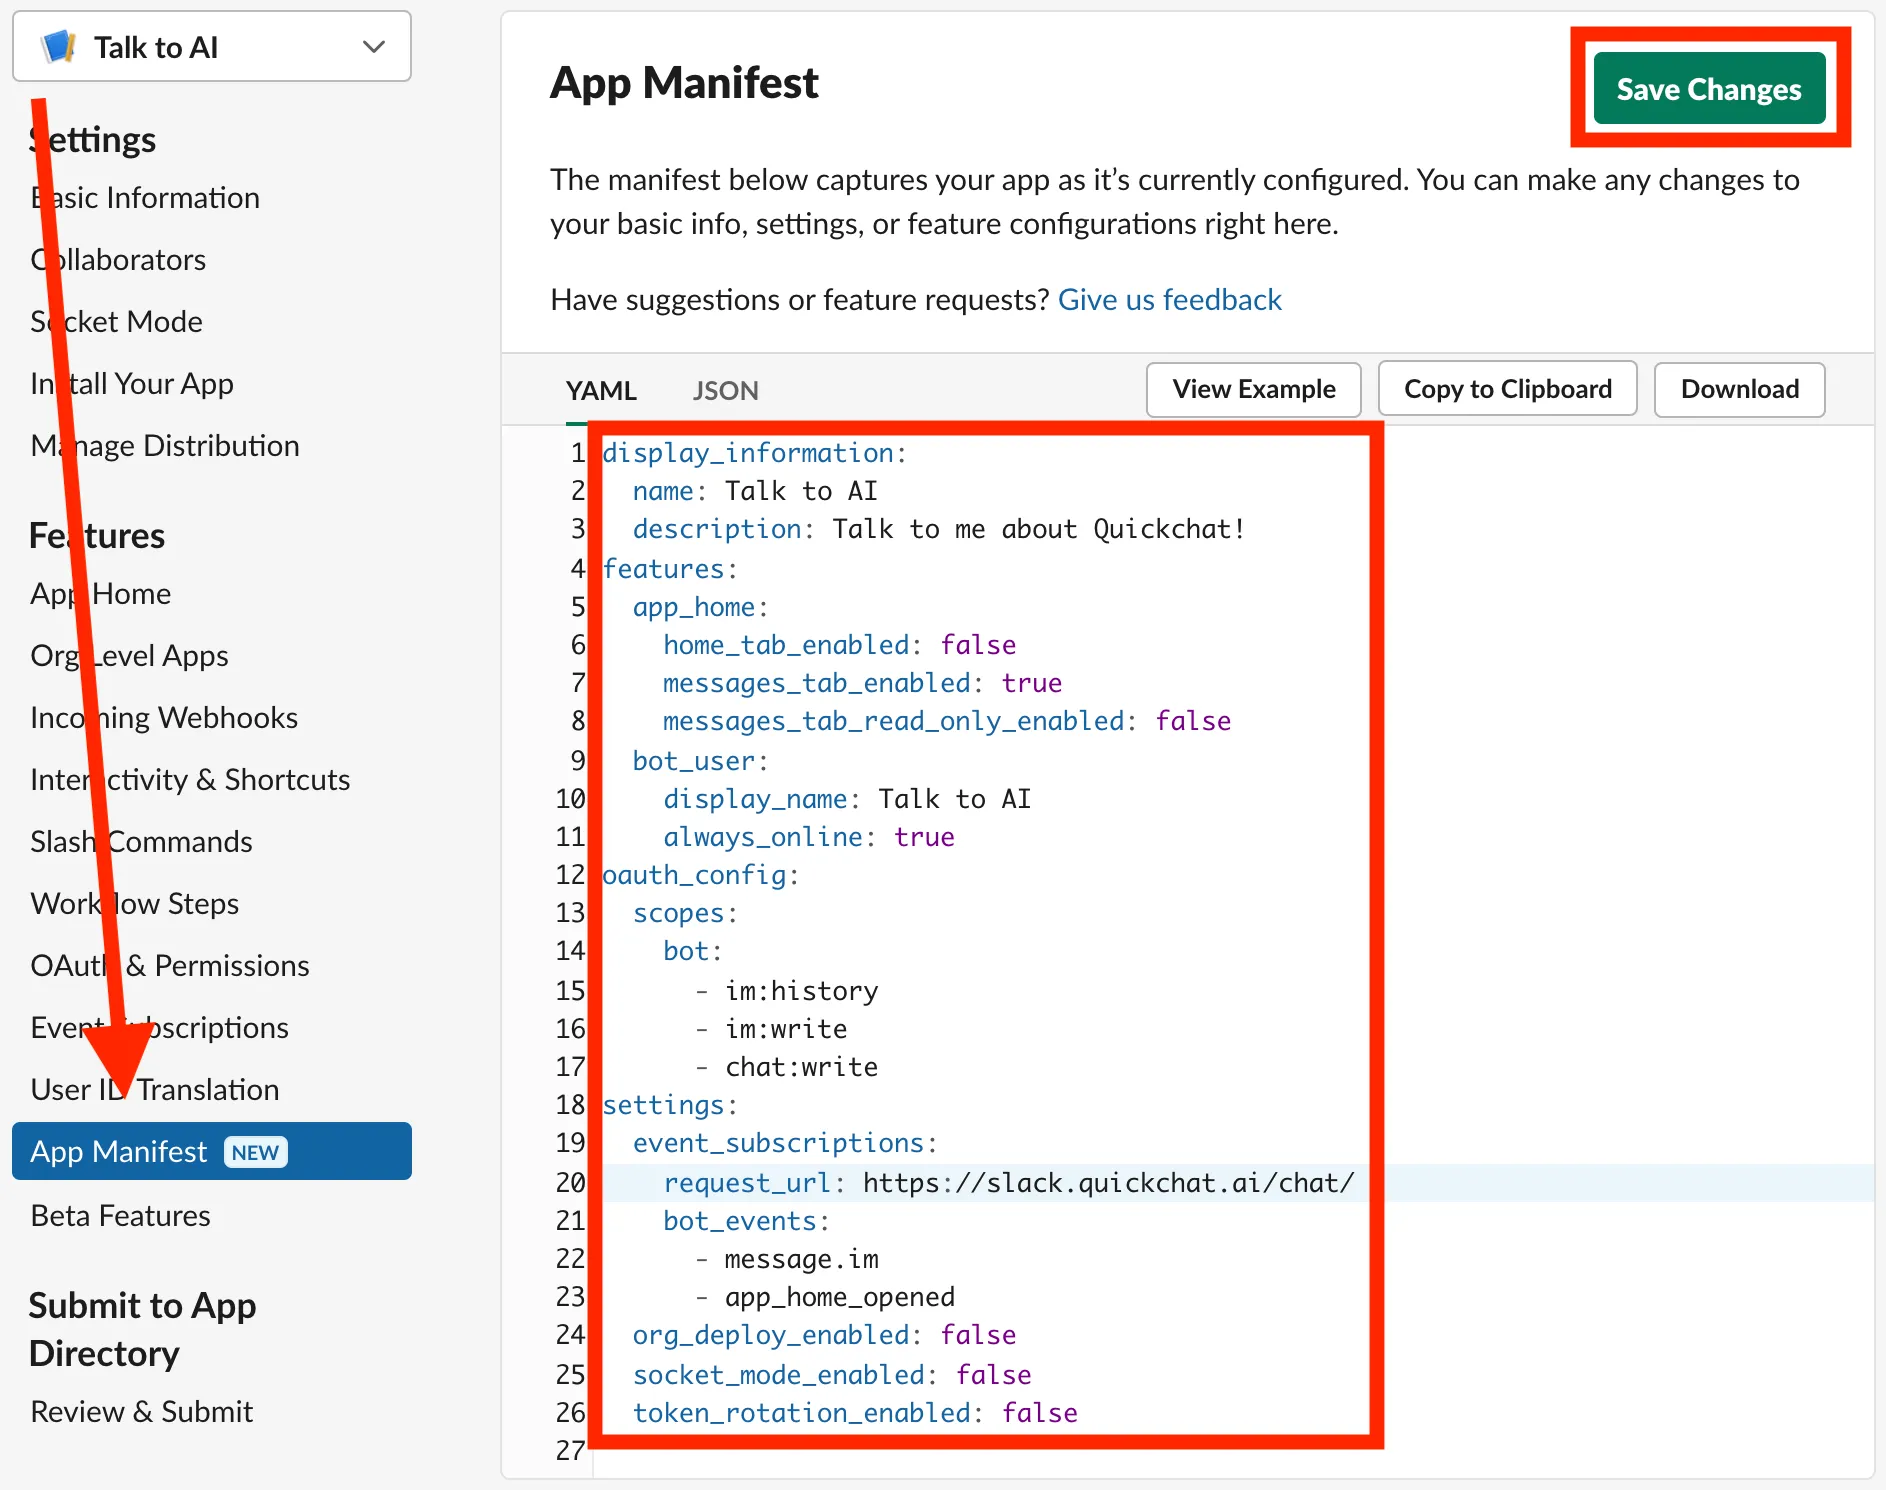
以下の YAML を貼り付け、必要に応じて調整:
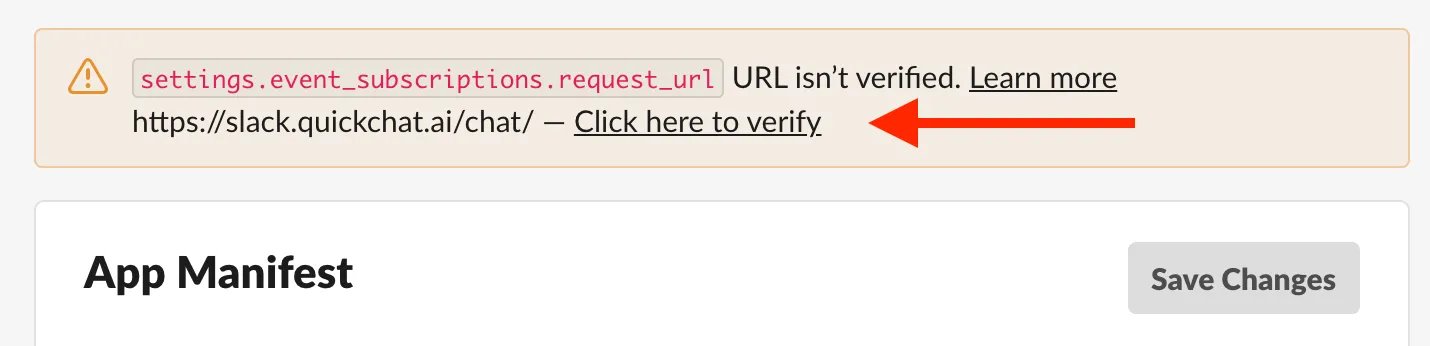
display_information: name: Talk to AI description: Talk to me about Quickchat!features: app_home: home_tab_enabled: false messages_tab_enabled: true messages_tab_read_only_enabled: false bot_user: display_name: Talk to AI always_online: trueoauth_config: scopes: bot: - im:history - im:write - chat:writesettings: event_subscriptions: request_url: https://slack.quickchat.ai/chat/ bot_events: - message.im - app_home_opened org_deploy_enabled: false socket_mode_enabled: false token_rotation_enabled: falsedisplay_information: name: Talk to AI description: Talk to me about Quickchat!features: app_home: home_tab_enabled: false messages_tab_enabled: true messages_tab_read_only_enabled: false bot_user: display_name: Talk to AI always_online: trueoauth_config: scopes: bot: - im:history - im:write - chat:write - app_mentions:read - channels:history - groups:historysettings: event_subscriptions: request_url: https://slack.quickchat.ai/chat/ bot_events: - message.im - app_home_opened - app_mention - message.groups - message.channels org_deploy_enabled: false socket_mode_enabled: false token_rotation_enabled: false保存時に URL 検証が求められる場合があります:
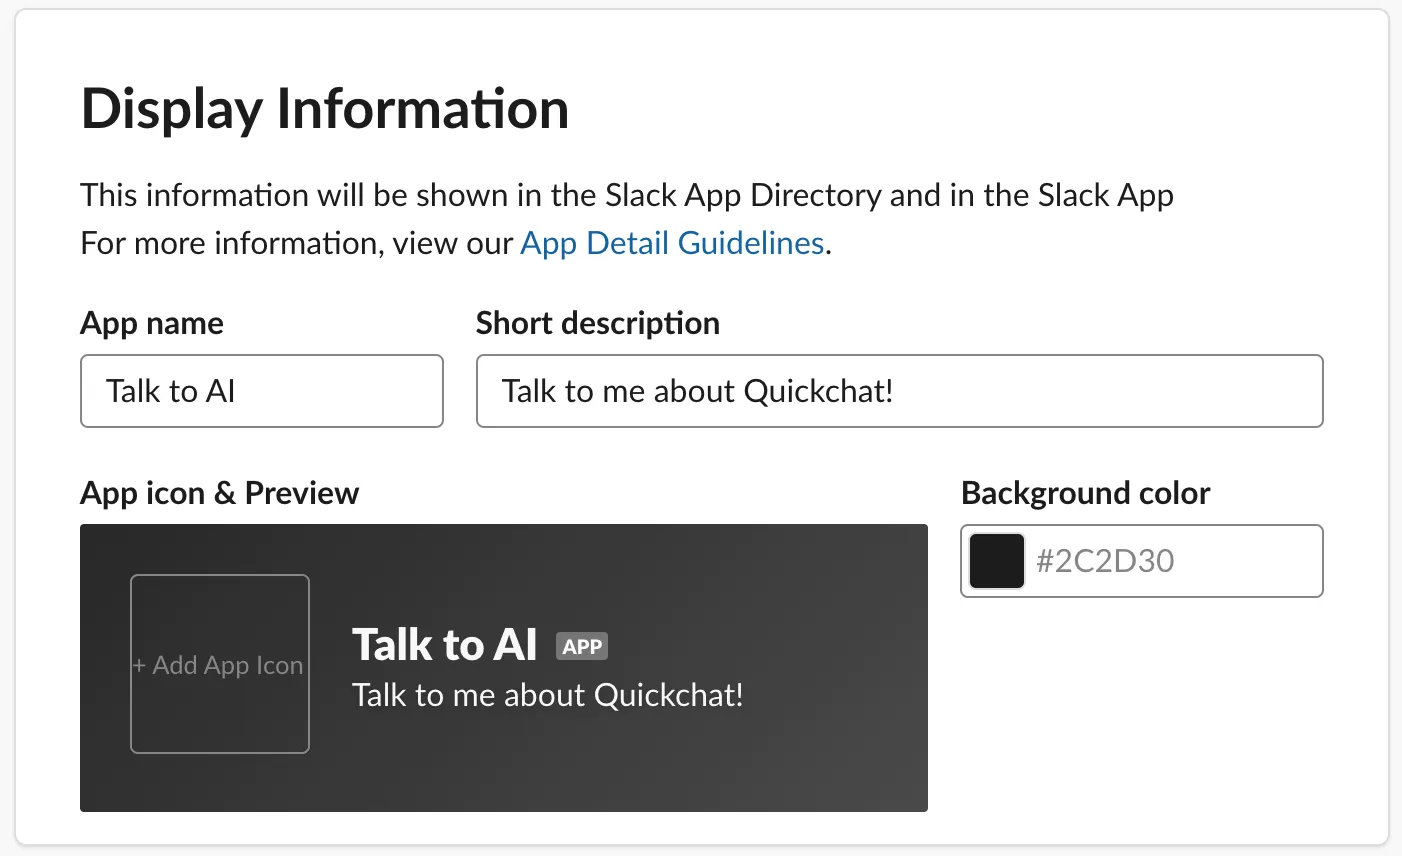
外観の微調整は Settings → Basic information → Display Information:
Quickchat AI と連携
Section titled “Quickchat AI と連携”以下を取得:
- App ID(Settings → Basic Information)
- Signing Secret(同上)
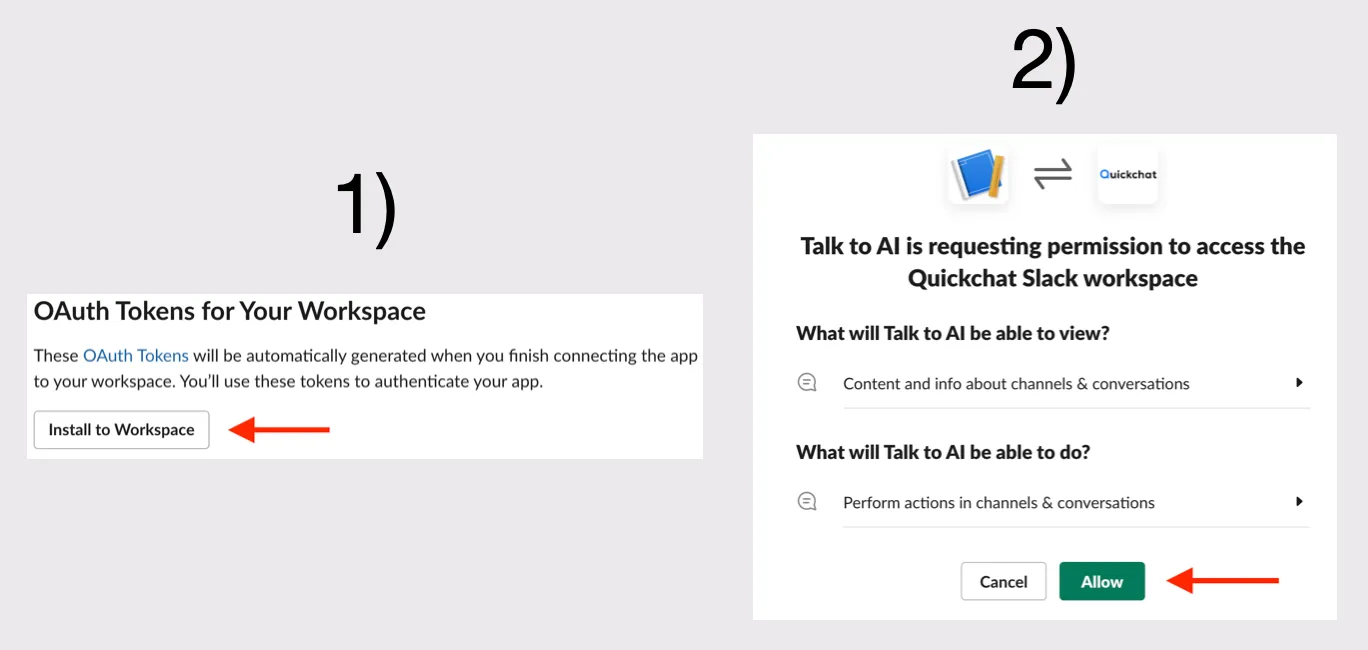
- Bot User OAuth Token(Features → OAuth & Permissions。ワークスペースにインストール後に表示)
Quickchat ダッシュボード → Integrations → Slack にて、App ID / Signing Secret / OAuth Token を入力します。
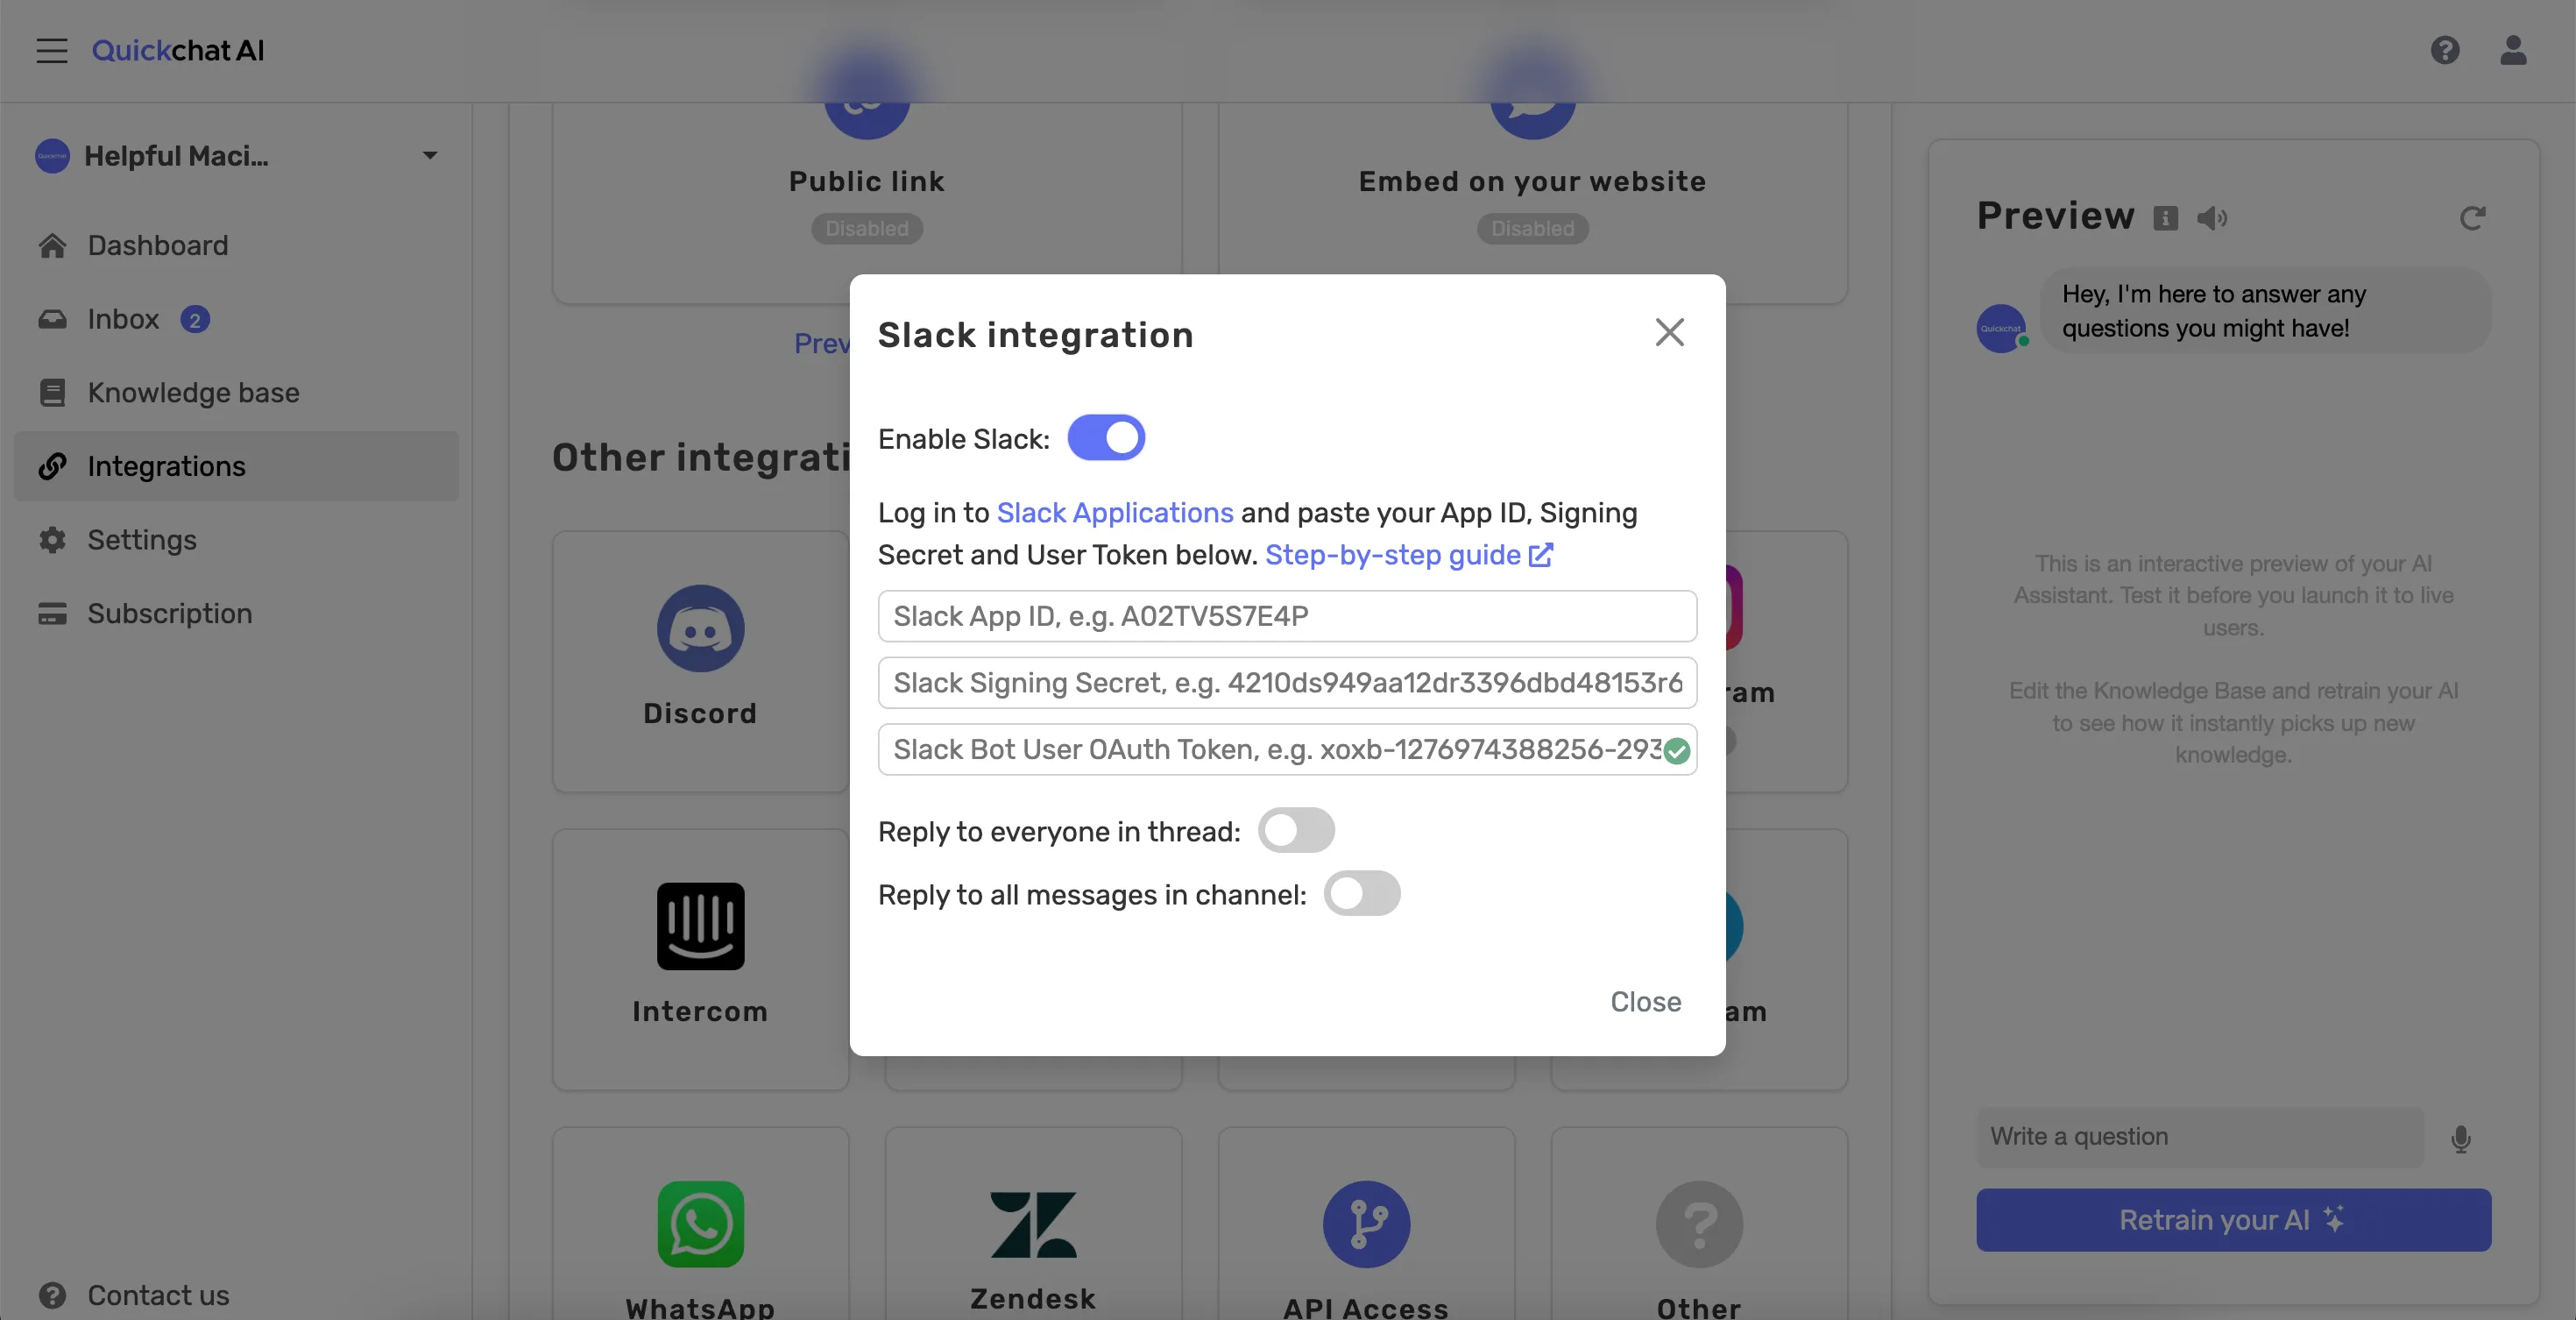
以上で Slack 連携は完了です。🎉