

Set up AI Agent actions — Human Handoff, Smart Data Gathering for lead generation, and Custom API Actions to connect external tools.
Define what your Al Agent can do during conversation. From answering questions using real-time API data, collecting leads and market research data, to performing custom tasks.
Human Handoff
Section titled “Human Handoff”The Human Handoff feature ensures that conversations requiring human attention are seamlessly transferred to a Human Agent.
It is particularly useful for handling questions beyond the AI Agent’s Knowledge Base or when users explicitly request to speak to a person. During Human Handoff, the AI Agent pauses, and the Human Agent takes over the conversation via the Inbox.
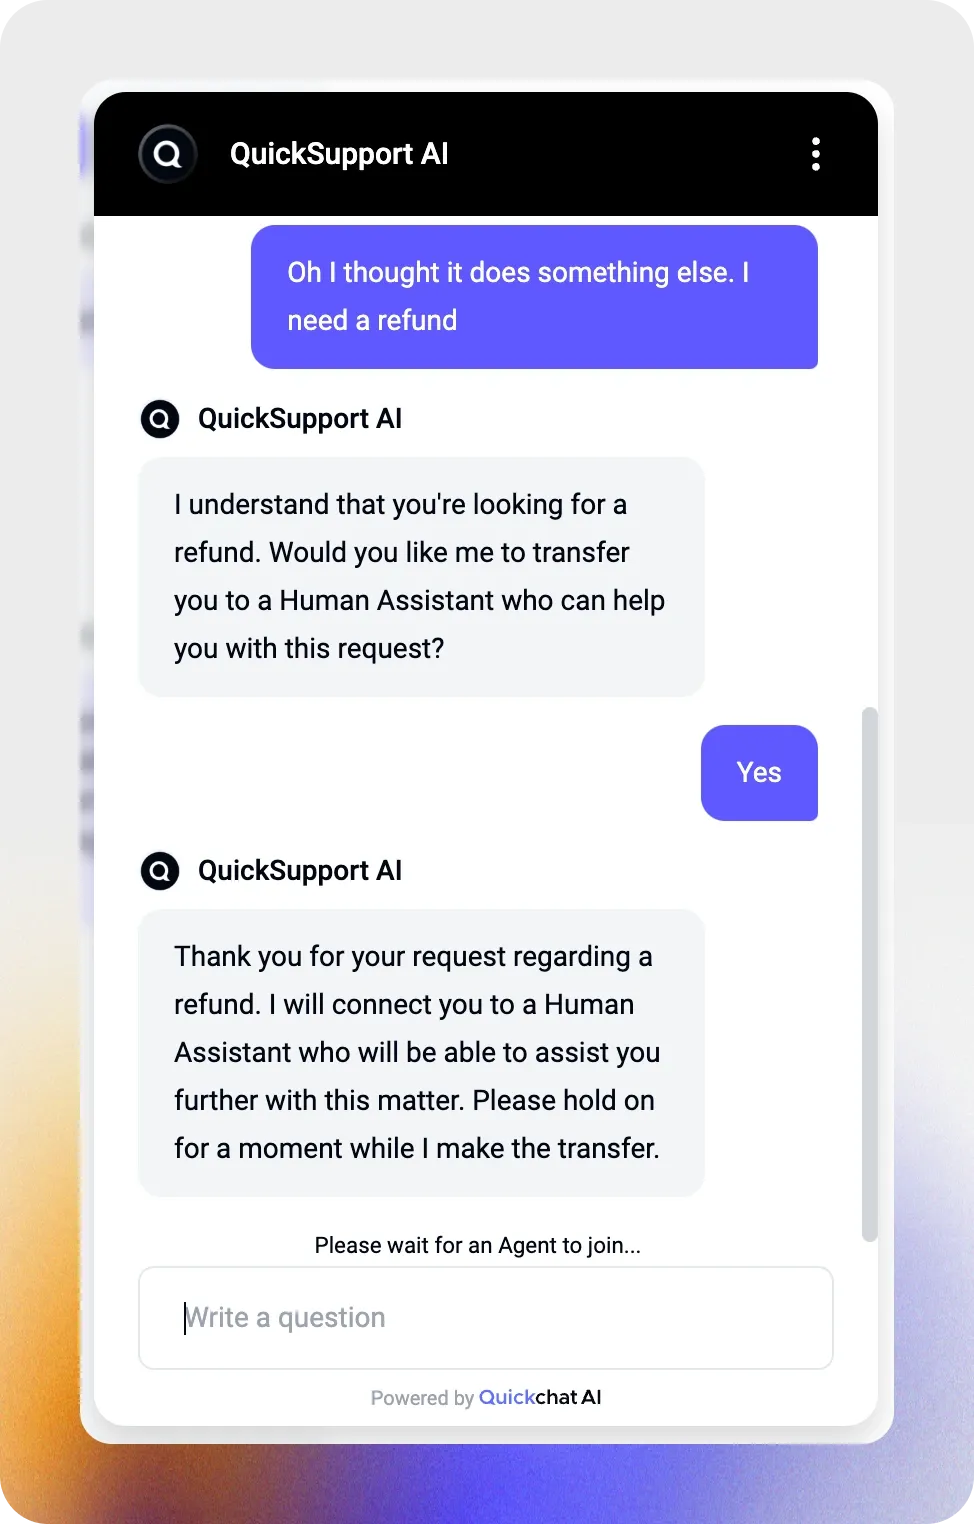
Here’s what happens on the user’s side:
- The user interacts with the AI Agent.
- If the request is beyond the AI’s capability or the user explicitly requests a human, the AI notifies the user about the transfer.
- The conversation is unassigned from the AI and assigned to a Human Agent.
- The Human Agent resolves the query or reassigns the AI Agent to continue.
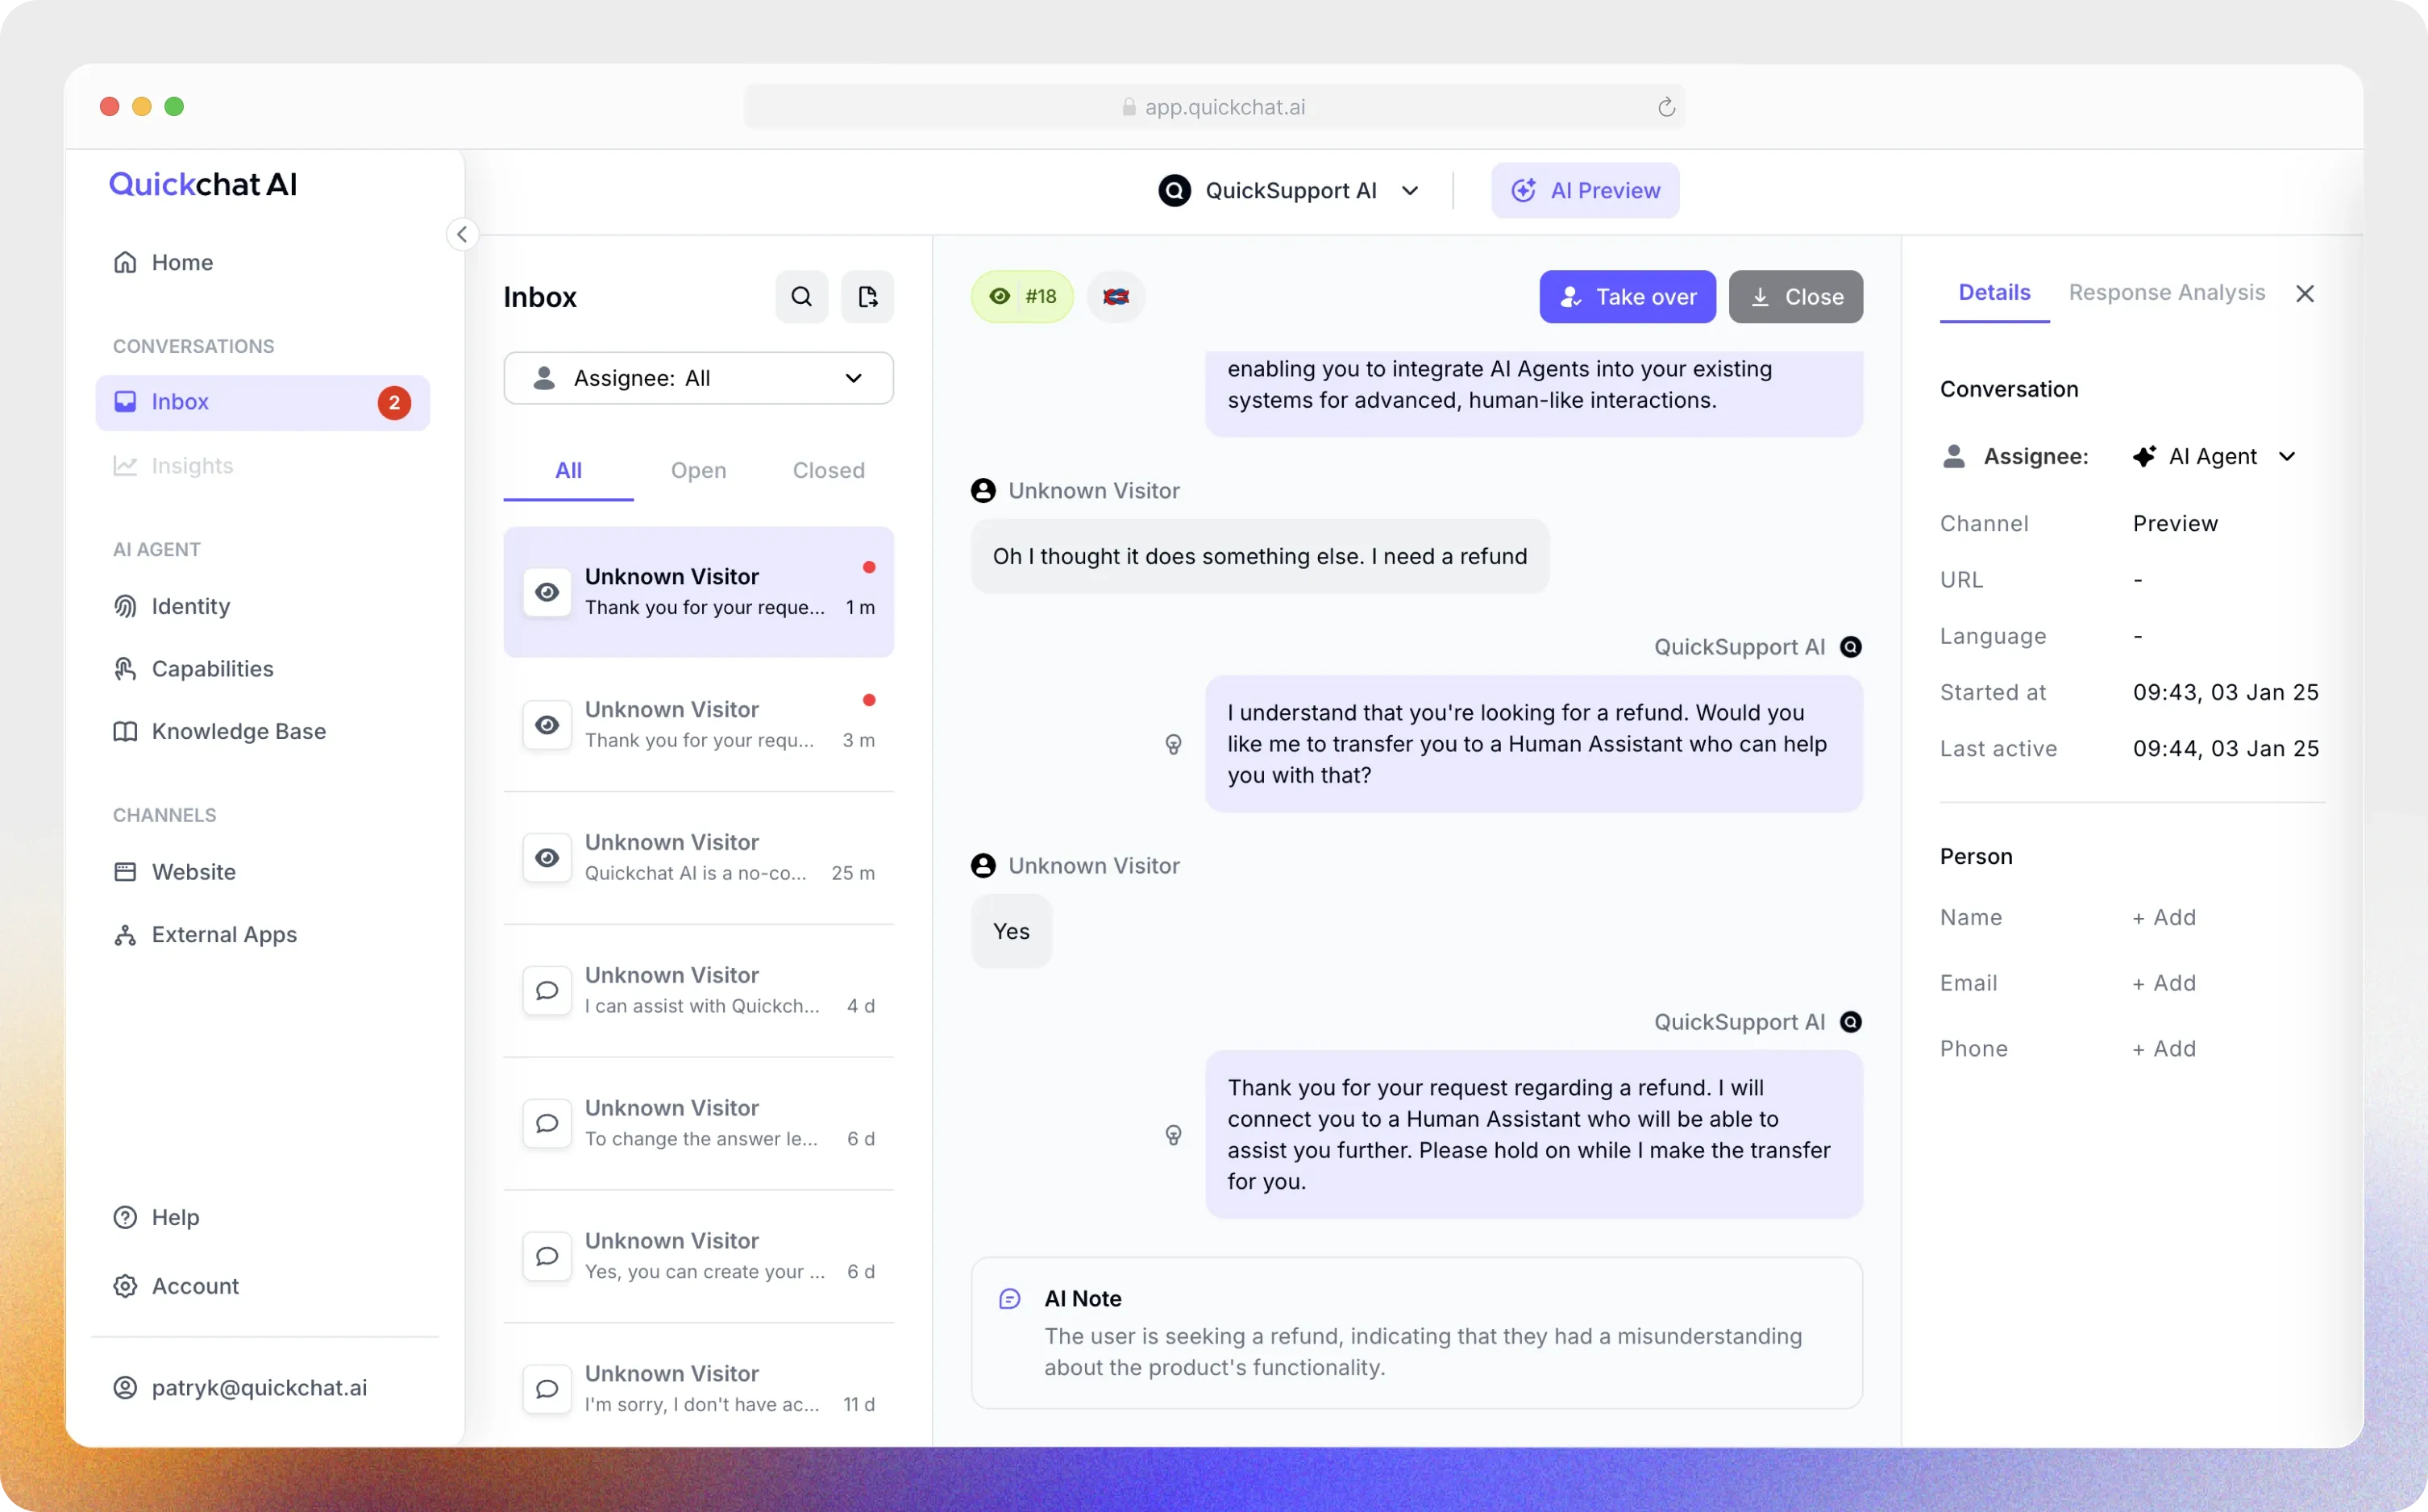
And here’s what you’ll see inside the Quickchat AI interface:
- The unassigned conversation appears in the Inbox.
- Your team member reviews the AI Summary to understand the conversation so far.
- The team member takes over the conversation and handles the user’s request.
- The team member either marks the conversation as resolved or reassigns.
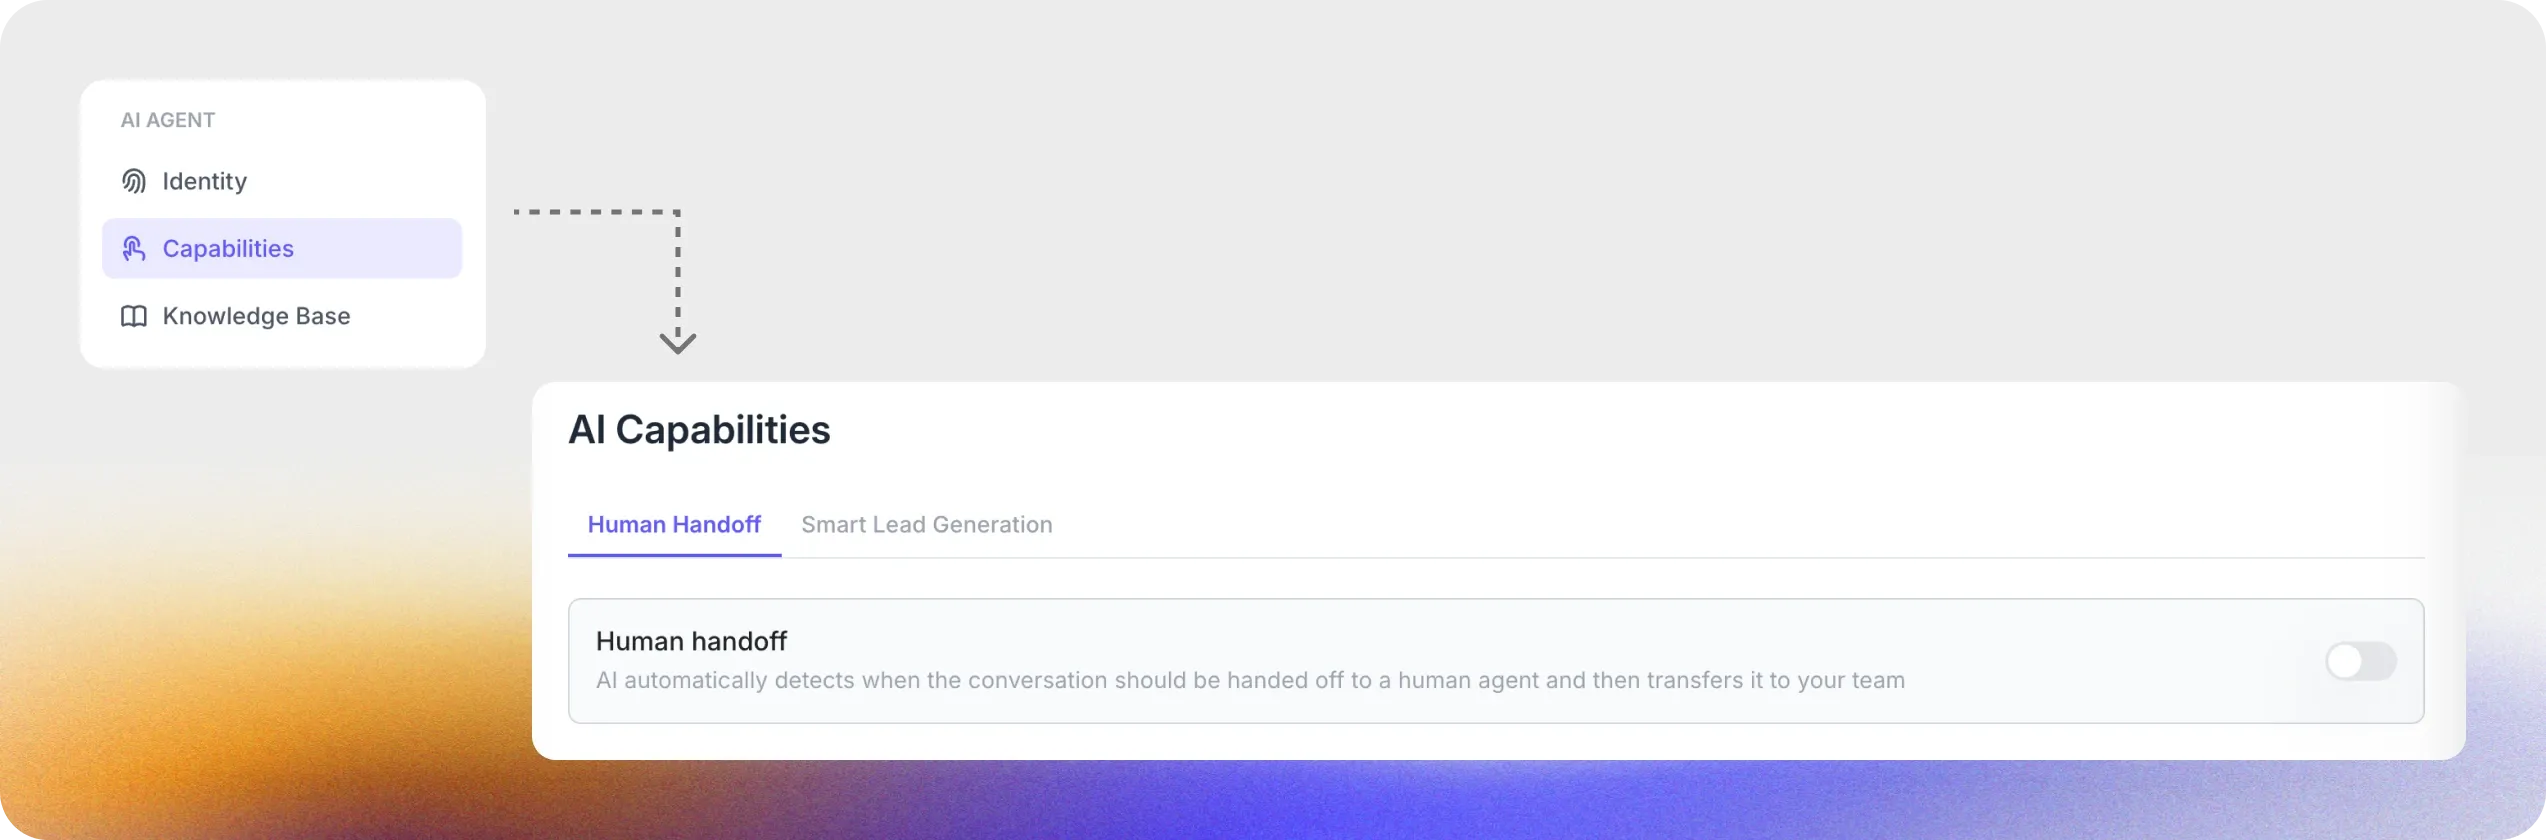
Enable Human Handoff
Section titled “Enable Human Handoff”Navigate to Actions & MCPs in the left sidebar, find the Human Handoff card under Quickchat AI Actions, and toggle the switch to “on.” Click Edit Action to configure the details.
You can then configure the following options:
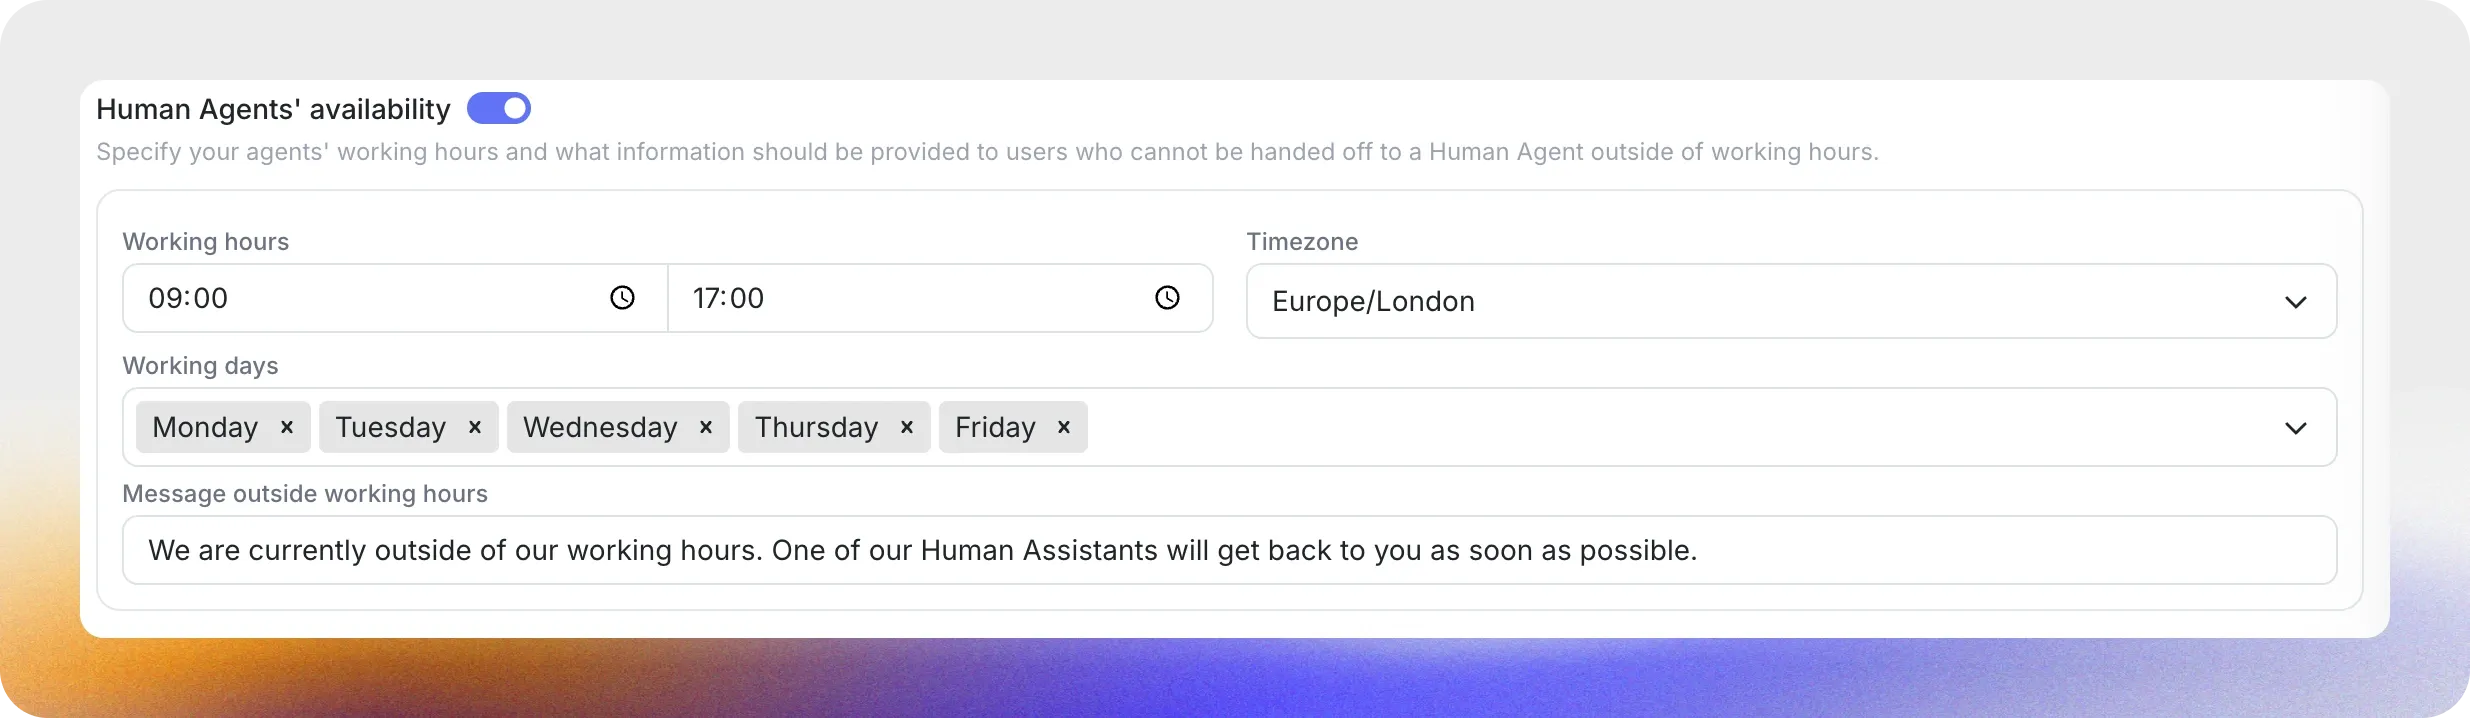
Human Agent’s Availability
Define the availability of Human Agents to ensure that Handoff requests are only initiated during working hours.
- Specify Working Hours: Set start and end times and select working days.
- Select Time Zone: Ensure the schedule matches your region.
- Configure an Out-of-Hours Message: Let users know when no Human Agents are available.
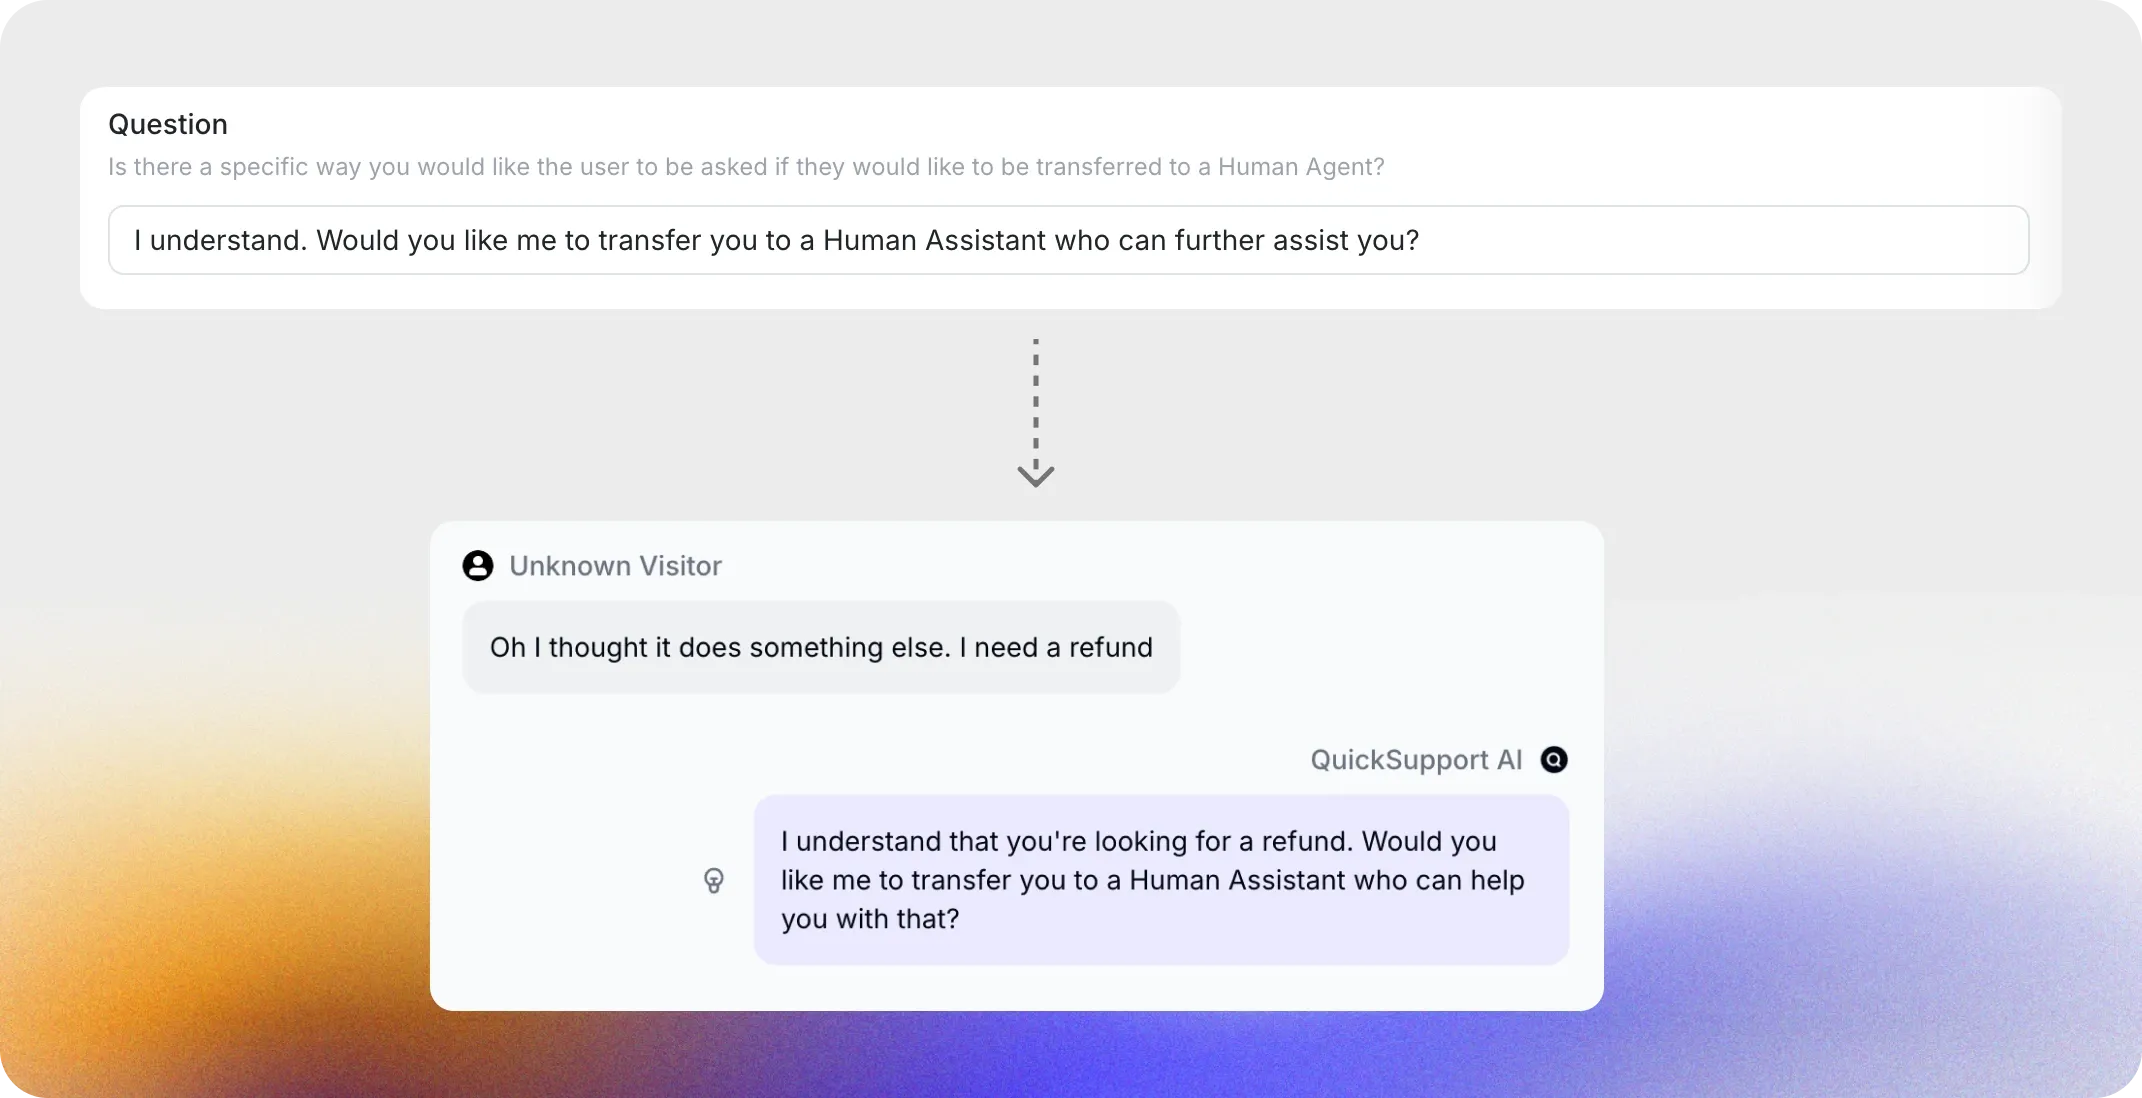
Question
Section titled “Question”Define the question the AI will ask before initiating Handoff.
*Example: Would you like me to connect you with our Customer Support team?*
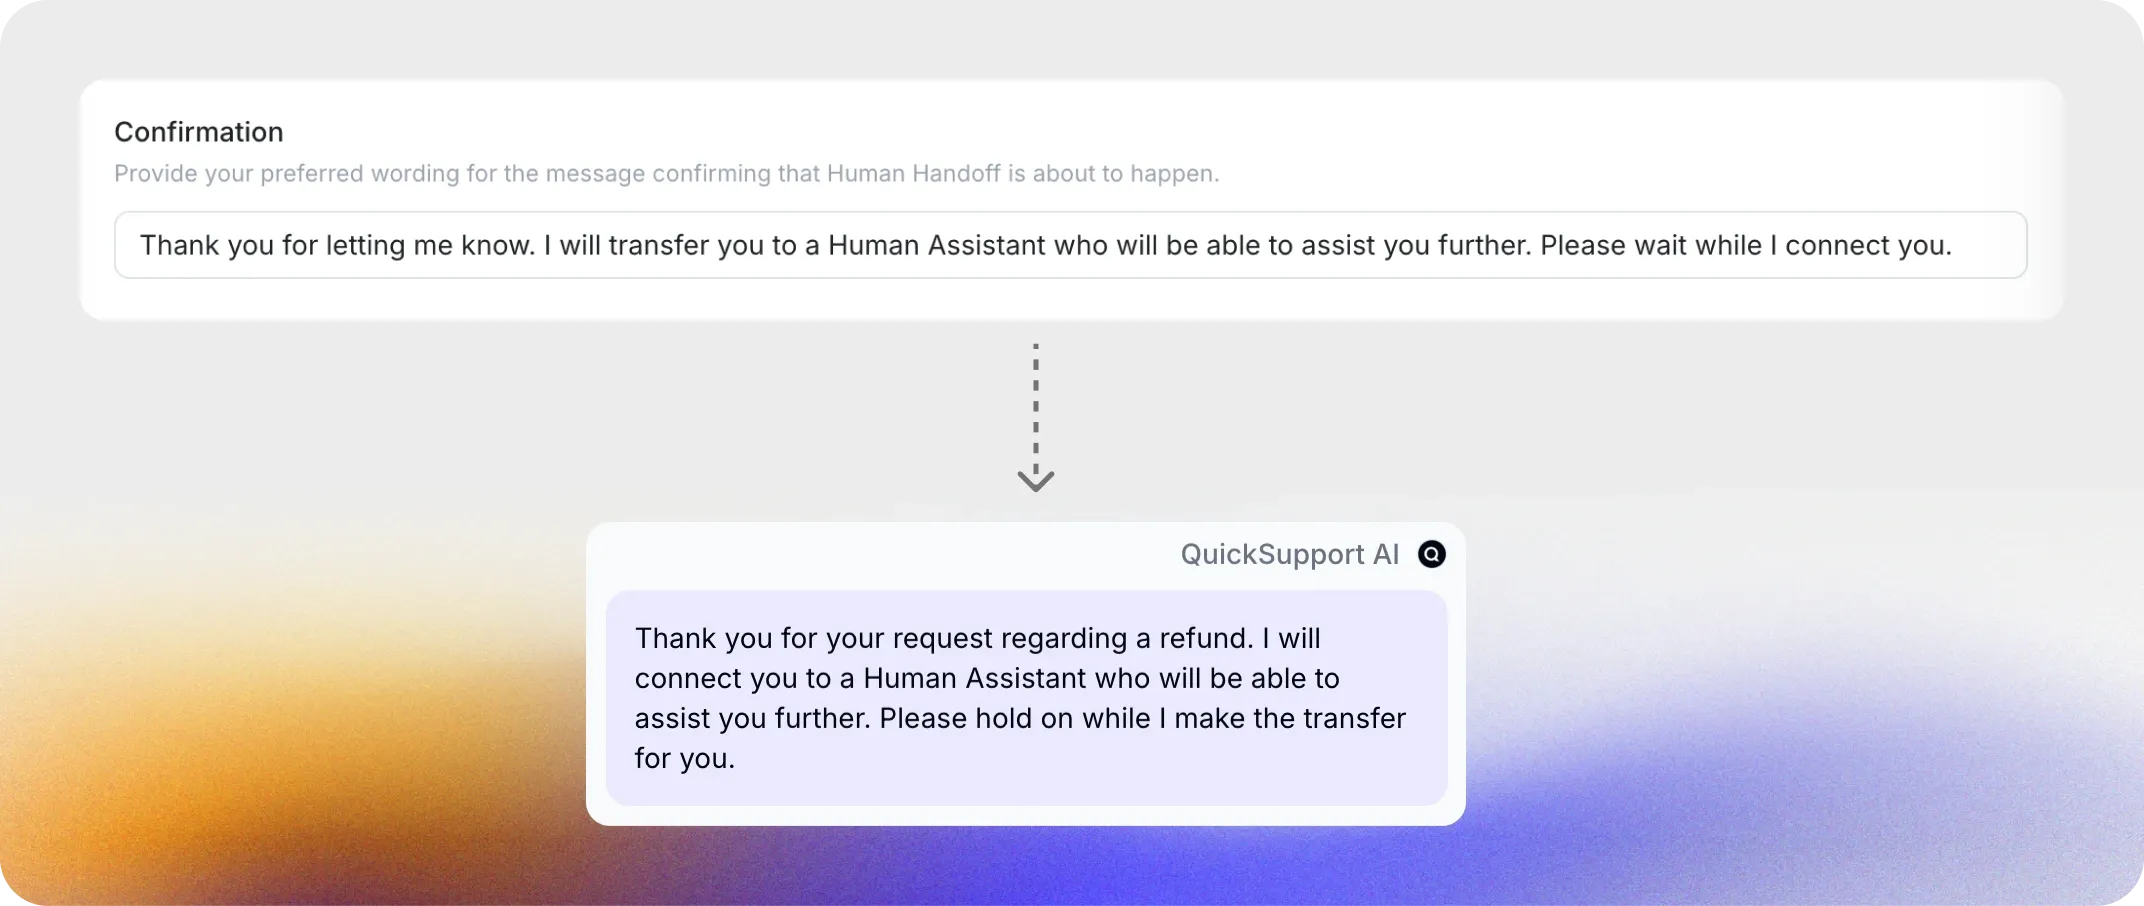
Confirmation
Section titled “Confirmation”Specify the confirmation message sent when the Handoff is initiated.
*Example: I understand. I will transfer you to our Customer Support team. Please wait while I connect you.*
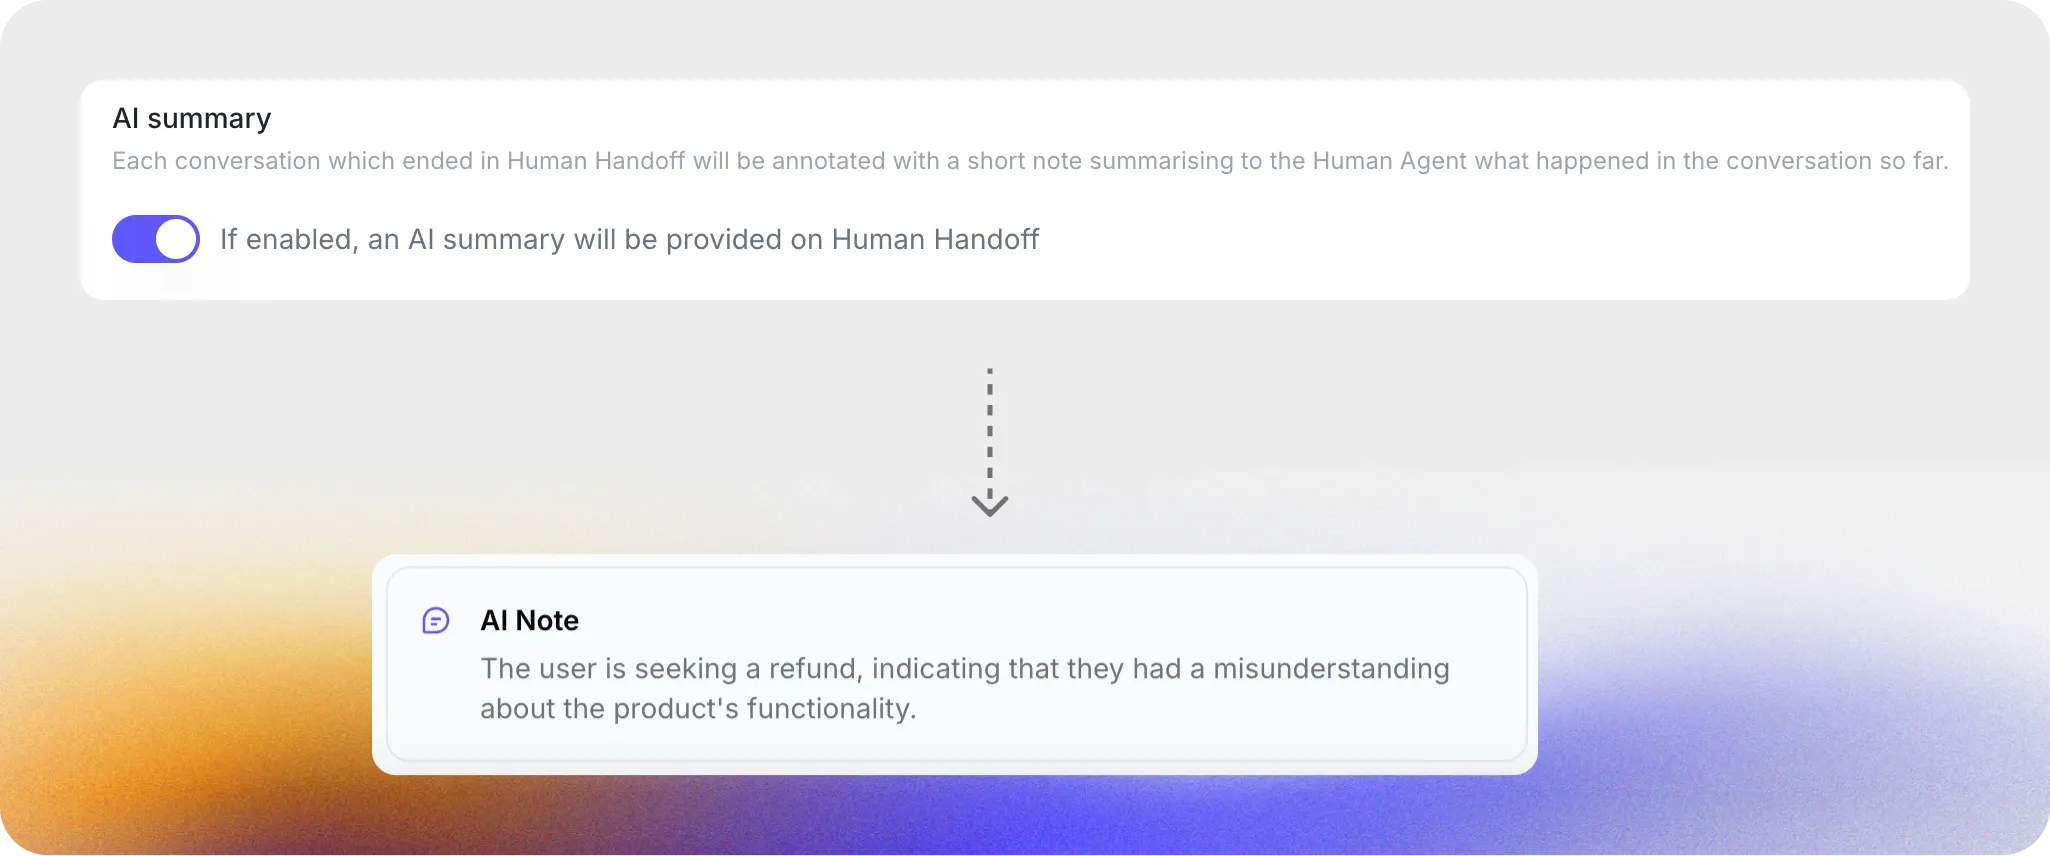
AI Summary
Section titled “AI Summary”Enable AI Summaries to automatically generate a short note summarizing the conversation so far. This summary provides the Human Agent with all the context needed to quickly address the user’s request.
Handoff Rules
Section titled “Handoff Rules”Describe the situations in which Human Handoff should be triggered. Each rule has a Name, a plain-language Description, and a State toggle so you can enable or disable rules without deleting them.
Quickchat AI ships with a default set of rules covering the most common handoff triggers:
- Media Message — the user sent an image, file, or other media the AI can’t process.
- User Frustration — the user is explicitly angry, frustrated, or dissatisfied.
- Customer Support Suggestion — the AI Agent has told the user to contact customer support as the next step, or has clearly ended AI-based assistance.
- Lack Of Knowledge — the AI Agent has acknowledged it doesn’t have the necessary information.
- Irrelevant Advice — the AI Agent has repeatedly tried to help but the user is still not satisfied.
You can toggle any of these on or off, and add your own rules with a custom Name and Description that tells the AI when to trigger.
In addition to rules, you can list Keywords that will always force a Human Handoff regardless of context — useful for compliance words like “lawsuit”, “GDPR”, or “chargeback” that you never want the AI to handle.
Topic routing
Section titled “Topic routing”When Human Handoff fires, Topic routing sends the conversation to the human agent best suited to handle that topic instead of leaving it unassigned in a shared queue.
Configure routing by mapping each topic (defined under Insights → Manage Topics) to one or more team members. When a handoff is triggered, Quickchat reads the conversation’s detected topic and routes the conversation to one of the agents assigned to that topic. If no rule matches, the conversation is left unassigned for any teammate to pick up from the Inbox.
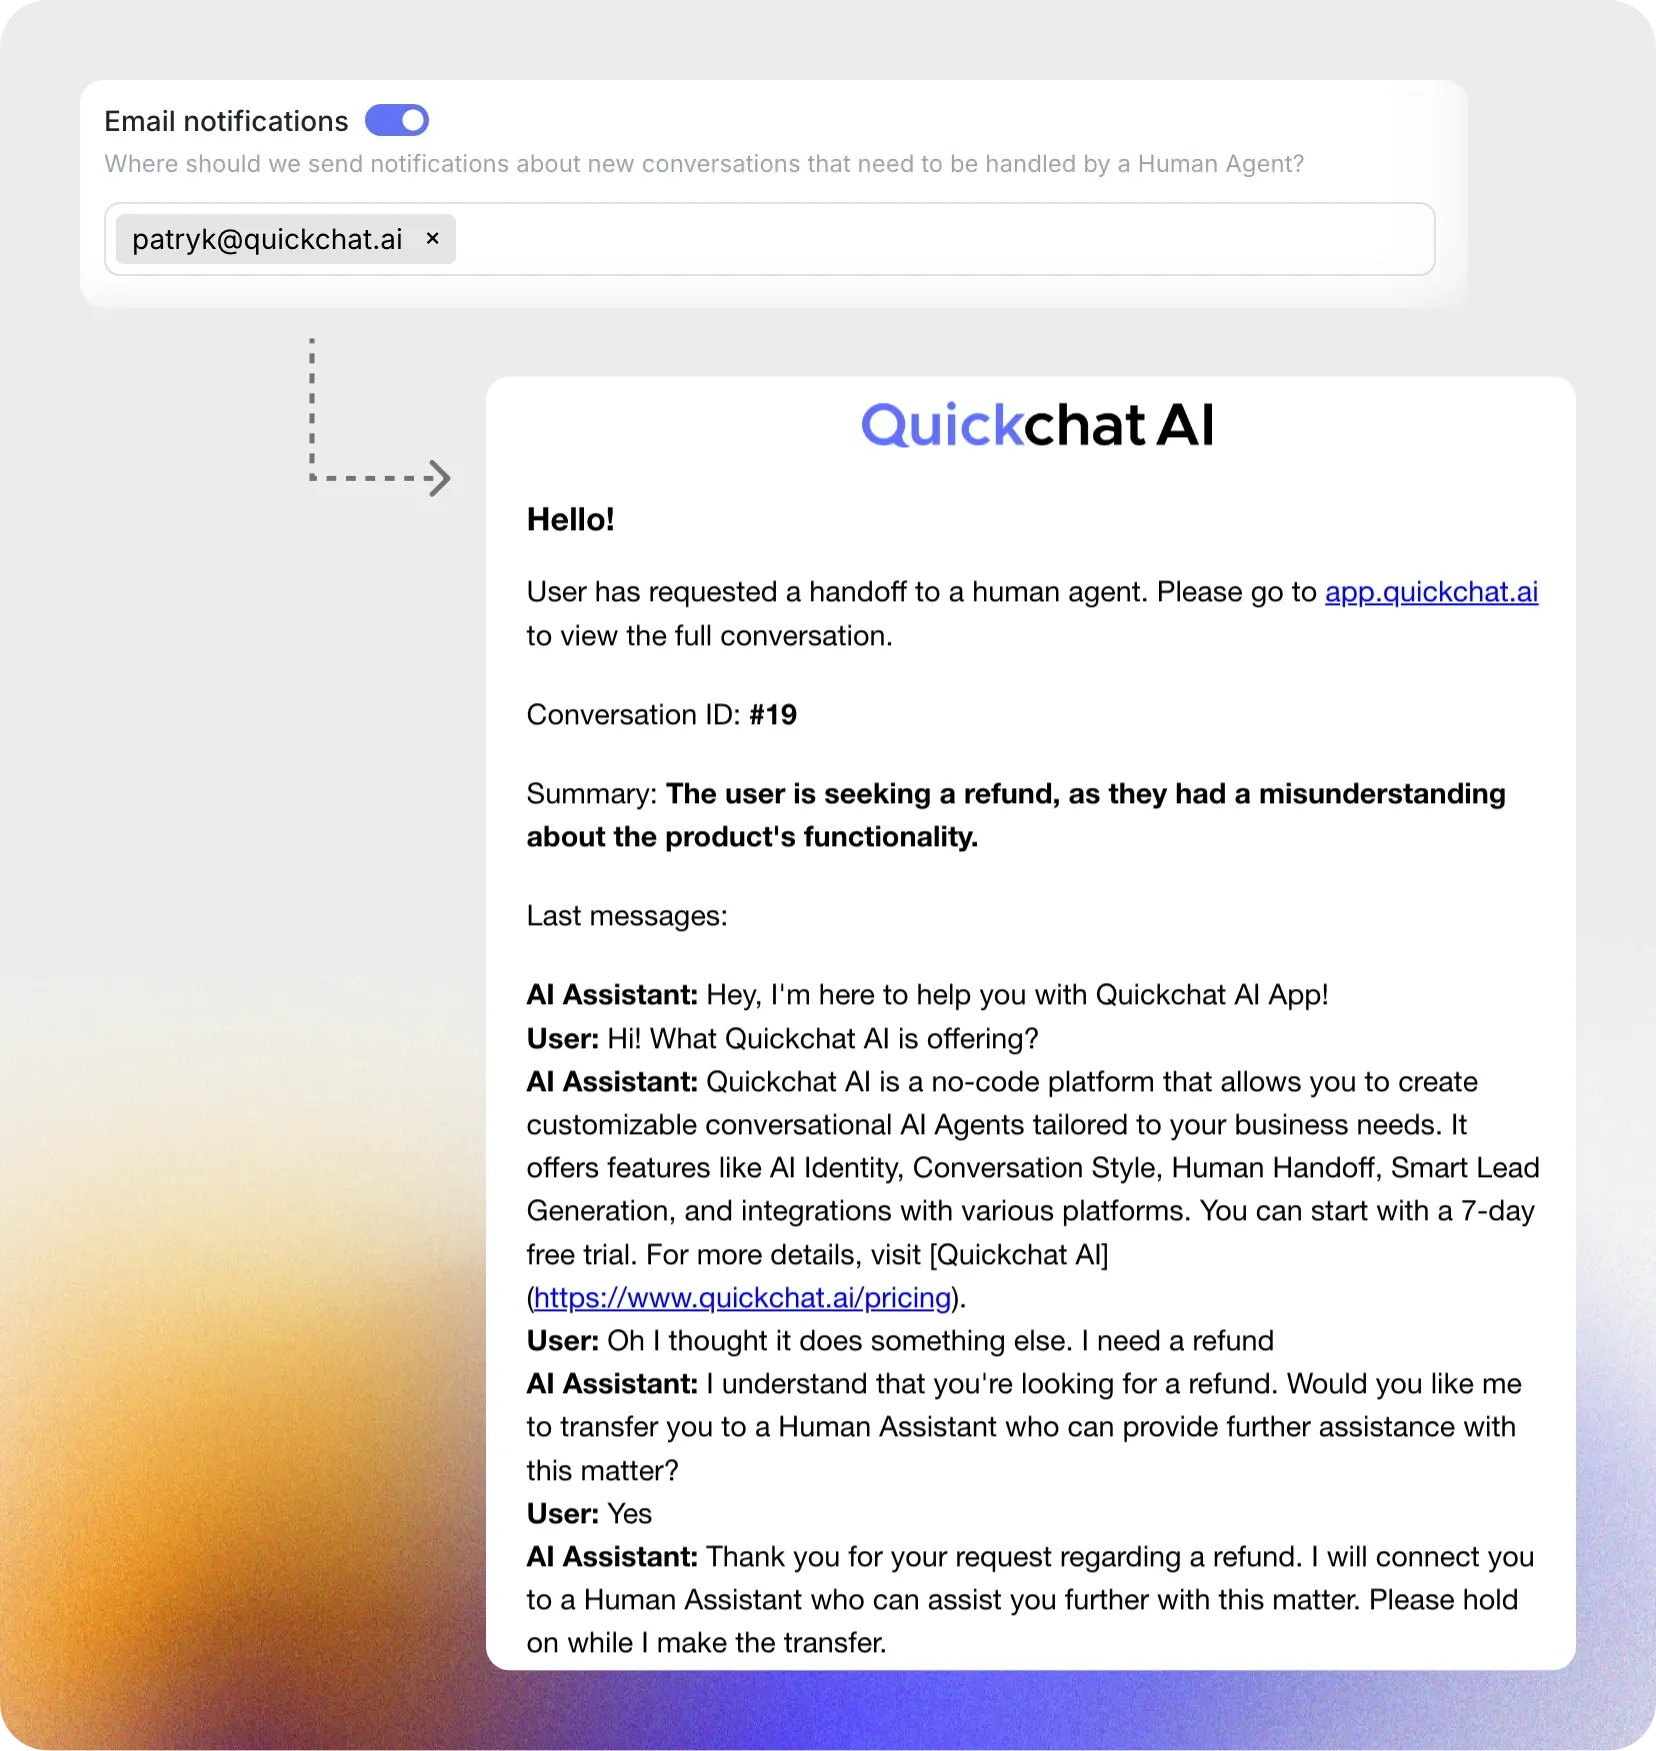
Email Notifications
Section titled “Email Notifications”Configure email addresses to receive notifications when a new conversation requires a Human Handoff.
Here’s how it looks:
Smart Data Gathering / Lead Generation
Section titled “Smart Data Gathering / Lead Generation”Smart Data Gathering allows your AI Agent to collect user information seamlessly during conversations. It engages with users naturally, asking relevant questions to gather details like name, email, phone number, or any other information you require. This data can then be sent to your CRM or other systems, enabling you to follow up effectively and convert potential leads into customers.
How it works
Section titled “How it works”Smart Data Gathering operates within the existing conversation flow, ensuring that the interaction feels natural and non-intrusive.
When a user interacts with your AI Agent, it:
- Detects opportunities to collect information, such as when a user expresses interest in your services or products.
- Asks specific questions tailored to your needs, like:
- “Can I have your name to better assist you?”
- “What’s the best email to contact you on?”
- Gathers and stores the responses, making them available for review or integration with your CRM system.
The feature is designed to minimize friction while maximizing the quality of leads captured.
Setting it up
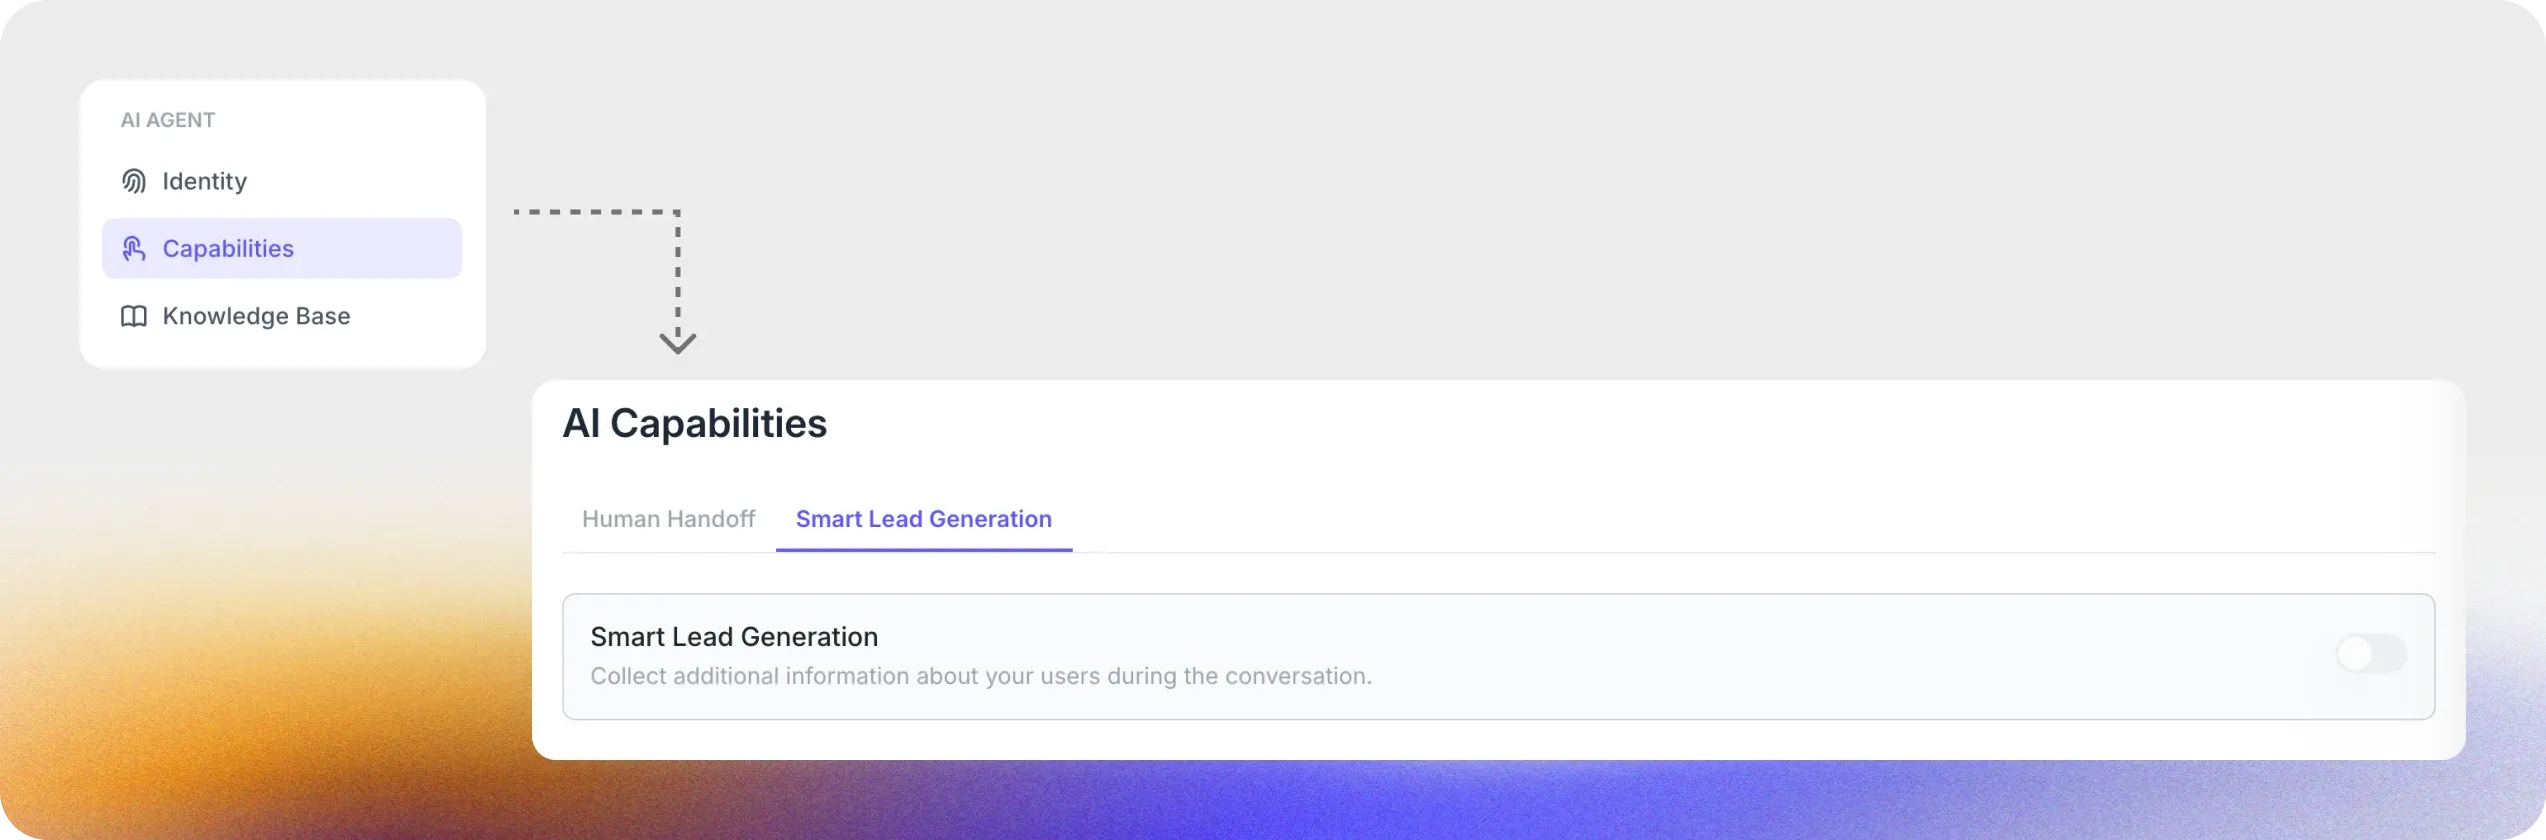
Section titled “Setting it up”Enable Smart Data Gathering
Section titled “Enable Smart Data Gathering”- Navigate to the Actions & MCPs tab
- Find Smart Data Gathering card
- Toggle the feature on
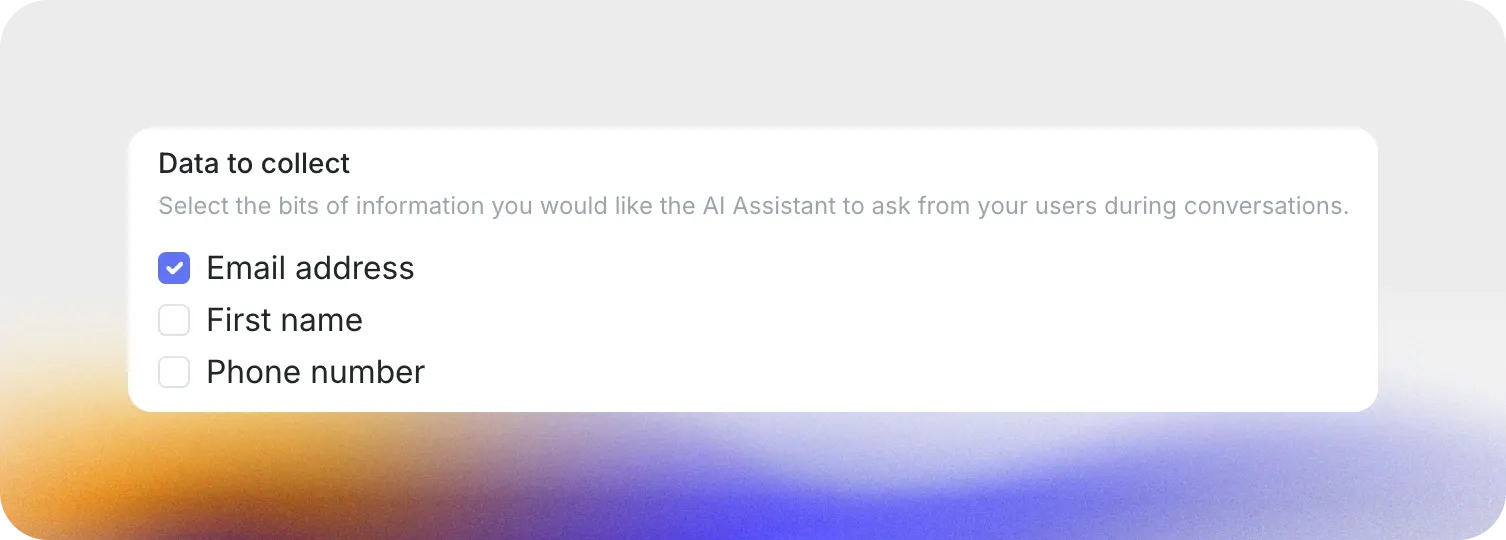
Data to Collect
Section titled “Data to Collect”Select contact details to capture.
- Email address
- First name
- Phone number
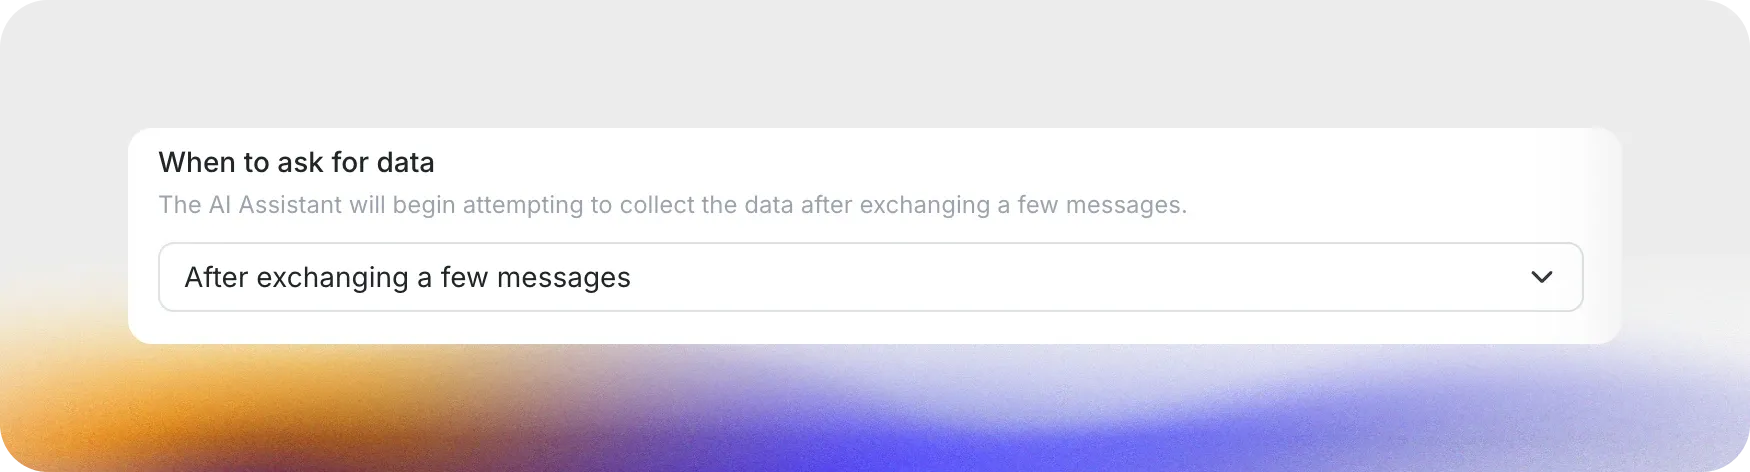
When to Ask for Data
Section titled “When to Ask for Data”Define when the AI Agent should ask for contact details.
- After exchanging a few messages
- Immediately after the user expresses interest
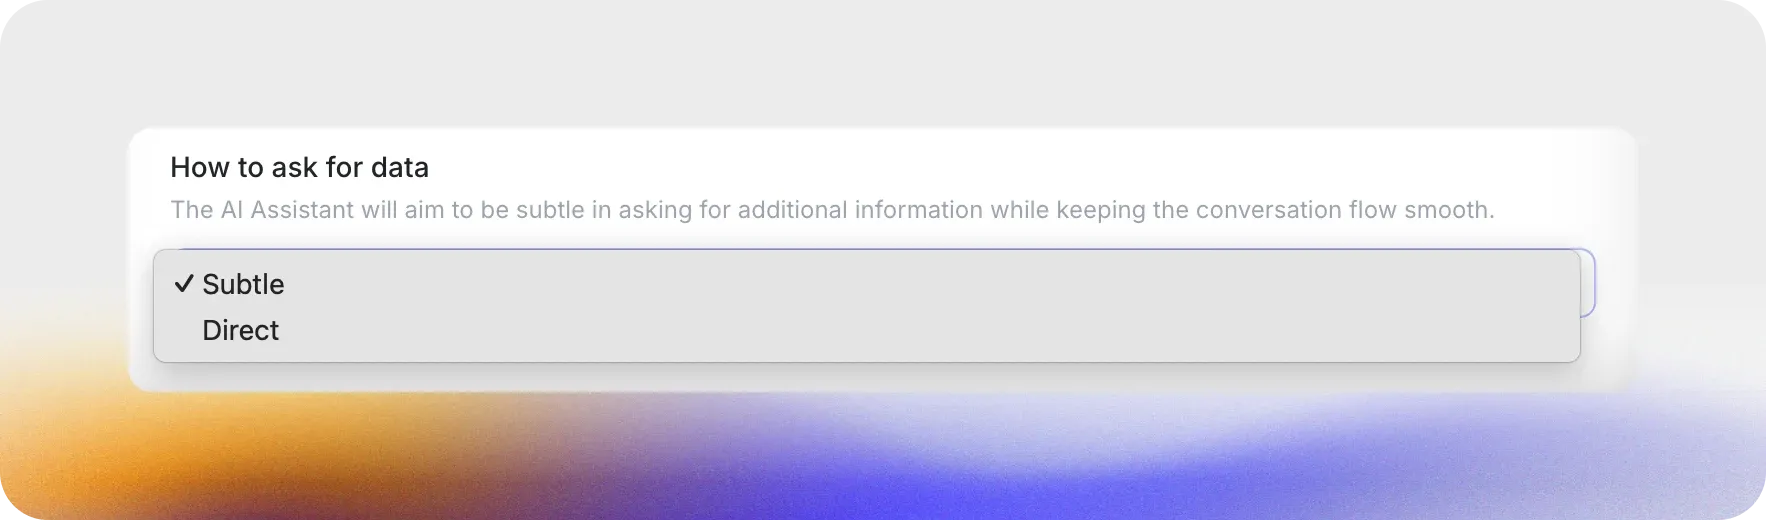
How to Ask for Data
Section titled “How to Ask for Data”Customize how the AI Agent asks for information.
- Subtle: Integrates questions naturally into the conversation
- Direct: Explicitly requests the information in a straightforward manner
Smart Lead Generation enables your AI Agent to collect user contact details efficiently while ensuring compliance and providing a seamless conversational experience.
Exporting the captured contact details
Section titled “Exporting the captured contact details”Follow these steps to export the details captured by your AI Agent:
- Go to the Inbox
- Click the export file icon to access export options.
- Select Export Gathered Data from the dropdown menu.
- Set Date Range: Specify the start and end dates for the data you want to export.
- Choose Format: Select the file format for your export (CSV, XLSX).
- Download: Click Download to save the exported data to your computer.
Custom Actions
Section titled “Custom Actions”Custom Actions let your AI call external tools during a conversation — search internal systems, create tickets, trigger alerts, or fetch fresh data that isn’t in the Knowledge Base. Find them in Actions & MCPs under the Custom Actions section.
Click + Add Action to create one. The dropdown offers three types:
- API Action — call any REST endpoint over HTTP. The most general option; use this for anything that has a URL and accepts JSON.
- HubSpot Action — pre-built connection to your HubSpot CRM. Use it to look up contacts, deals, or tickets without managing API tokens yourself.
- Shopify MCP — connect a Shopify store via the Shopify MCP server so the AI can query products, orders, inventory, and customers. Only one Shopify MCP action per scenario.
How Custom Actions work
Section titled “How Custom Actions work”- You define an action (API Action, HubSpot Action, or Shopify MCP) with a name, a detailed description, and any parameters the AI needs to fill in.
- During a chat, the AI uses your description and parameter hints to decide when to run the action.
- Quickchat executes the call and returns the result to the AI. The AI reads the response and replies to the user in natural language.
- You can test the request from the Action editor before using it in conversations.
Create an API Action
Section titled “Create an API Action”- Go to Actions & MCPs.
- Click + Add Action in Custom Actions and choose API Action.
- Fill in Details:
- Name: clear and descriptive.
- Description: when to use it and what to include in parameters.
- Configure Connection:
- Action Type: HTTP method (GET, POST, etc.).
- Action endpoint URL: full API URL.
- Headers: add any required headers like
Authorizationorcontent-type: application/json.
- Define Parameters: give each parameter a name, location (query, body, or header), and a description that tells the AI how to compose the value. Path values aren’t a parameter location; insert them directly in the endpoint URL using
{{placeholder}}templating. - Test request and verify the response. Then click Done.
Beyond the request itself, an API Action has three optional settings worth knowing: Save to memory, Run only when, and Response filter.
Save to memory
Section titled “Save to memory”Capture a value from the API response and store it in the conversation’s memory under a key you choose. Later Actions can reuse it as {{metadata_<key>}}, and it appears in the conversation details (Inbox, the API, and exports).
Reach for this when one Action produces something a later Action needs. A lookup Action can save a customer_id from its response; a follow-up Action then sends {{metadata_customer_id}} without the AI having to copy the value across.
In the Save to memory section of the API Action editor, give the captured value a memory key and point it at the part of the response you want to keep. From then on it’s a metadata variable like any other.

Run only when
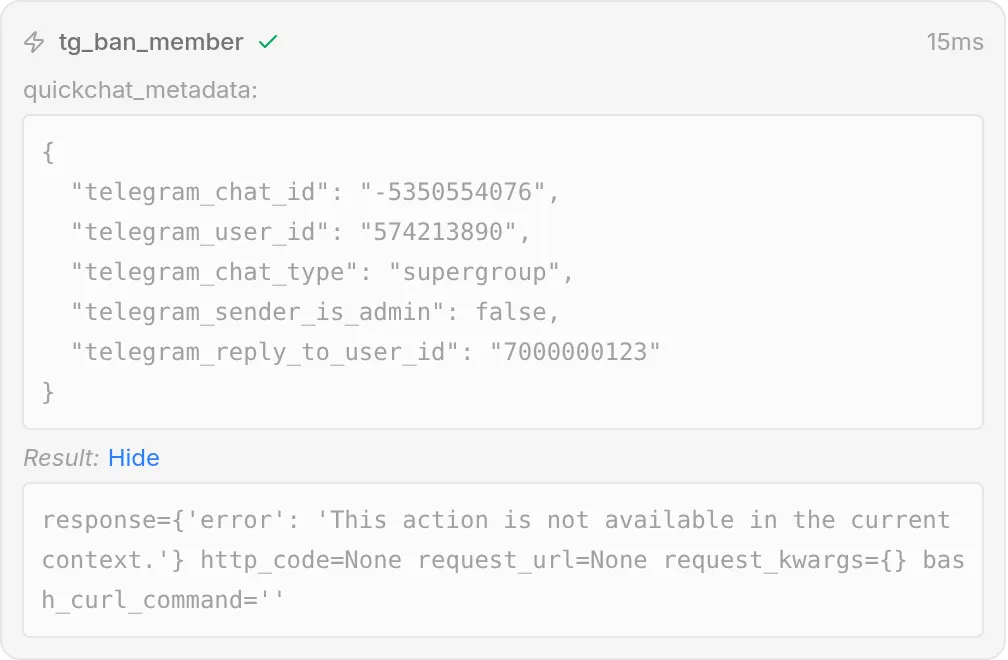
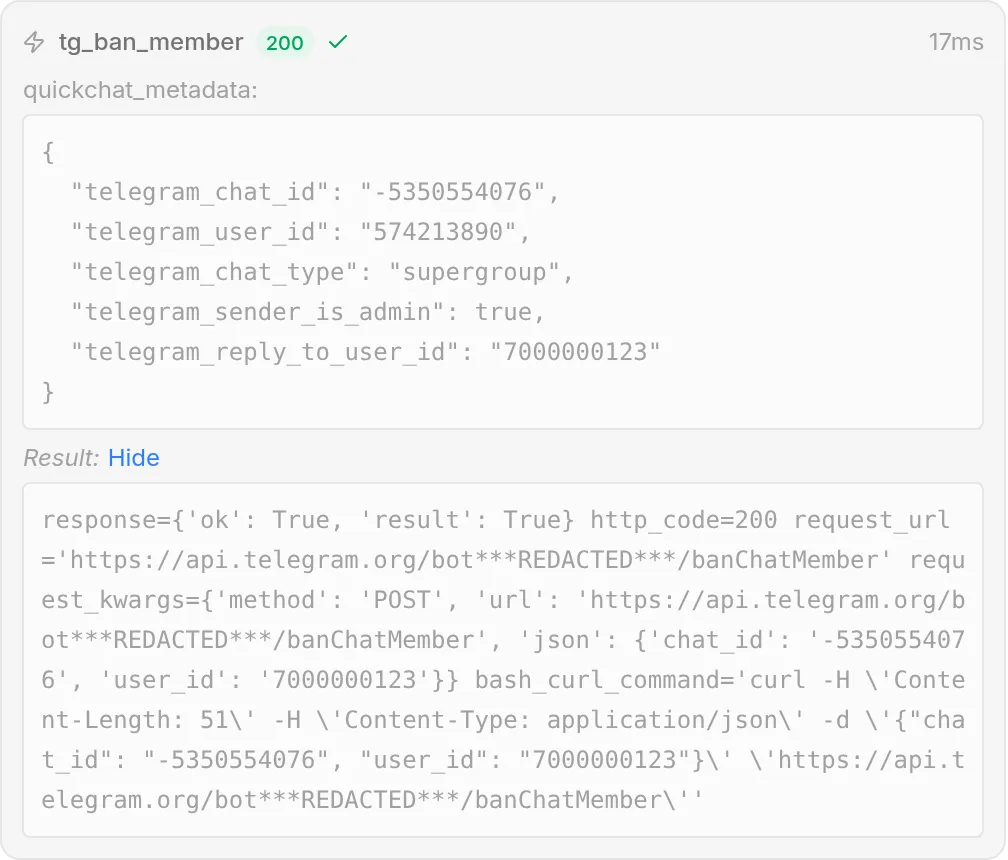
Section titled “Run only when”Restrict an Action so it runs only when conditions on the conversation metadata hold. The conditions are checked on our side, at call time, after the AI has decided to call the Action but before any request is sent, so they can’t be talked around from the chat.
This is the right tool for privileged or irreversible Actions (banning a member, issuing a refund, deleting a record). A line in your prompt that says “only admins can do this” is a helpful instruction, but it isn’t a security boundary: a determined user can argue with the model or attempt a prompt injection. A run-condition is deterministic and lives outside the prompt, so it holds regardless of what the conversation says.
- The run-condition is the boundary. It’s evaluated server-side and isn’t part of the prompt the model reads. This is what actually stops the Action from running.
- The prompt rule is the user experience. Keep a line in your prompt too, so the AI declines politely and explains why instead of going silent.
Add conditions in the Run only when section of the Action editor. Click Add condition, pick a metadata key (for example telegram_sender_is_admin), and choose how to compare it:
| Condition | Passes when the metadata value… |
|---|---|
| is true | is truthy |
| is false | is falsy |
| exists | is present on the conversation |
| does not exist | is absent |
| equals | matches a value you specify |
| does not equal | differs from a value you specify |
The Action runs only when every condition holds. A condition on a key that isn’t set on the conversation doesn’t pass.

When a condition fails, no request is sent and the AI tells the user it can’t do that. Below, the same ban request is blocked for a non-admin and allowed for an admin, with nothing changed but who is asking:
Response filter
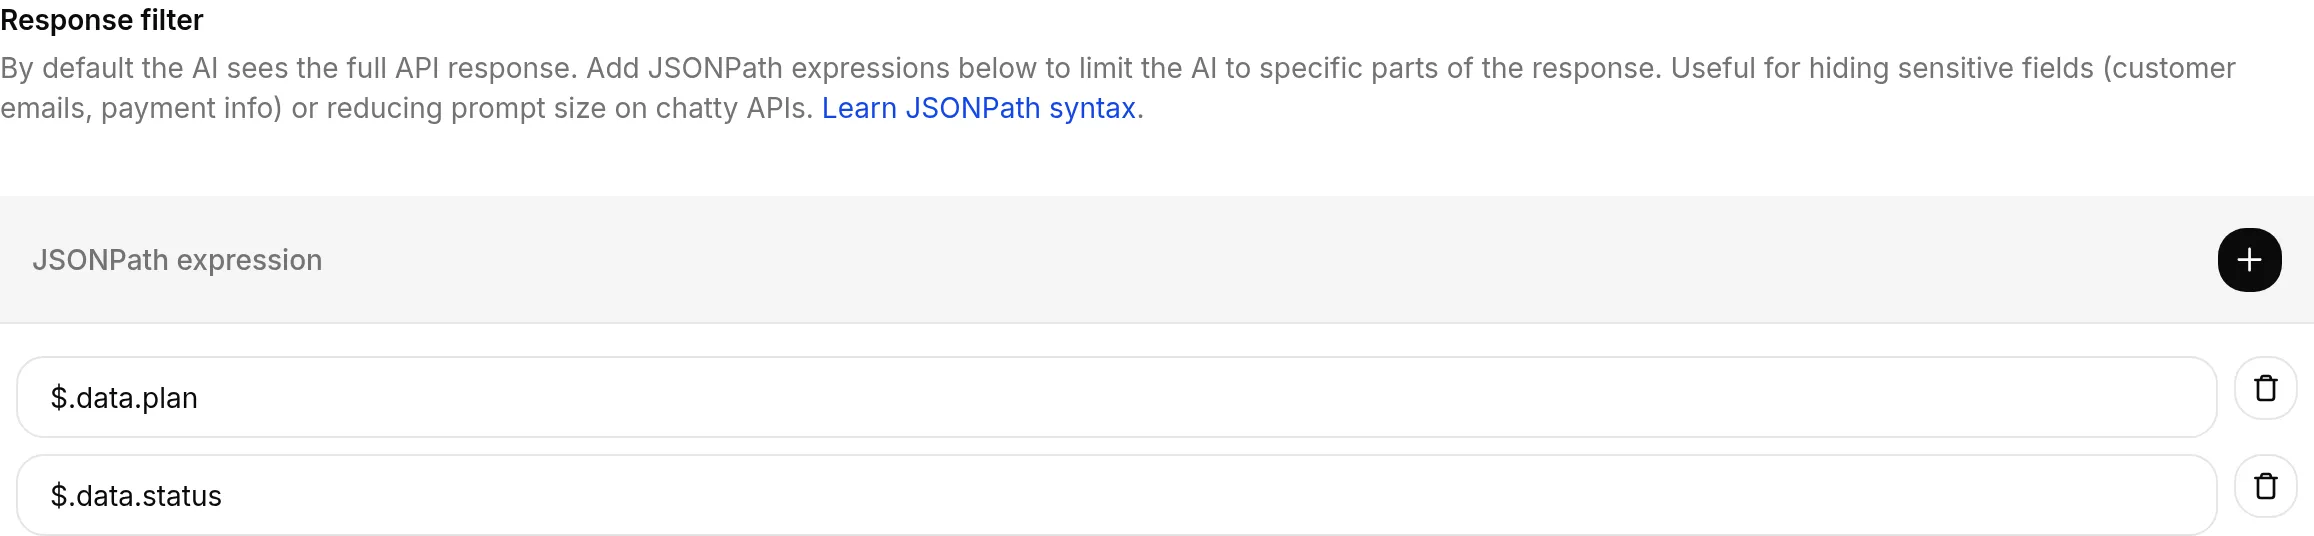
Section titled “Response filter”By default the AI sees the full API response. Add JSONPath expressions in the Response filter section to limit the AI to specific parts of it.
Two common reasons to filter:
- Hide sensitive fields. Keep customer emails, payment details, or internal ids out of the model’s context when the endpoint returns more than the AI needs.
- Shrink the prompt. Chatty APIs can return large payloads; filtering to the few fields that matter keeps the response small and the AI focused.
Add one or more JSONPath expressions and the AI receives only the matched parts. For example, $.data.items[*].name keeps just the item names from a larger response.
Best practices
Section titled “Best practices”- Be explicit in descriptions. Tell the AI when to use the action and what each parameter should contain.
- Keep scopes minimal. Only include the headers and tokens the endpoint needs. For Jira, use the Basic header derived from your Atlassian email and API token.
- Test before rollout using the Test request panel. Confirm status codes and sample payloads look right in the target tool.
Tutorials
Section titled “Tutorials”- Connect an AI Agent to Jira tickets (canonical reference) or the narrated blog walkthrough
- Send Slack notification with an AI Action