Hubspot
Overview
In this guide, we'll go through how to integrate your AI Assistant into Hubspot. Here's an overview of what we'll cover:
- Integrate Hubspot into Quickchat AI app
- Change settings to Hubspot Account with Chatflow
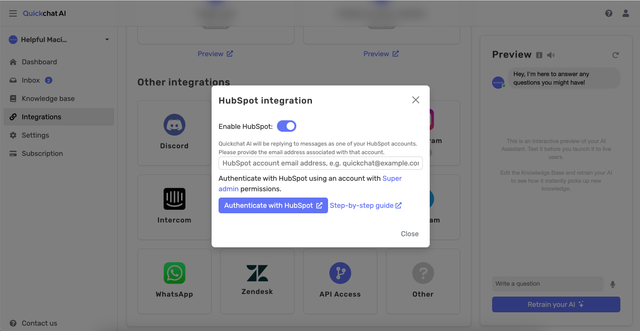
HubSpot integration in Quickchat dashboard
Before you start the integration, it is recommended you create a new HubSpot account for your AI Assistant.
After creating it, navigate to the Quickchat AI App dashboard and go to the Integrations tab, select Hubspot. Provide the email address you want to connect with Quickchat AI. It will be responding to messages on behalf of that account. Click on Authenticate with HubSpot and follow the on-screen prompts by choosing the appropriate HubSpot workspace.
Please keep in mind that you need to have HubSpot Super Admin permissions in order to authenticate your account.
HubSpot account settings
In the next step, we need to edit the account settings on HubSpot. Navigate to HubSpot, go to the Conversations tab and then select Chatflows. Click create a new Chatflow or edit an existing one and execute the following:
- Choose Website and then Live chat.
- Select an inbox and language (Remember to set the same language in the Quickchat AI settings.).
- Customize your Welcome message.
- Disable Knowledge base search.
- Select Automatically assign conversations, select Specific users and select your Quickchat user (associated with the email address you provided earlier).
- (Optional) Disable Email capture.
- Save your chatflow.
Ensure your Quickchat AI user is assigned as the "Owner" of a conversation; otherwise, the Quickchat AI Assistant won't respond. Check other HubSpot features you use, like "Automations," as they may affect the assignment automatically.
The below video guide summarises these steps.
That's it! 🎉 Your integration is now complete!
As a final verification of your integration, you can test the widget in the Preview section of the HubSpot Chatflow editor. You should get a reply from your AI Assistant and the conversation should appear in the Inbox in the Quickchat AI App. You can now share the HubSpot widget on your website and have Quickchat AI reply automatically!