Zendesk
Overview
In this guide, we'll go through how to integrate your AI Assistant into Zendesk. Here's an overview of what we'll cover:
- Setting up a Zendesk Account
- Enabling Quickchat AI Responses in Zendesk
- Integrating your Slack bot with Quickchat AI
As prerequisite for this integration is that your Zendesk account is on Professional plan or higher.
Zendesk Account Setup
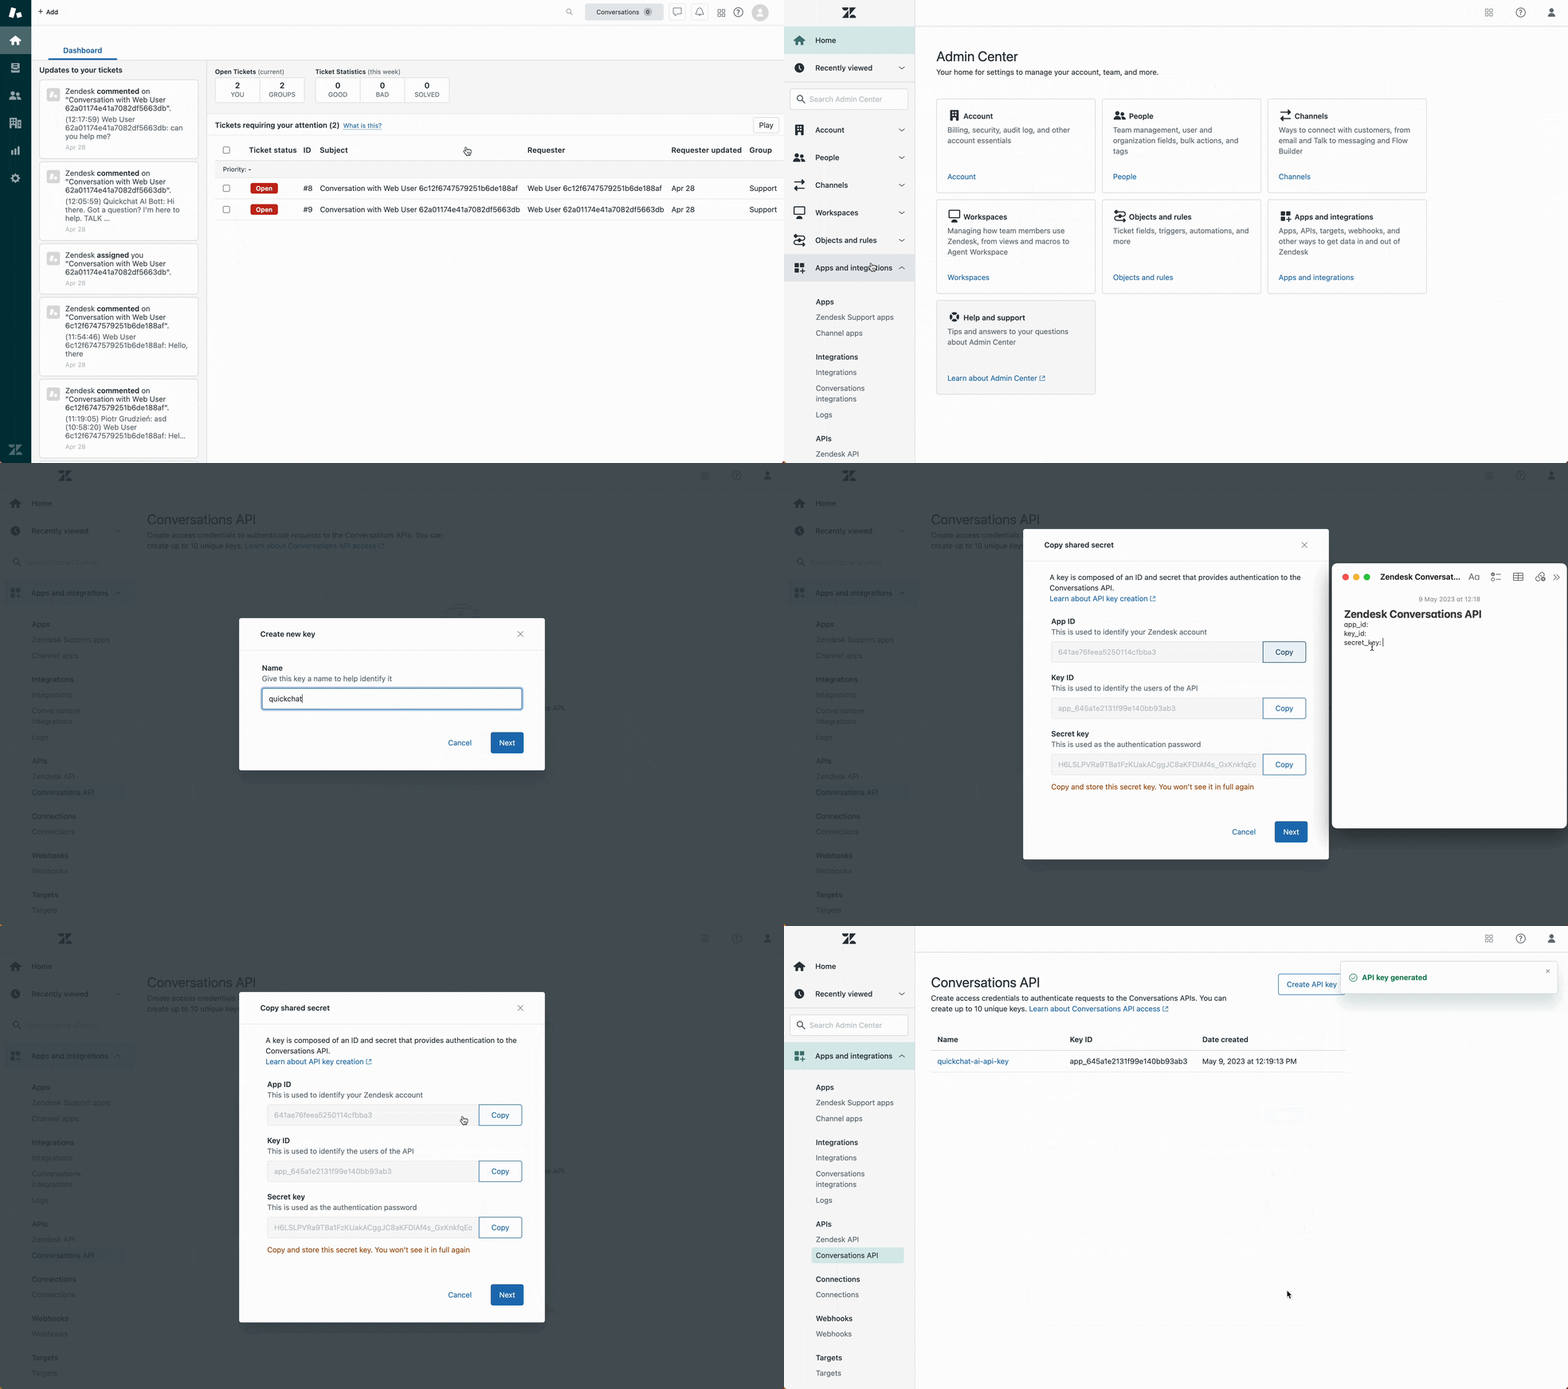
To initiate the integration process, navigate to the Zendesk Admin Center, Apps and integrations → API → Conversations API. Then Create an API key and insert it's name (e.g. quickchat-ai-api-key). Upon creation, the App ID, Key ID and Secret key should appear. Keep this tab open, and copy them to a safe place for later use. The below video-guide summarises these steps:

Integrate Zendesk into Quickchat
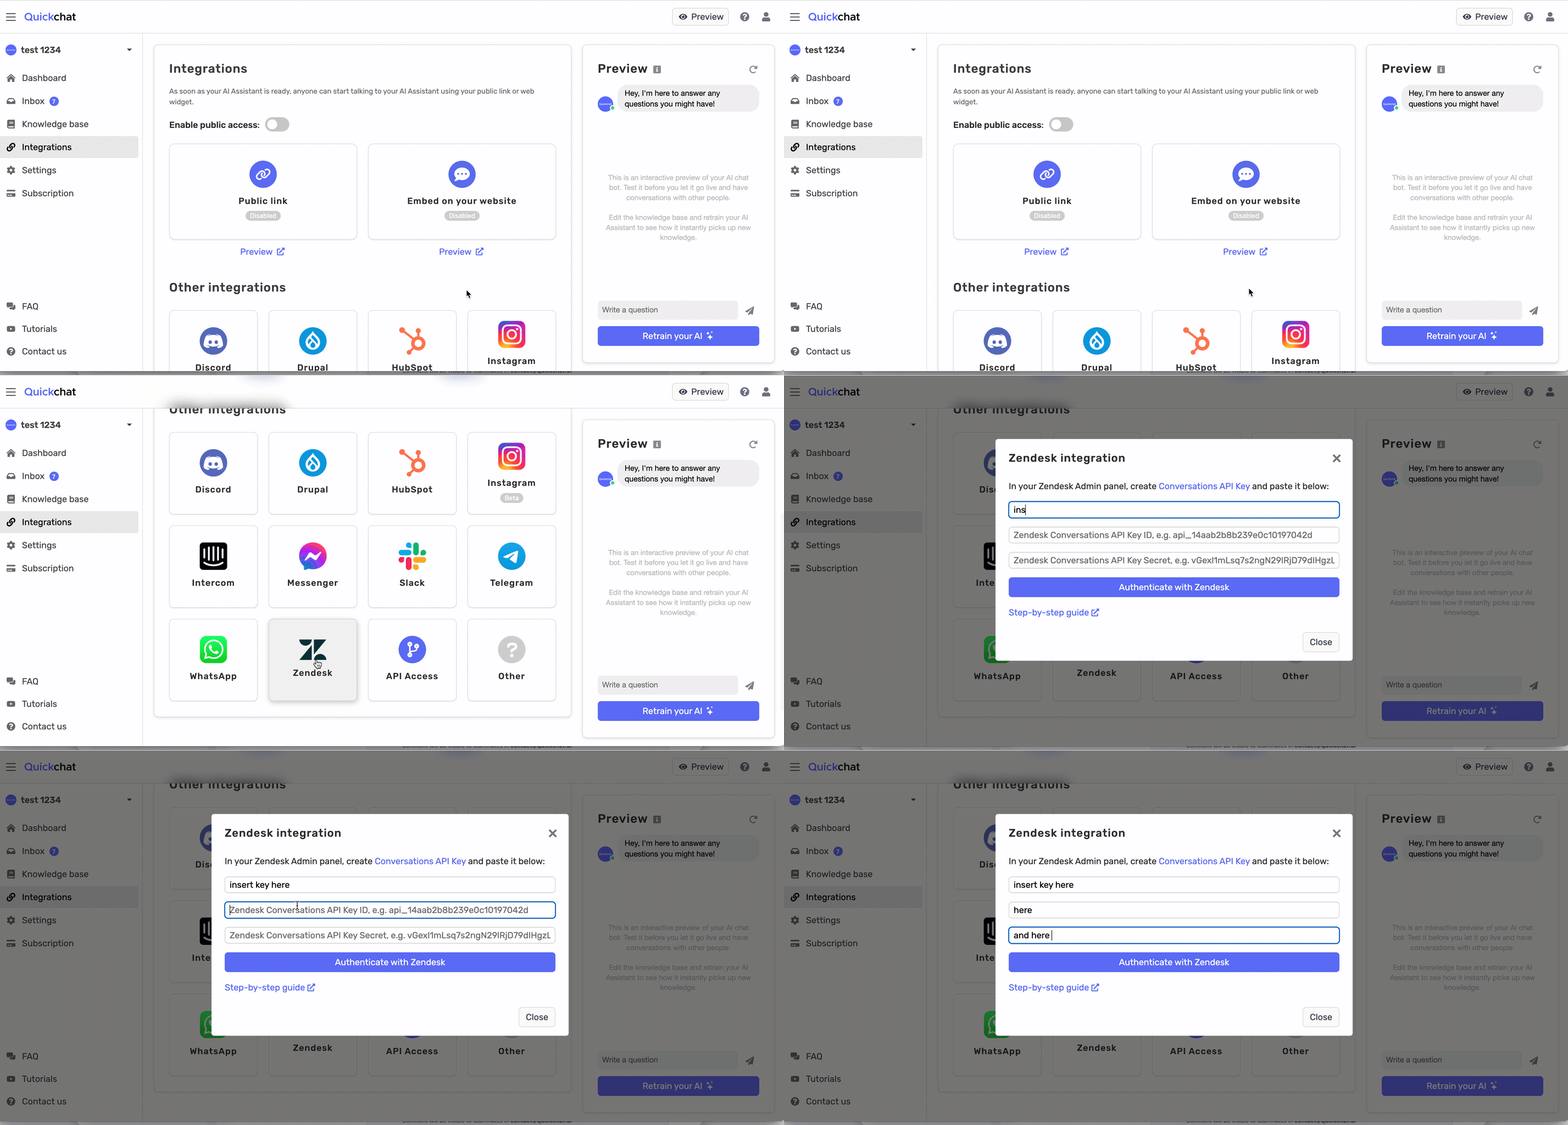
In a new tab, navigate to the Quickchat dashboard. Then navigate to the Integrations tab and click on Zendesk. In the pop-up window, paste App ID, Key ID, and Secret key from the previous step and click on the Authenticate with Zendesk button. You will see the "Your Quickchat account is successfully connected to your Zendesk account" message, and more settings will appear. The below video-guide summarises these steps:

Enable Quickchat AI Responses in Zendesk
We have successfully integrated Zendesk into Quickchat AI. Now, we need to enable AI Assistant responses in Zendesk to allow our bot to respond to users. This can be done in two ways.
1: Always Respond to All New Conversations
In the Quickchat AI dashboard:
- Navigate to the Integrations tab and click on Zendesk.
- In the pop-up window, switch "Respond to all new Zendesk conversations" to ON.
- Switch "Activate Integration" to ON.
The integration is now ready! 🎉 Your Quickchat AI Assistant will now be the default integration and respond to ALL incoming messages in your Zendesk account.
2: (Advanced) Make Quickchat Assistant respond only in particular cases rather than always
More advanced users might want to transfer the conversation over to Quickchat AI only under certain conditions. Here is how to achieve that using the Zendesk Answer Bot:
In your Quickchat dashboard:
- Navigate to the Integrations tab and click on Zendesk.
- In the pop-up window, switch the "Respond to all new Zendesk conversations" to OFF.
- Copy your generated Quickchat Tag (should look something like:
quickchatai-bot-asd3f23pk1). It will be used in the next step. - Switch the "Activate Integration" to ON.
In your Zendesk Account:
- Navigate to the Admin Center and in the Channels section go to Bots and automation > Bots.
- Click on the Create bot button and give your bot any name you like.
- Create a new answer or start editing an existing one.
- In the Flow Builder, add a Transfer to agent step.
- Enter a bot message that will be displayed right before the conversation is transferred to Quickchat AI.
- Add your personal Quickchat Tag (which we saved earlier) into the Tags section.
- Save your changes and publish the bot.
Now, when the Zendesk Answer Bot reaches the Transfer to agent step with your Quickchat Tag tag, the conversation will be transferred to Quickchat AI.
Using the Automated Human Handoff Feature
Activate Human Handoff in the Quickchat AI Settings tab. You can see a guide on how to do it here. After enabling Human Handoff, behind the curtains, Quickchat AI will add the "quickchatai-handoff" tag to the conversation when it should be handed off to a Human Agent. Then, you can create a Zendesk trigger based on the "quickchatai-handoff" tag to notify agents or assign the conversation to a specific agent. You can learn more about Zendesk triggers here
Congratulations! 🎉 Your Zendesk integration with Quickchat AI is now set up.